What does high-intensity interval training (HIIT) have to do with yoga?
Everything!
When you combine yoga and HIIT you give your body everything it needs to build muscle, strengthen your stabilizing muscles, and reap cardiovascular benefits. Plus, HIIT exercises are tough, so you're sure to bring in lots of that ever-important oxygen your body can use to increase prana.
Here, we're going to share a 40-minute high-intensity interval training workout that you can add to your workout schedule a couple of times each week. But first...
HIIT is a training method in which you push to your limits, giving 100% effort for short bursts, followed by a short recovery period. HIIT keeps your heart rate up and helps you burn more fat in less time. It increases your body's need for oxygen, creating a shortage of oxygen during the working portions of the workout. This, in turn, means that your body needs more oxygen during the recovery portions of the workout.
The result is a bigger calorie and fat burn than you get from "steady-state" workouts in which your effort is relatively steady over a period of time.
Now, let's get into our workout!
Here's how it works: You're going to have a four-minute block of work consisting of eight smaller blocks of 30 seconds each, with 20 seconds at 100% effort and a 10-second recovery. For each four-minute block, you will alternate between two different exercises.
So each 4-minute block looks like this:
Then, you'll have a longer break (1 minute) between each four-minute block before moving onto the next set of two exercises.
Don't worry, it's much less complicated than it looks on paper.
Start by standing with your feet hip-distance apart. Roll your shoulders up, back, and down for at least 10 counts. Reverse for 10 counts.
Next, lift your hands up to the ceiling and bend forward to touch the ground (or as far as you can go). Repeat briskly for 10 counts, reaching to the sky and to the ground.
Now, turn your torso from side to side, warming up your back and spine, for 10 counts.
We're going to make the side to side movement bigger, engaging the legs to turn your entire body side to side, adding in your arms by bringing them up to the ceiling on each side and back down as you switch sides. Continue this movement for 10 counts.
Add in the lower body. Starting with your right knee, alternate lifting your knees to your chest and circling your leg out from the hip to warm up your hip flexors. Repeat, alternating sides for 10 counts.
Now, give the legs a little break and place your hands on your shoulders, circling your elbows in towards one another, up, then out and down. Repeat for 10 counts.
Back to the lower body, alternate stepping one foot forward while raising your arms up into the air. Bring your arms down and switch legs, once again raising your arms to the sky. Repeat, alternating sides for 10 counts.
Finally, standing center, lift one leg out to the side and sweep the leg in and out, crossing the centerline of your body. Repeat for 10 counts on one side before repeating on the other side.
[CTA-GC]
Now it's time for the exercises! We're going to share descriptions of each exercise here and finish out this article with a list of how this all fits together.
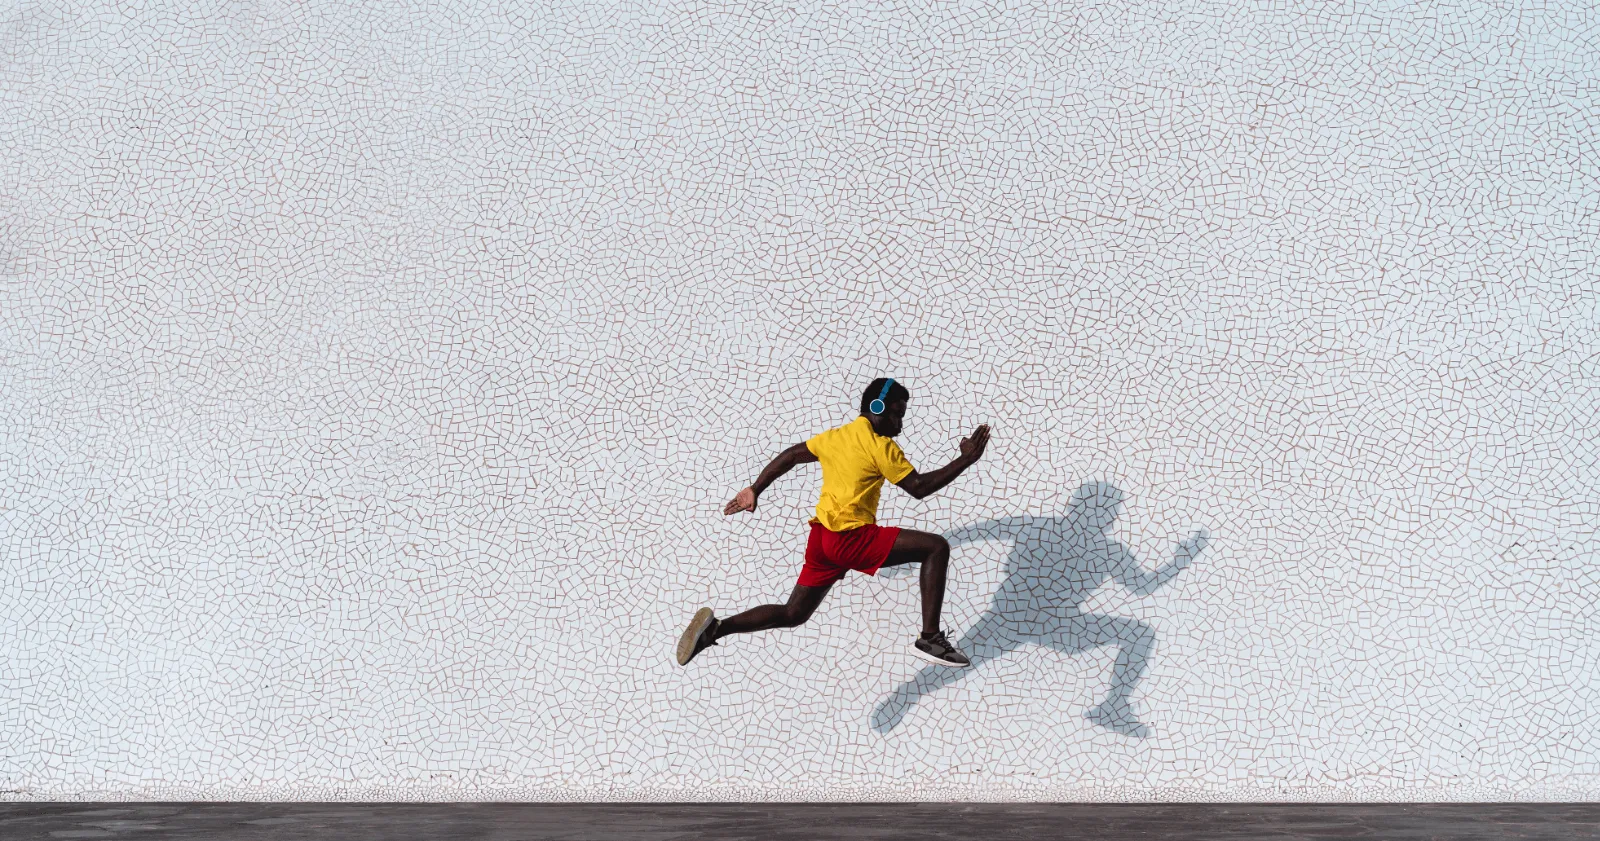
Run in place quickly, on your toes and swinging your arms. No jumping and no high knees—just run in place. Go at a speed that is right for your fitness level and comfort.
Stand with your feet hip-distance apart with knees and hips straight but relaxed and "bouncy." Your hands should be in fists and your arms lifted with your hands facing your body at chin height. Elbows are bent at a 90-degree angle. Lower your body into a slight squat position, rotating your torso and lowering your right hand down to chest height. Begin to scoop your arm under and up to the left as you rotate your body to the left. Stop when your fist is at chin height of your imaginary opponent. Repeat the scooping motion with the other arm and continue to repeat, alternating arms.

Image: Verywell / Ben Goldstein
Start with a squat, and jump your feet together between each squat. You always have a low-impact option in which you squat and tap your feet in (no jumping) before returning to the squat.
Start in the same position as the uppercut. Keeping a 90-degree bend in your right arm, swing as if you're punching someone on the side of their jaw. Pivot on your feet so your knee and hips face to the right. Repeat with the other arm. Return to center and alternate two kicks to the front of your body.
Jump up with your arms in the air, lower your hands to the ground and jump your feet back to a pushup position before letting your body go all the way to the floor. Press back up into a push-up position and jump your feet forward to meet your hands. Stand up and jump again, arms in the air. For a low-impact option, don't jump.

Real talk: burpees are brutal but they make you strong.
Using whatever space you have, run. Feel free to walk or jog, depending on your level of fitness or comfort.
Do a standard burpee, but instead of going down onto your stomach, stay in a push-up position and do two mountain climbers (alternating feet) and two jacks (jump out and in with your feet), before coming back up and completing the burpee.
Get into a plank position on your elbows and hold.
Place a yoga block or something else sturdy and square on your lower back while in a high plank position. Keep your hips level and remove the item from your back with your left hand, transfer the item to your right hand (sliding it along the floor under you), then place the item back on your lower back with your right hand. Stay in the plank and move the item around.
Lie on your back and pass the block from your hands to your feet, bringing your arms and legs together in a crunch motion. Then, pass the block from your feet to your hands.

Just dance! During the breaks, freeze and hold your position, whatever that position is, for the entire 10-second break. Then, dance again! Not a dancer? Run in place or do jumping jacks.
Lie down on your back in savasana and close your eyes. Put your right hand on your stomach and feel yourself breathe.
When you're ready, come into a seated position, with your eyes still closed. Rub your hands together to generate some warmth and place your hands over your eyes and face. Remove your hands and open your eyes.
Warmup (5 minutes)
Block 1 (5 minutes): Alternate between Exercise 1 and Exercise 2, completing each exercise 4 times. Rest 1 minute.
Block 2 (5 minutes): Alternate between Exercise 3 and Exercise 4, completing each exercise 4 times. Rest 1 minute.
Block 3 (5 minutes): Alternate between Exercise 5 and Exercise 6, completing each exercise 4 times. Rest 1 minute.
Block 4 (5 minutes): Alternate between Exercise 7 and Exercise 8, completing each exercise 4 times. Rest 1 minute.
Block 5 (5 minutes): Alternate between Exercise 9 and Exercise 10, completing each exercise 4 times. Rest 1 minute.
Block 6 (5 minutes): Alternate between Exercise 11 and Exercise 12, completing each exercise 4 times. Rest 1 minute.
Cooldown (5 minutes)

Receive personalized guidance tailored to your unique fitness goals, live with a dedicated coach—no credit card required.


© Copyright 2025 MyYogaTeacher Inc