

We know that yoga can help elevate your mental and emotional wellbeing, but it’s actually an incredibly efficient tool for improving your mobility for the better, regardless of your age, background, or ability.
What do we mean by mobility, and why is it important? Mobility refers to the level of ease with which you can move your body. This affects your ability to walk, run, lift, and engage in physical activities like sports, dancing, or just playing in the backyard with your kids or grandkids. Your level of mobility directly translates to your overall well-being, and it can greatly influence whether or not you experience chronic pain.
A typical yoga practice includes performing a holistic routine of stretches that work to improve your flexibility, balance, and strength — which all directly impact your mobility. Let’s break down how each of those factors work.
Flexibility refers to the range of motion between your joints and muscles, and an inflexible body is rigid, stiff, and achy, with a relatively small range of motion. A regular yoga routine can help lengthen and strengthen your muscles, improving your range of motion while preventing injury and reducing your risk for chronic pain. Along with increasing mobility, improving your flexibility also puts less strain on your body overall.
Building strength is crucial to achieve better mobility, since stronger muscles give you better stability, balance, and control over your movements. Yoga targets muscle groups and makes them stronger, more toned, and more capable of increased movement with more control. Increasing strength also helps prevent injury, improves your sense of balance, and reduces your risk for issues later in life – like osteoporosis.
It may be surprising to learn that yogic breathing can also help improve your mobility. By calming your mind, improving your awareness, and relaxing your body, you can build a greater connection with your physical self and reduce tension. This can lead to an increase in your range of motion and a better understanding of your personal limitations.
The best part about yoga is that it's low impact, and it's approachable for everyone. It doesn’t matter how old you are, or whether or not you’re a beginner. You can start out with slow, gentle movements that can greatly improve your mobility without the risk of injury. You can also practice yoga in the comfort of your own home, by following the sequence below or working with one of the many qualified yoga instructors available here at MyYogaTeacher.
To get started practicing yoga for improved physical mobility, try performing the poses below several times per week over an extended period of time.
Start at the top of your mat in Mountain pose, with your hands in prayer position. With flowing, dynamic movement, progress through the following postures 3 or more times:
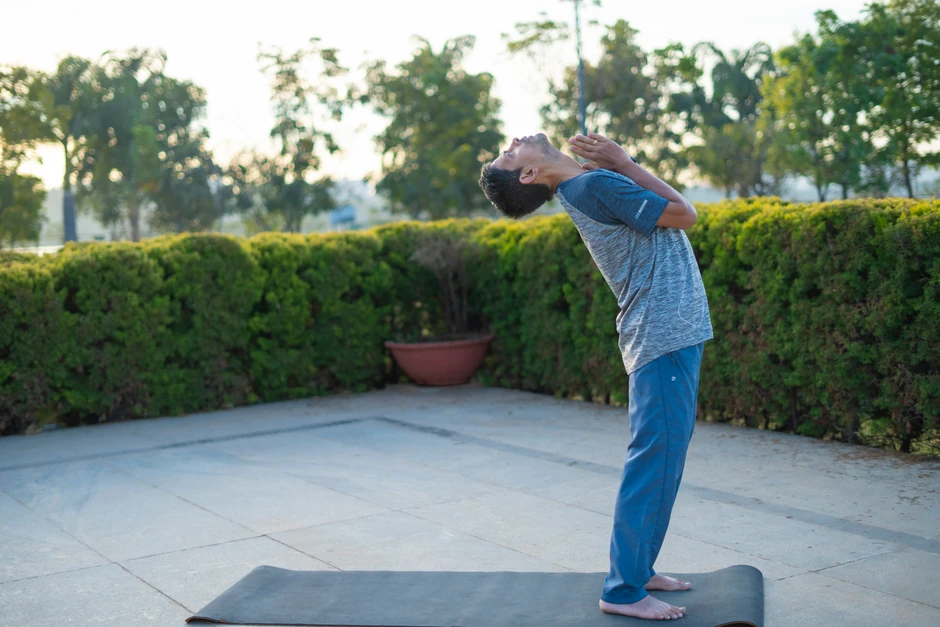
Upward Salute
Standing Half-Forward Bend
Standing Forward Fold
Low Lunge (left foot forward)
Plank
Four-Limbed Staff pose
Upward Facing Dog or Cobra
Downward Facing Dog
Low Lunge (right foot forward)
Standing Half-Forward Bend
Standing Forward Fold
Upward Salute
Return to Mountain pose
Repeat
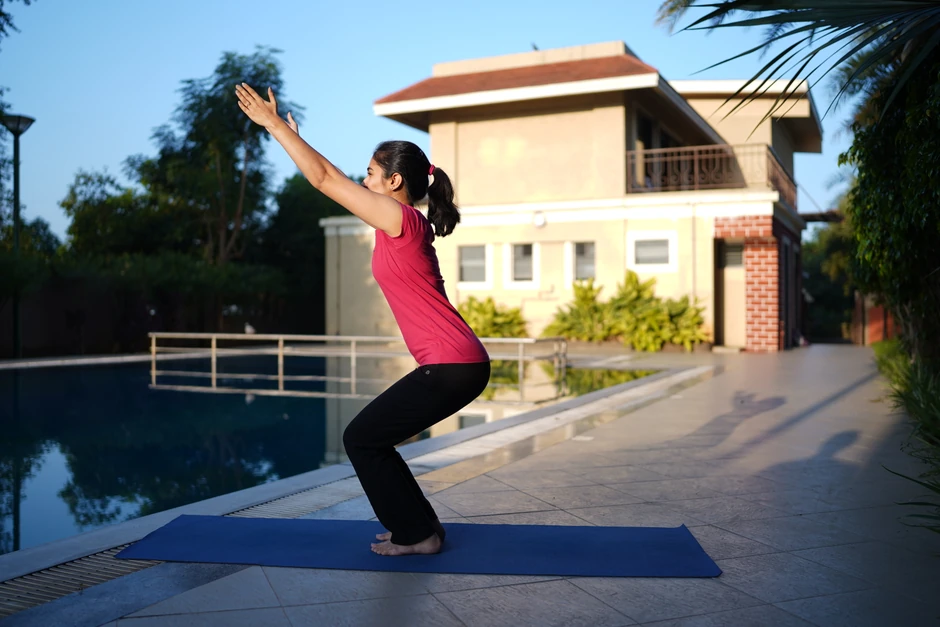
Stand in Mountain pose at the top of your mat, with your hands at your sides and feet hip distance apart. As you inhale, raise your hands over your head, with your arms parallel with your ears. As you exhale, hinge slightly at your waist, bend your knees and lower your torso forward as if you were about to sit down in a chair. Keep your core engaged and your spine straight while you hold this posture for several breaths.
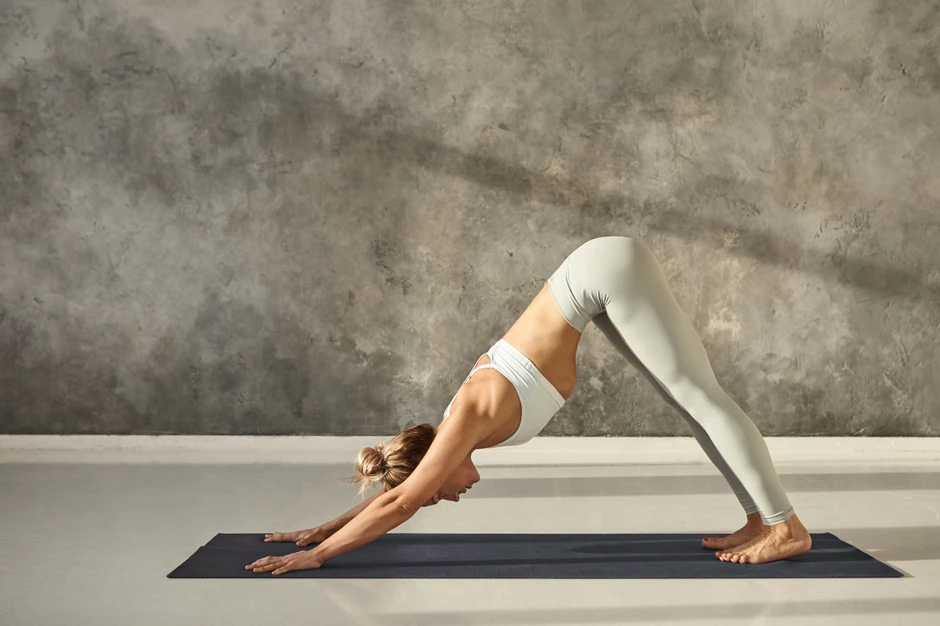
Start in a tabletop position, with your hands and knees on your mat. Push up from your hands and knees, lifting your hips until you are balanced on your hands and feet, with your body resembling an inverted “v.” Keep your head in between your arms, ears balanced over your shoulders, and stay in this pose for several breaths.
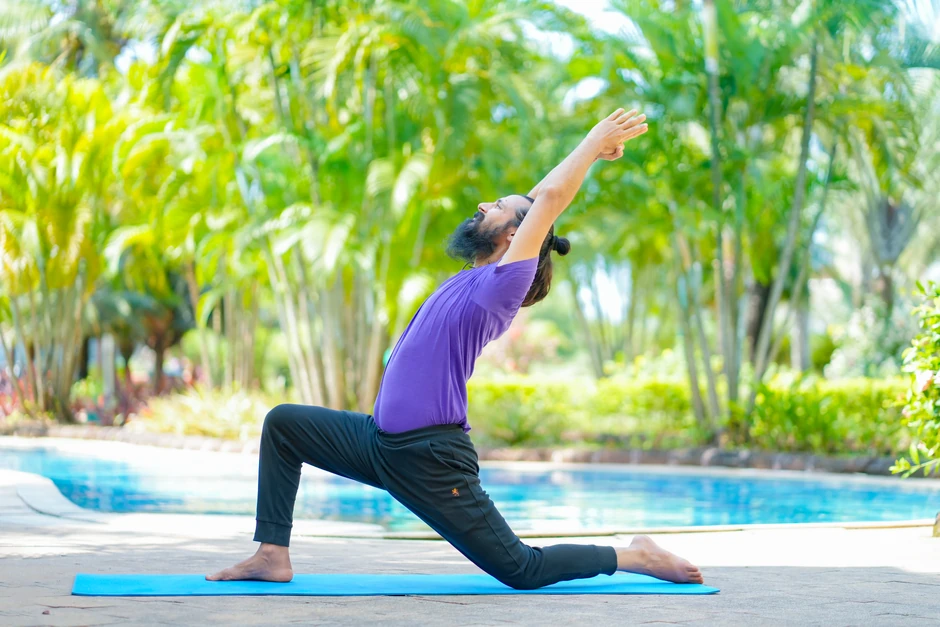
From your position in Downward Dog, you can easily transition to Low Lunge by bringing your left foot forward and bending your left leg at the knee. With your right leg behind you, gently kneel on your right knee. Inhale as you reach your arms up over your head, parallel with your ears. Expand your chest, lengthen your spine, keep your chin level and your gaze focused forward in front of you.
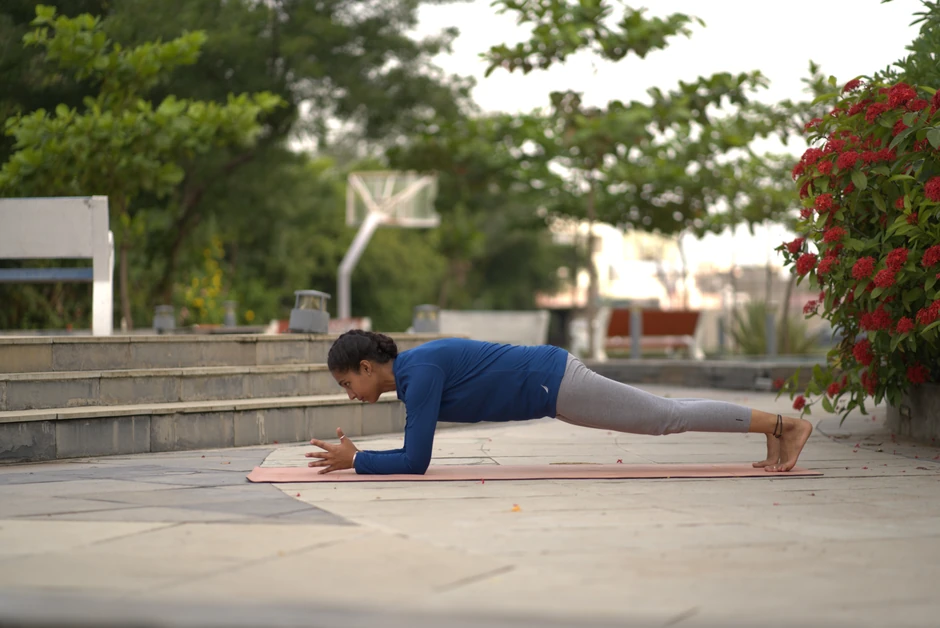
Lie face down on your mat, and using your palms to push up from the floor, lift your body until you are balanced on your palms and the toes of your feet. In this pose, your body should be positioned in a straight line, with your gaze directed at the floor in front of you. Hold for a few breaths, or for 30-60 seconds if you are feeling strong in this pose.
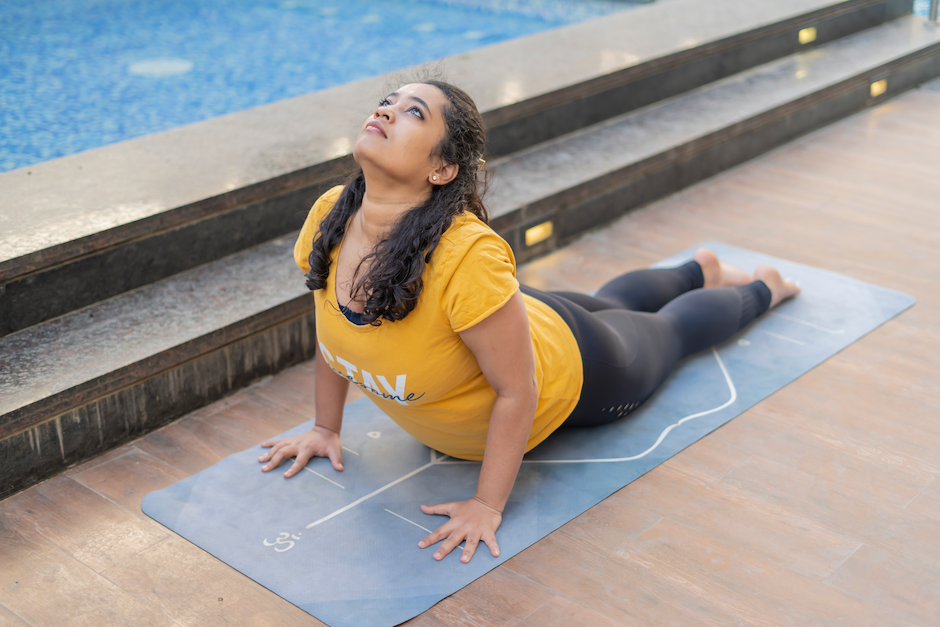
Start by laying with your stomach facing down on the floor, with your legs straight and your arms folded under your head. Place your palms on the mat parallel to your chest. Slightly lift your head off the mat, keeping your head and back aligned, and press your thighs together. Now, steadily pull your elbows towards your rib cage keeping your hands underneath your shoulders. With a deep inhale, press your hands into the mat, curl your shoulders backward, and lift your upper body off the mat, arching your back. Hold this position for a few breaths and then rest.
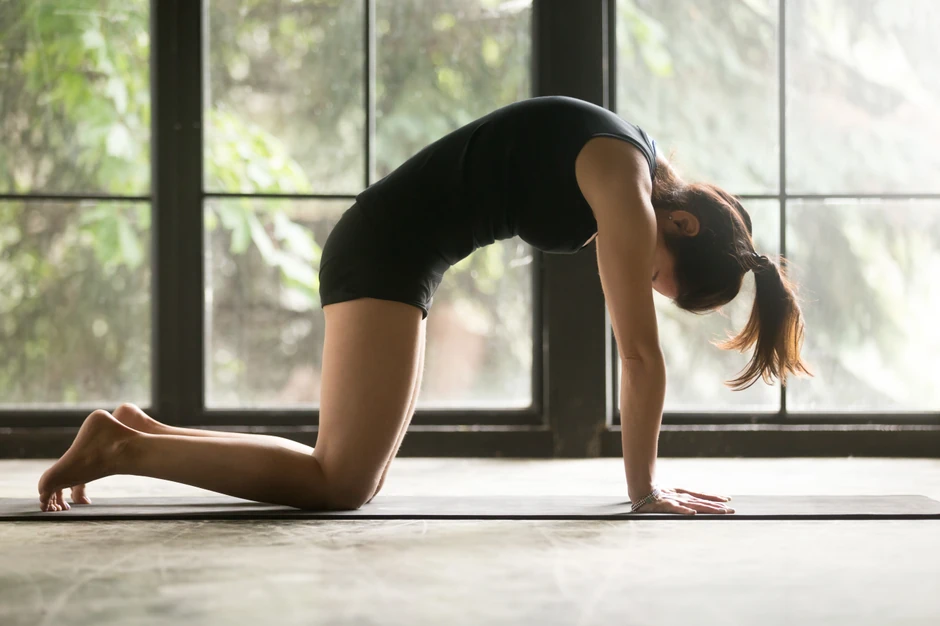
Start in a tabletop position with your hands and knees on the floor. Inhale and look up, lifting your chin and gently arching your spine. As you exhale, drop your chin and look down toward your naval as you curl your spine forward. Continue this movement 5-10 times.
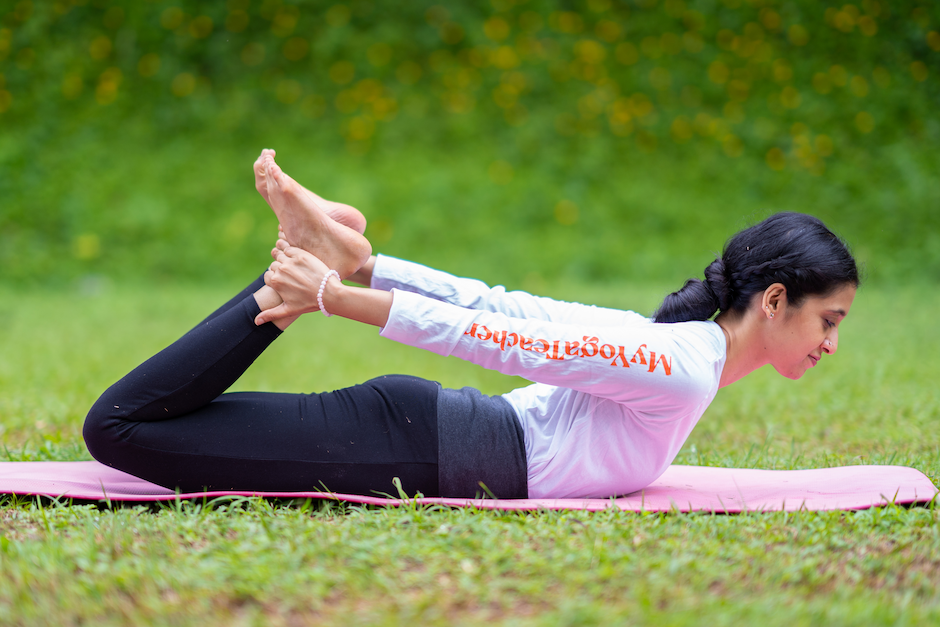
Lie down on your stomach with your forehead against the mat and your hands resting at your sides. Inhale and engage your core, slightly lifting your torso up, bending your legs and grabbing your ankles with each hand. Open your chest and lift your chin, so that your gaze is facing forward. Maintain a steady breath while holding this pose, allowing your body to gently rock back and forth with each inhale and exhale. Release after 20-30 seconds.
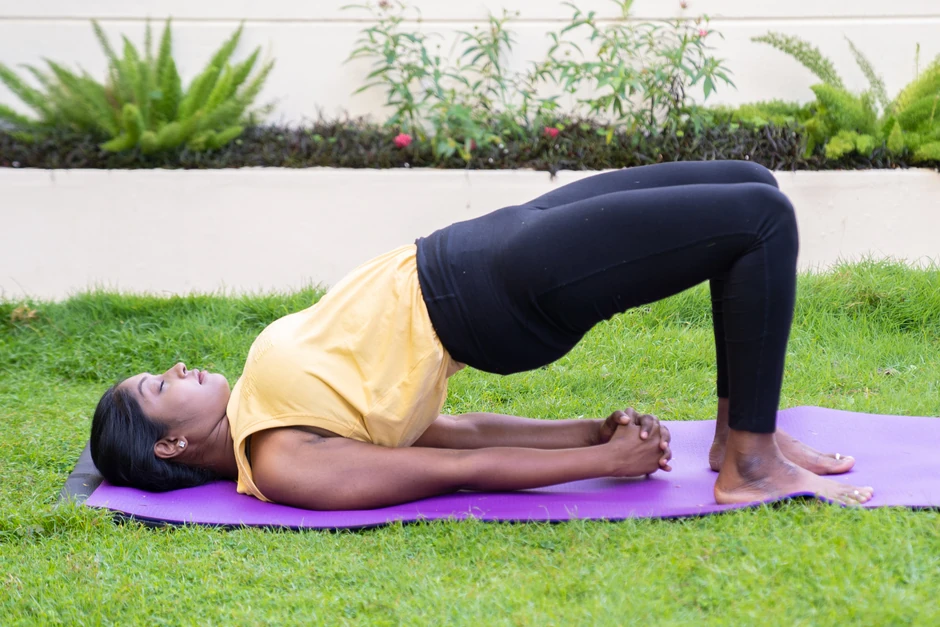
Start by lying on your back with your knees bent. On your next exhale, tuck your chin and lift your hips, being careful not to allow your knees to splay outward. Interlace your fingers on the floor underneath you and lift your hips higher, while staying in the pose for 5-10 breaths.
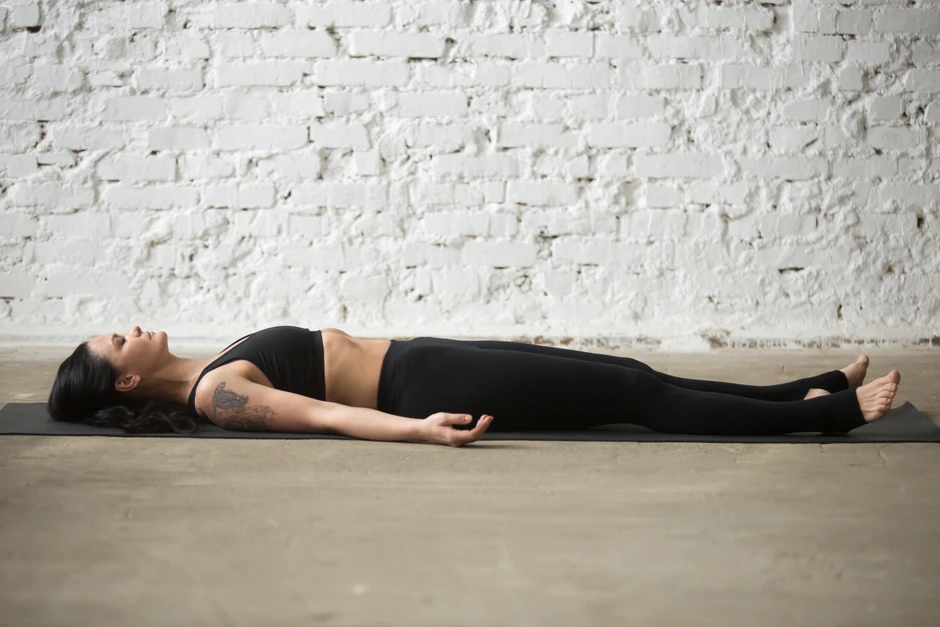
Sit on your yoga mat and lower your body to the floor, relaxing your legs and letting your arms rest on the floor at your sides, palms up. Keep your eyes closed and focus on your breathing. Relax the muscles in your face and neck, and visualize every part of your body letting go of all tension. Hold this pose for 5-7 minutes.

Receive personalized guidance tailored to your unique fitness goals, live with a dedicated coach—no credit card required.
Master Power Yoga poses for all levels. Learn beginner to advanced asanas, weight loss sequences, and safety tips with expert guidance. Start today!
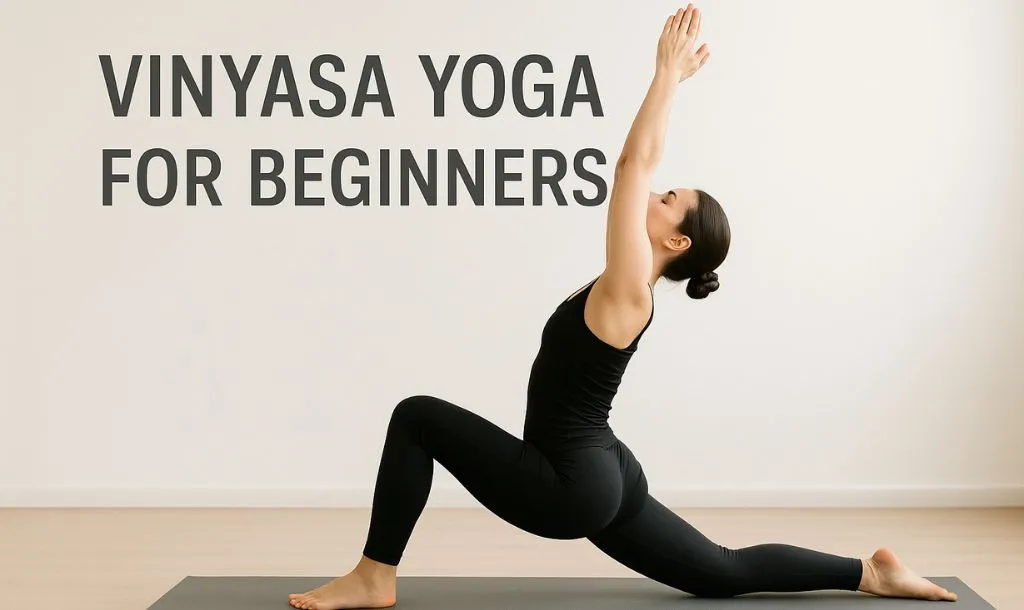
Start Vinyasa yoga with confidence! Learn beginner-friendly poses, breathing techniques, and safe sequences. Get expert guidance that makes all the difference!
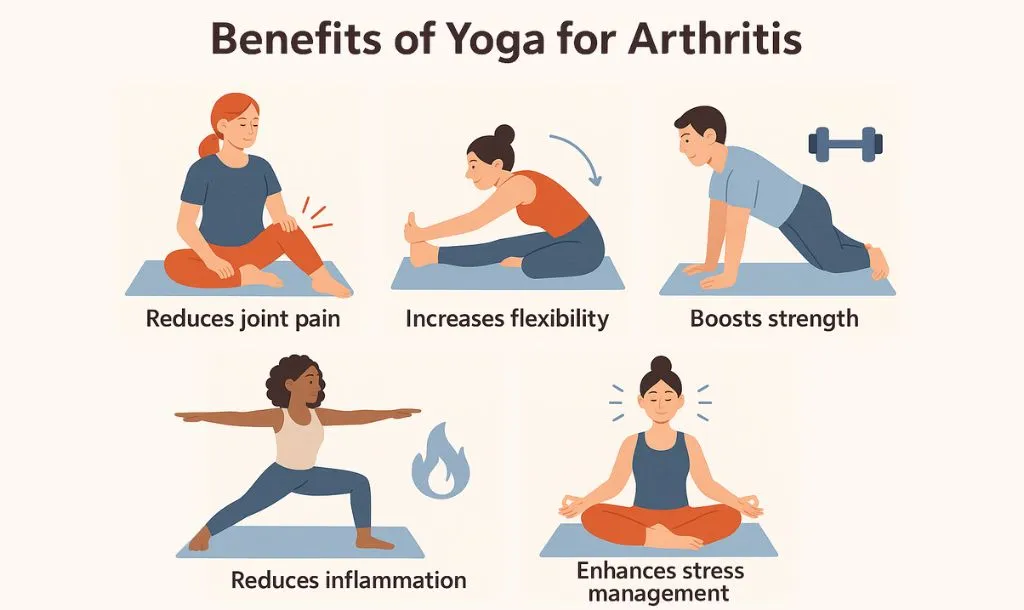
Yes, yoga is good for arthritis! Discover research-backed benefits, safety tips, and gentle poses. Expert guidance for arthritis-friendly practice.


© Copyright 2025 MyYogaTeacher Inc