Have you been experiencing knee pain lately? It's not uncommon, especially for women. Knee pain can be caused by a variety of factors, including injury, overuse, or arthritis. But did you know that yoga can be a helpful tool in managing knee pain and promoting knee health? In this article, we'll explore the benefits of yoga for women with knee pain, as well as some precautions and specific poses to try.
Causes of Knee Pain in Women
Before we dive into yoga, let's briefly discuss some common causes of knee pain in women. These can include injury, such as a torn ligament or meniscus, overuse from activities like running or jumping, or conditions like arthritis. It's important to consult with a healthcare professional if you're experiencing knee pain to determine the underlying cause and develop an appropriate treatment plan.
Benefits of Yoga for Knee Pain in Women
Yoga can be a great way to alleviate knee pain and promote knee health. Some benefits include:
Strengthening the muscles around the knee joint for greater support and stability
Improving flexibility and range of motion in the knee joint
Reducing inflammation and pain
Promoting relaxation and stress relief, which can be helpful for managing chronic pain
Precautions for Yoga Practice with Knee Pain
While yoga can be helpful for managing knee pain, it's important to take precautions to avoid aggravating the knee joint. Here are some tips to keep in mind:
Consult with a healthcare professional before starting a yoga practice if you have knee pain
Avoid high-impact poses like jumping or deep lunges, especially if they cause pain
Use props like blocks or blankets to modify poses and reduce stress on the knee joint
Listen to your body and avoid pushing past your limits, especially if you're experiencing pain
13 Easy Yoga Poses for Knee Pain in Women
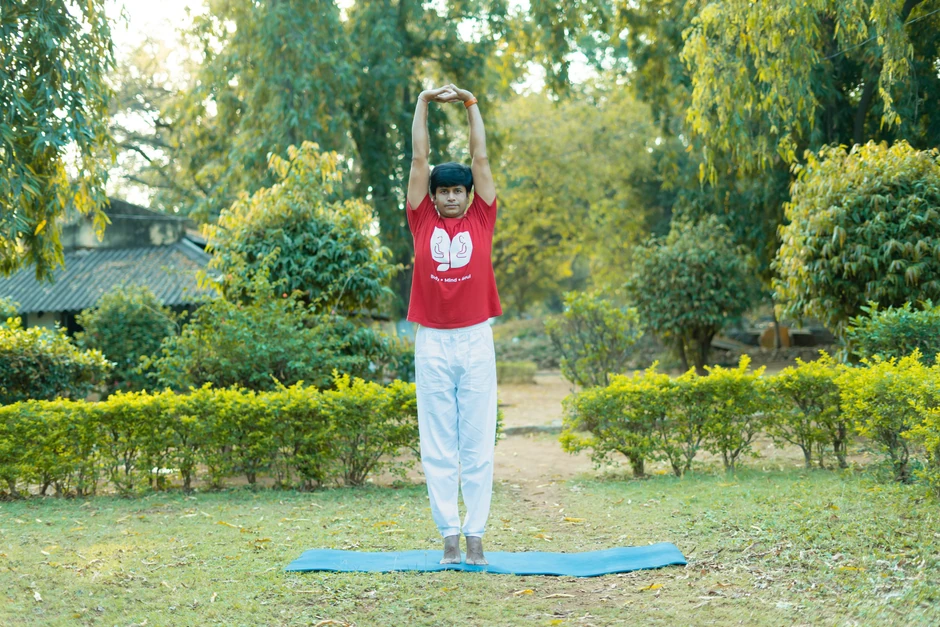
1. Mountain Pose (Tadasana)
Stand with your feet together and your arms at your sides
Ground down through your feet and lengthen through the crown of your head
Engage your quadriceps to lift your kneecaps and strengthen the muscles around your knees
Hold for several breaths and release
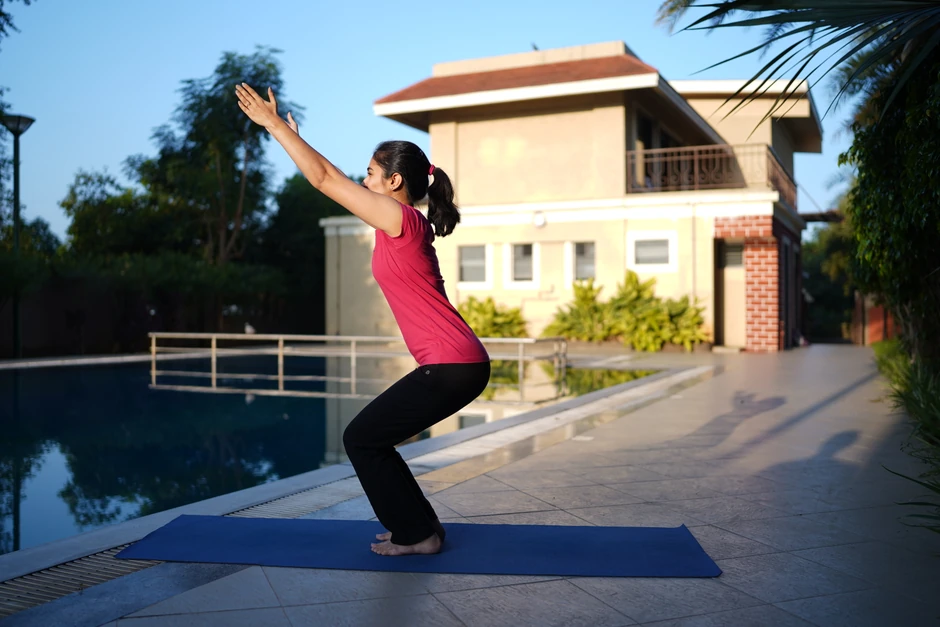
2. Chair Pose (Utkatasana)
Stand with your feet hip-distance apart
Inhale and raise your arms overhead, keeping your palms facing each other
Exhale and bend your knees, bringing your thighs as parallel to the ground as possible
Keep your weight in your heels and your knees pointed forward
Hold for several breaths and release
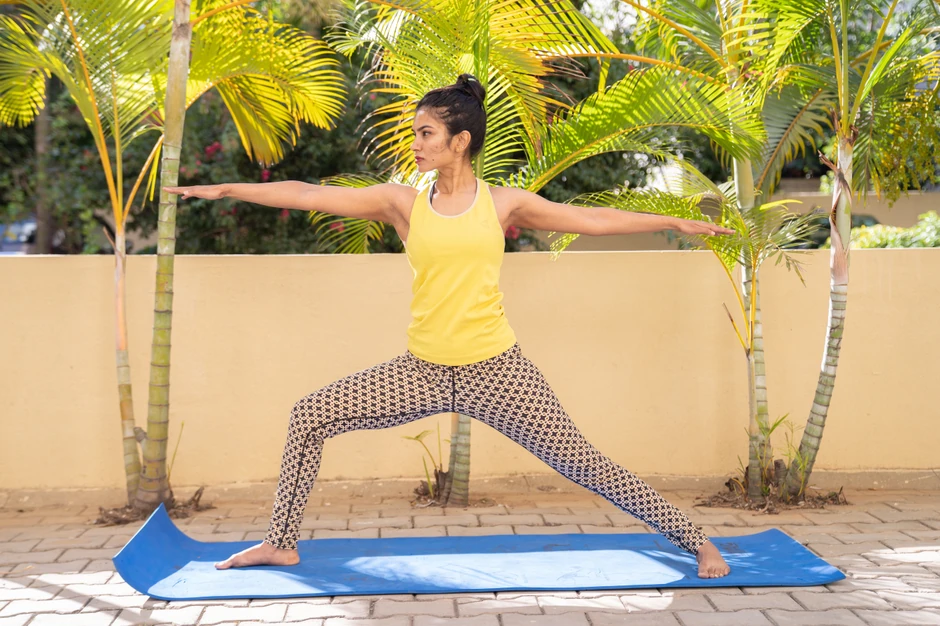
3. Warrior II (Virabhadrasana II)
Start in Mountain Pose, then step your left foot back about 3-4 feet
Turn your left foot out and your right foot slightly in
Inhale and raise your arms to shoulder height, palms facing down
Exhale and bend your right knee, bringing it directly over your ankle
Keep your left leg straight and strong, and gaze over your right hand
Hold for several breaths and release, then switch sides
4. Extended Triangle Pose (Utthita Trikonasana)
Start in Warrior II with your right foot forward
Straighten your right leg and extend your right arm forward, then lower your right hand to your shin, ankle, or the floor
Extend your left arm straight up toward the ceiling and gaze up at your left hand
Keep your left hip stacked on top of your right hip, and keep both legs strong and engaged
Hold for several breaths and release, then switch sides
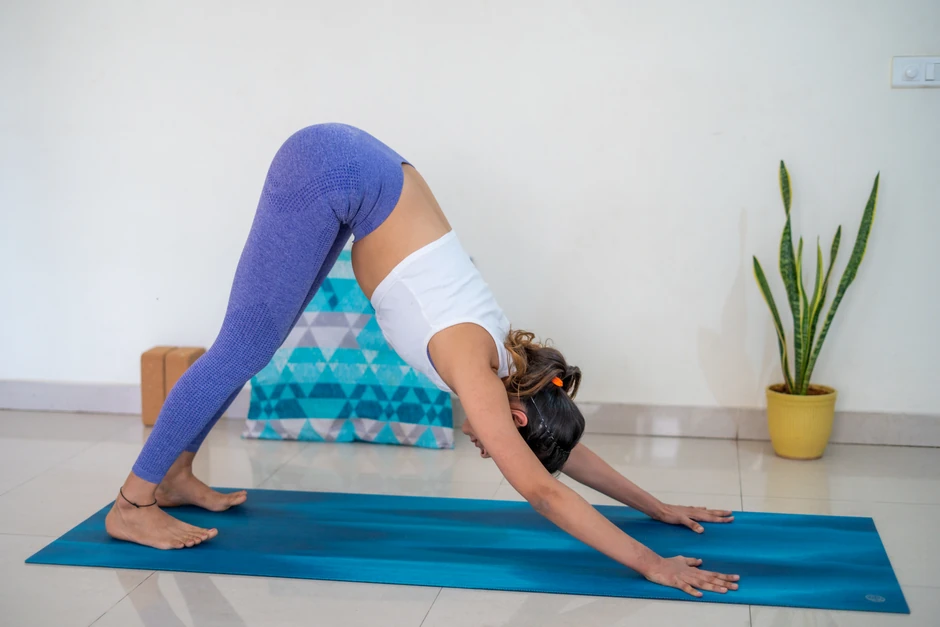
5. Downward-Facing Dog (Adho Mukha Svanasana)
Start on your hands and knees, with your hands shoulder-width apart and your knees hip-width apart
Tuck your toes and lift your hips up and back, straightening your arms and legs
Keep your heels grounded and your head between your arms
Press your hands and feet into the ground to create length and space in your spine
Hold for several breaths and release
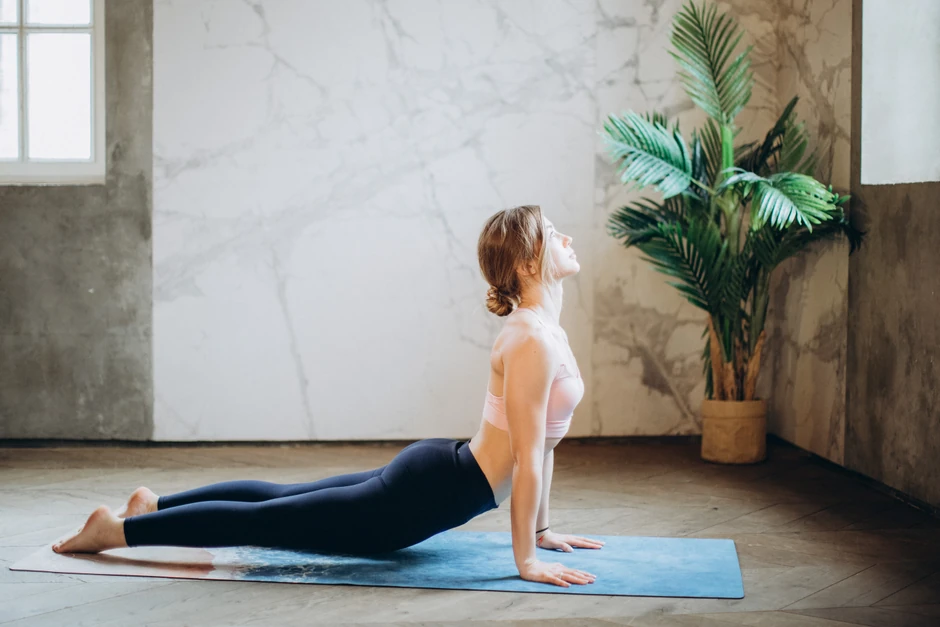
6. Upward-Facing Dog (Urdhva Mukha Svanasana)
Start in a low plank position with your elbows bent and your body hovering above the ground
Inhale and straighten your arms, lifting your chest and torso up and off the ground
Keep your thighs and hips lifted off the ground, and gaze up toward the ceiling
Hold for several breaths and release
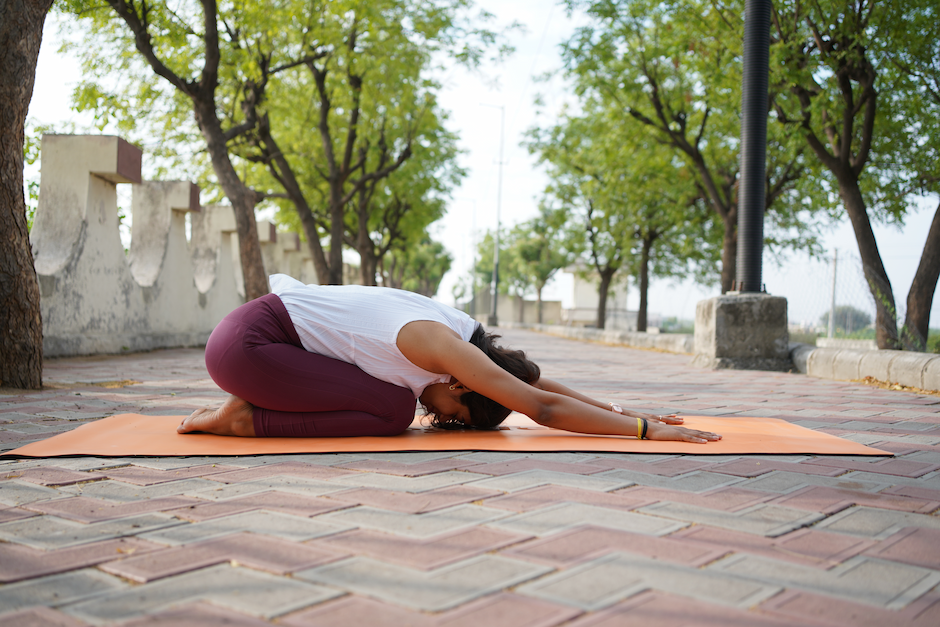
7. Child's Pose (Balasana)
Start on your hands and knees, then lower your hips back toward your heels
Extend your arms forward and rest your forehead on the ground
Relax your entire body and take deep breaths
Hold for several breaths and release
8. Pigeon Pose (Eka Pada Rajakapotasana)
Start on your hands and knees, then bring your right knee forward and place it behind your right wrist
Slide your left leg back and straighten it behind you, keeping your hips squared to the front of your mat
Fold forward over your right leg and rest your forearms and forehead on the ground
Hold for several breaths and release, then switch sides
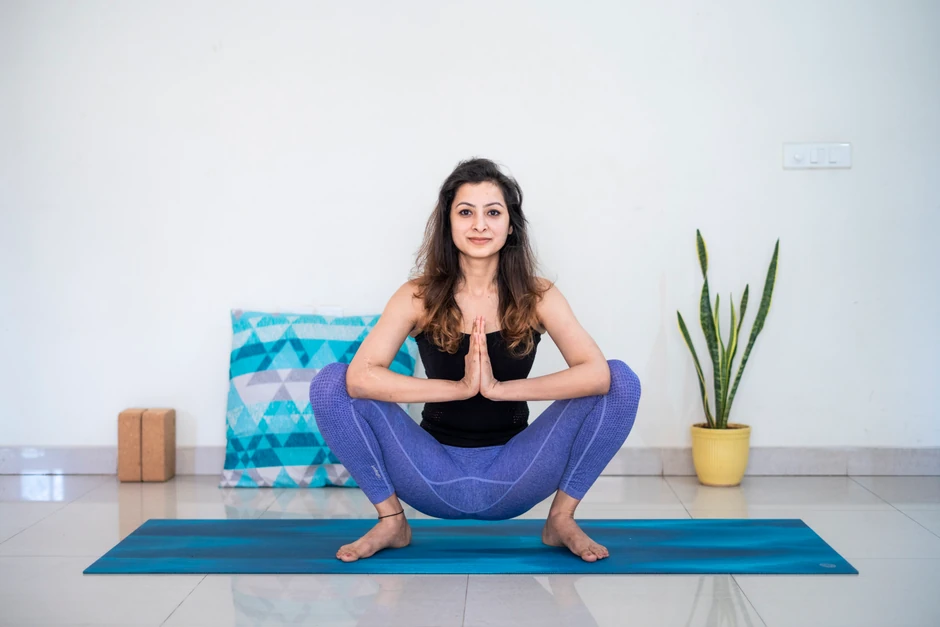
9. Garland Pose (Malasana)
Stand with your feet slightly wider than hip-distance apart, with your toes turned out
Lower your hips down toward the ground, keeping your heels on the ground
Bring your palms together at your chest and press your elbows into your inner thighs to create a deeper stretch
Lengthen through your spine and gaze forward
Hold for several breaths and release
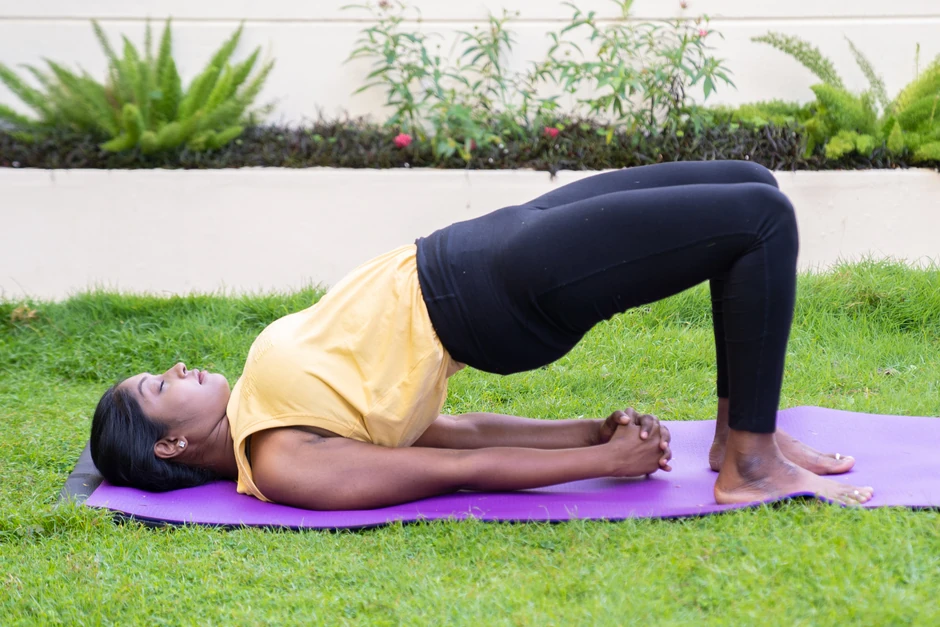
10. Bridge Pose (Setu Bandha Sarvangasana)
Lie on your back with your knees bent and your feet hip-distance apart
Press your feet and arms into the ground to lift your hips up toward the ceiling
Keep your thighs and feet parallel to each other, and clasp your hands together underneath your body
Bend your right knee and bring your right foot toward your buttocks
Loop a strap around the ball of your right foot and hold onto the strap with both hands
Straighten your right leg up toward the ceiling, keeping your left leg extended and grounded
Hold for several breaths and release, then switch sides
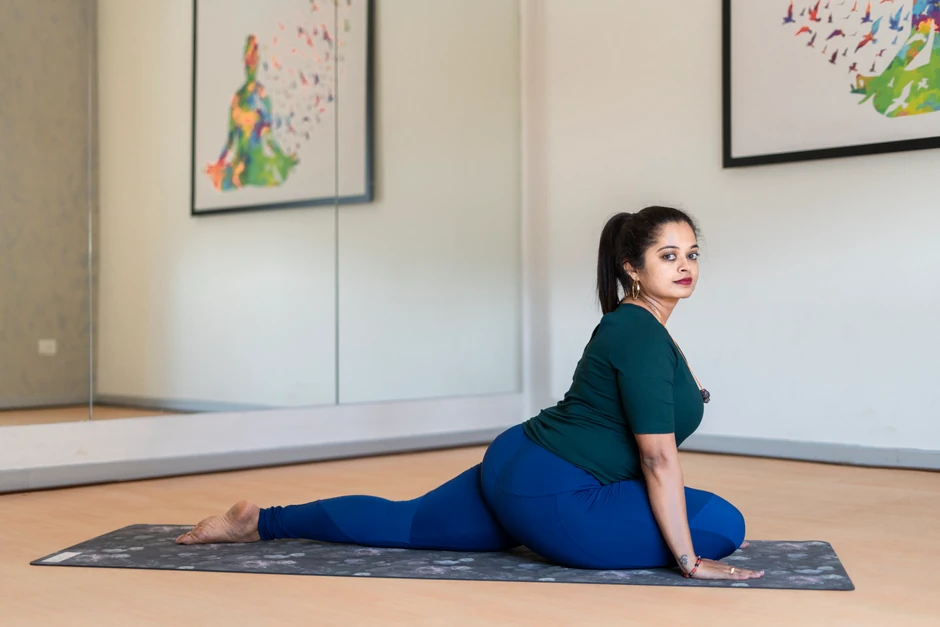
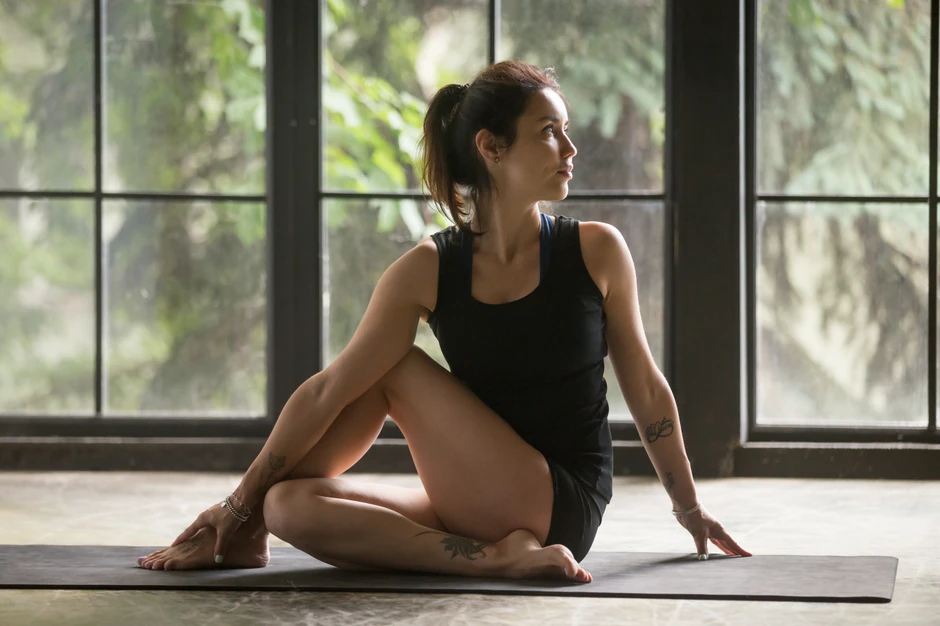
12. Half Lord of the Fishes Pose (Ardha Matsyendrasana)
Sit on the ground with your legs extended in front of you
Bend your right knee and place your right foot on the ground outside your left knee
Wrap your left arm around your right knee and place your right hand on the ground behind you
Twist your torso to the right, gazing over your right shoulder
Hold for several breaths and release, then switch sides
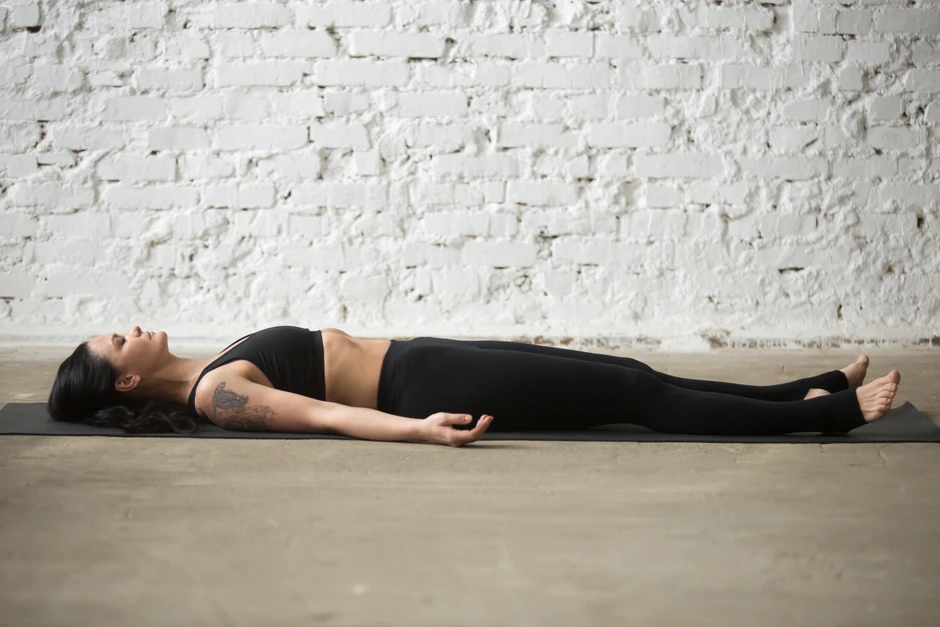
13. Corpse Pose (Savasana)
Lie on your back with your legs extended and your arms at your sides
Close your eyes and take deep, slow breaths
Relax your entire body and allow your mind to become still
Hold for several minutes and slowly come out of the pose.
Yoga Practices for Knee Pain Prevention
In addition to managing knee pain, yoga can also be helpful for preventing knee pain in the first place. Here are some tips to keep in mind:
Practice regularly to maintain strength and flexibility in the knee joint
Incorporate a variety of poses that target the muscles around the knee, as well as the hips and thighs
Focus on proper alignment to reduce stress on the knee joint
Take breaks and listen to your body if you start to experience pain or discomfort
Yoga Therapy for Knee Pain
In some cases, more targeted yoga therapy techniques can be helpful for managing knee pain. These might include:
Specific exercises to strengthen the muscles around the knee joint
Massage or stretching techniques to release tension and reduce inflammation
Mind-body practices like meditation or visualization to manage stress and pain
Frequently Asked Questions about Yoga for Knee Pain in Women
Is yoga good for painful knees?
Yes, yoga can be very beneficial for painful knees. Certain yoga poses can help to strengthen the muscles around the knee joint, increase flexibility, and reduce inflammation. However, it is important to speak with your doctor or a qualified yoga instructor before starting a yoga practice if you have knee pain.
Which yoga poses reduce knee pain?
There are several yoga poses that can help to reduce knee pain. Some of the best poses include Mountain Pose (Tadasana), Chair Pose (Utkatasana), Warrior II (Virabhadrasana II), Extended Triangle Pose (Utthita Trikonasana), and Downward-Facing Dog (Adho Mukha Svanasana). These poses help to strengthen the muscles around the knee joint and increase flexibility.
Can Vajrasana cure knee pain?
Vajrasana, also known as Thunderbolt Pose, is a yoga pose that involves sitting on your heels with your toes pointing back. This pose can help to improve digestion and strengthen the muscles in the legs, but it may not cure knee pain. If you have knee pain, it is important to speak with your doctor or a qualified yoga instructor to determine the best course of treatment.
What exercises are best for knee pain?
In addition to yoga, there are several exercises that can help to reduce knee pain. Some of the best exercises include cycling, swimming, and walking. These exercises help to strengthen the muscles around the knee joint and improve overall fitness. It is important to start slowly and gradually increase the intensity of your exercise routine to avoid further injury. Additionally, it is important to speak with your doctor or a qualified fitness instructor to determine the best course of treatment for your specific knee pain.
No items found.
Online Yoga Classes with Expert Indian Teachers - Live!
1-on-1 & Group Classes - Available 24x7, Live via Zoom
Enjoy a Free 1-on-1 Session with a Coach!
Receive personalized guidance tailored to your unique fitness goals, live with a dedicated coach—no credit card required.


_optimized.webp)