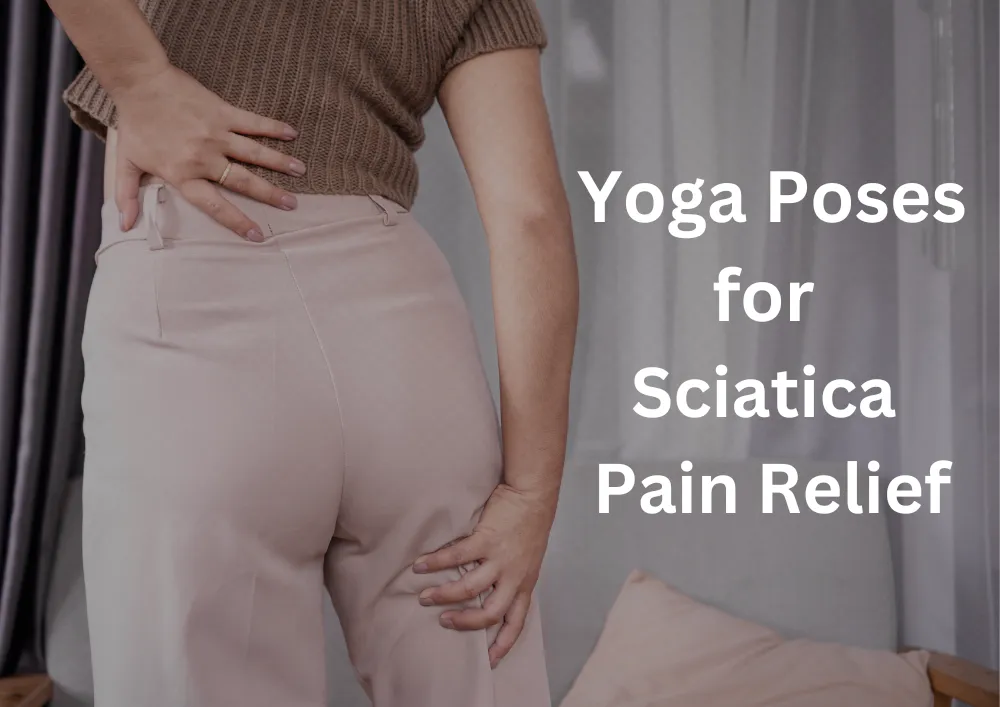
If you're experiencing low back or leg pain, it could be sciatica. Fortunately, yoga can bring you some welcome relief. In this article, we'll share 7 yoga poses for sciatica. But what is sciatica, what does it feel like, and what yoga poses can help ease your pain? Keep reading for answers to all those questions and more.
Of course, you can always jump right in with myYogaTeacher's Yoga for Back Pain program. Sign up for a two-week free trial of the program and you'll get three free one-on-one sessions with our expert yoga instructors as well as group classes focusing on yoga for back pain and core strengthening. Plus, you'll have access to 30+ other daily yoga classes!
Online Yoga Classes – Live & Interactive
Get 2 free private yoga sessions and 2 weeks of unlimited group classes with authentic yoga teachers. No credit card required when you sign up today!
The sciatic nerves are the longest nerves in the body and are as thick as your pinky. They start in your lower lumbar spine and extend down the length of your legs to the soles of your feet. The pain from sciatica can start anywhere along this path. Most people who suffer from sciatica describe it as a tingling, burning, or searing pain or even numbness that starts in the lower back and shoots down the back of one leg.
Sciatica itself is the word used to describe the tenderness or compression of the sciatic nerve. It can be present with other back or muscle injuries or could be triggered by things as simple as sitting, walking, or just standing weird. Sciatica is typically unilateral meaning that people usually get it just on one side of the body at a time.
Basically, sciatica isn't a good time. But there are ways to ease the pain. According to a report by Harvard Medical School, practicing yoga is a non-invasive way to prevent sciatica.
To cure sciatica with yoga, it's important to find the right yoga poses that are going to make things better, not worse. Be sure to listen to your body; if anything you're doing causes you more pain or discomfort, stop doing it. We find it's also helpful to have a trusted yoga teacher who can show you the proper way to do yoga poses and who can provide modifications if needed.
Yoga can help align and strengthen the lower back, relieving pain caused by compression of the sciatic nerve. And, since we sit so much throughout the day, our hips tend to be tight, which also increases pressure on the sciatic nerves. Adding yoga asanas can help loosen tight areas and ease pain along the entire sciatic nerve.
So, without further ado, here are 7 yoga poses to improve and prevent sciatica you can add to your day. To get even more benefit, sign up for a two-week free trial of our Yoga for Back Pain program!
Bridge pose opens and stretches your hip flexors, relieves lower back pain, and strengthens core and back muscles. You can support your lower back with your hands, a block, or a bolster.
Legs Up the Wall pose is helpful for relaxing the hips and back, reducing knee and ankle pain, and relieving tired feet and legs. You can do it actually up against a wall or not. Place a bolster under your hips for more support if that feels better for you.
Pigeon pose not only promotes good posture but stretches the lower part of your body, making the hip area more flexible and relieving muscle aches. It's important to perform this pose on both sides even if you only have pain on one side.
Downward-facing dog is an important yoga pose that helps lengthen the spine, stretch the back muscles, and strengthen the feet and legs. As you work your way into the pose, try to shift your weight back onto your heels (and off of your back). It's fine if you can't rest your heels on the floor.
Wind-relieving pose loosens the lower back and helps flex your back and hip muscles. You may also find that this pose relieves knee pain. Stay in the pose for as long as is comfortable.
Twists can feel amazing on your back but be sure to only twist as much as is comfortable for you, sitting on a cushion to lift your lower back as you twist, if needed. Half Lord of the Fishes helps to stretch your back muscles, release stiffness from hips, and flex the spine. Be sure to repeat the twist on both sides.
Cow face pose is a beautiful pose that can help elongate the spine and correct posture. It also strengthens the back and hip muscles. Many people struggle with this pose because they're not able to meet their hands at the back. That's okay. Your flexibility will improve over time.
If you have a few minutes left after completing these poses, take those minutes in savasana by lying on your back with your feet flat on the mat. Focus on how your body feels. If you notice areas of tension, breathe into those areas for a few minutes.
If you're actively experiencing sciatica, your best bet is curling up with heating pads or ice packs until the pain is gone. In addition, there are some yoga poses that should be avoided as they can further aggravate already unhappy sciatic nerves. Generally, poses that involve forward bends or put pressure on the lower back should be avoided.
If you're taking any type of sedative medication or are hypermobile, it's important to listen to a physical therapist or qualified yoga teacher before proceeding with yoga practice.
No matter whether your sciatic nerves get mad at you for sleeping wrong or you've just been sitting for too many hours out of the day, these yoga poses for sciatica are a great way to ease pain and prevent it from happening in the future. We recommend signing up for a free 2-week trial of our Yoga for Back Pain program. You'll not only get access to our full schedule of yoga classes, but you'll receive three free one-on-one sessions with our expert yoga teachers who will address your questions and concerns and get you started on a path towards better back health (the one-on-one sessions are kind of like working with a physical therapist, but specifically for yoga).
Online Yoga Classes – Live & Interactive
Get 2 free private yoga sessions and 2 weeks of unlimited group classes with authentic yoga teachers. No credit card required when you sign up today!
{"slug":"yoga-for-sciatica","recentPosts":[{"id":"clgc1nu7j1uwk0birznqai3x1","slug":"10-yoga-poses-for-multiple-sclerosis","author":{"name":"Will","teacherMytSlug":"will-1","pictureUrl":"will.jpeg"},"title":"10 Yoga Poses to Enhance Wellness for Multiple Sclerosis Patients","subTitle":null,"seoTitle":null,"seoDescription":"Learn about Yoga for Multiple Sclerosis and how it can help manage symptoms. Improve your quality of life with these yoga poses.","readTime":null,"excerpt":"Discover yoga for multiple sclerosis - improve your quality of life with these poses.","tags":[],"createdAt":"2023-04-11T09:12:29.35505+00:00","coverUrl":"aydrjq4doquwuaot8kt7.jpg","content":{"text":"Multiple sclerosis (MS) is a chronic autoimmune disease that affects the central nervous system. It can cause a range of symptoms, including fatigue, muscle weakness, and difficulty with balance and coordination. While there is no cure for MS, practicing yoga can help manage symptoms and improve overall health and well-being. Before starting a yoga practice, it's important to consult with a healthcare provider to ensure safety and effectiveness.\\n\\nBenefits of Yoga for Multiple Sclerosis\\nStress and Fatigue Reduction: Yoga provides a calming and relaxing effect on the body and mind, which can help ease the mental and physical stresses of MS. It can lead to a reduction in fatigue levels and promote a more peaceful state of mind.\\nImproved Balance and Coordination: MS can cause issues with balance and coordination, but yoga can help improve these areas. The practice of yoga involves movements that require balance and coordination, which can improve the function of the nervous system.\\nIncreased Flexibility and Strength: Yoga poses require the use of muscles that may not be utilized in everyday activities. Practicing yoga regularly can lead to increased flexibility and strength, which can improve overall fitness levels.\\nRespiratory Function Improvement: MS can affect respiratory function, but yoga can help improve breathing patterns. Certain yoga practices involve deep breathing exercises that can help increase lung capacity and oxygenation of the body.\\nPain Management: MS can cause pain and discomfort, but yoga can be an effective tool for managing these symptoms. The gentle movements of yoga can help relieve tension and tightness in the muscles, which can reduce pain and improve overall comfort.\\nImproved Overall Health and Well-Being: By providing a range of physical and mental benefits, yoga can improve overall health and well-being for individuals with MS. Regular practice can promote a sense of inner calm and peacefulness, which can positively impact all areas of life.\\n\\nYoga Poses for Multiple Sclerosis Symptom Management\\nSeated or chair yoga poses are ideal for individuals with limited mobility, while standing poses are suitable for those with greater mobility. Focus on poses that improve balance, coordination, and flexibility, such as:\\n\\n1.Child's Pose (Balasana): \\n\\nSit on your heels with your knees apart, and fold your torso forward, resting your forehead on the floor. Stretch your arms forward, palms facing down. Hold for 5-10 deep breaths.\\n\\n2.Cat-Cow (Marjaryasana-Bitilasana): \\n\\nStart on your hands and knees, with your wrists under your shoulders and knees under your hips. Inhale and lift your chest and tailbone towards the ceiling (Cow pose), and exhale, rounding your spine towards the ceiling (Cat pose). Repeat for 5-10 breaths.\\n\\n3.Warrior II (Virabhadrasana II): \\n\\nFrom a standing position, step your left foot back and turn it out 90 degrees. Bend your right knee, keeping it directly over your ankle. Extend your arms out to the sides, and gaze over your right hand. Hold for 5-10 breaths and repeat on the other side.\\n\\n4.Tree Pose (Vrksasana): \\n\\nStand with your feet hip-distance apart, and shift your weight onto your left foot. Place your right foot on your left thigh, and balance here. Place your hands in prayer position at your heart or extend your arms overhead. Hold for 5-10 breaths and repeat on the other side.\\n\\n5.Downward-Facing Dog (Adho Mukha Svanasana): \\n\\nFrom a tabletop position, walk your hands forward and lift your hips up and back, forming an inverted V-shape with your body. Press your hands and feet into the ground and hold for 5-10 breaths.\\n\\n6.Warrior I (Virabhadrasana I): \\n\\nFrom a standing position, step your left foot back and turn it out 45 degrees. Bend your right knee, keeping it directly over your ankle. Extend your arms overhead and gaze forward. Hold for 5-10 breaths and repeat on the other side.\n\\n7.Sphinx Pose (Salamba Bhujangasana): \\n\\nLie on your stomach with your elbows under your shoulders and forearms on the ground. Press into your forearms and lift your chest up, keeping your shoulders relaxed. Hold for 5-10 breaths.\n\\n8.Bridge Pose (Setu Bandha Sarvangasana): \\n\\nLie on your back with your knees bent and feet hip-distance apart. Press into your feet and lift your hips up, keeping your arms and shoulders on the ground. Hold for 5-10 breaths.\\n\\n9.Triangle Pose (Trikonasana): \\n\\nFrom a standing position, step your left foot back and turn it out 90 degrees. Extend your arms out to the sides and reach forward with your right hand, placing it on your shin or a block. Gaze up at your left hand. Hold for 5-10 breaths and repeat on the other side.\\n\\n10.Corpse Pose (Savasana): \\n\\nLie on your back with your arms and legs extended. Close your eyes and focus on your breath, allowing your body to fully relax. Stay here for at least 5-10 minutes.\\n\\nBreathing and Meditation Practices for Yoga for Multiple Sclerosis\\nHere are some breathing and meditation practices that can be incorporated into a yoga practice for multiple sclerosis symptom management:\\n\nDeep Breathing: Sit comfortably and take deep, slow breaths through the nose, filling the lungs completely. Exhale slowly through the nose, releasing all the air. Repeat for several minutes.\\nAlternate Nostril Breathing: Sit comfortably and use the thumb to close one nostril while inhaling through the other. Then, use the ring finger to close the opposite nostril while exhaling through the first. Repeat for several minutes.\\nMindful Breathing: Focus on the sensation of the breath as it enters and leaves the body. If the mind wanders, gently bring the focus back to the breath.\\nBody Scan Meditation: Lie down or sit comfortably and bring attention to each part of the body, starting from the toes and moving up to the head. Notice any sensations or tensions and release them as you move through each part.\\n\\nConclusion\\nPracticing yoga can provide many benefits for individuals with multiple sclerosis, including reduced stress and fatigue, improved balance and coordination, and increased flexibility and strength. Incorporating yoga poses and practices into your routine can help manage symptoms and improve overall health and well-being. Remember to consult with a healthcare provider and find a qualified yoga teacher to begin a safe and effective practice."},"category":["fitness"]},{"id":"clg55sr3657wd0airoeszt66q","slug":"yoga-for-carpal-tunnel-syndrom","author":{"name":"Will","teacherMytSlug":"will-1","pictureUrl":"will.jpeg"},"title":"Yoga for Carpal Tunnel: Top 10 Yoga Poses, Benefits, FAQs","subTitle":null,"seoTitle":null,"seoDescription":"Alleviate carpal tunnel symptoms with yoga! Discover 10 poses to reduce pain and improve wrist and hand health. Learn best practices and protect yourself.","readTime":null,"excerpt":"Relieve carpal tunnel with yoga! 10 poses to manage symptoms and improve wrist and hand health.","tags":[],"createdAt":"2023-04-06T13:33:53.820514+00:00","coverUrl":"fyzezortjqar8ovbd4vf.jpg","content":{"text":"Do you ever experience pain or tingling in your hands and fingers? It could be carpal tunnel syndrome, a common condition that affects many people who use their hands and wrists frequently. Carpal tunnel syndrome is caused by the compression of the median nerve in the wrist, which can lead to discomfort, numbness, and weakness in the hand and fingers.\\nFortunately, yoga can offer a natural and effective way to manage carpal tunnel syndrome symptoms. In this article, we'll explore some yoga poses and practices that can help relieve pain and improve flexibility in the wrists and hands.\n\n\\nBenefits of Yoga for Carpal Tunnel Syndrome\\nYoga has many benefits for overall health and wellness, and it can be particularly helpful for managing carpal tunnel syndrome symptoms. Here are just a few of the benefits:\\nReducing pain:\\n Certain yoga poses can help stretch and strengthen the muscles in the wrist and hand, which can reduce pain and discomfort.\\nImproving flexibility: \\nTight muscles and tendons in the wrist and hand can exacerbate carpal tunnel syndrome symptoms, but yoga can help improve flexibility and mobility.\\nReducing stress:\\n Stress and tension in the body can contribute to carpal tunnel syndrome symptoms, but yoga can help reduce stress levels and promote relaxation.\n\\n\\nYoga Poses for Carpal Tunnel Syndrome Relief\\nYoga poses, or asanas, can be a powerful tool for managing carpal tunnel syndrome symptoms. Here are a few poses to try:\\n\n\\n1.Gomukhasana (Cow Face Pose): \\n\\nThis pose can help stretch the wrists and forearms, reducing pain and stiffness. To perform this pose, sit on the floor with your legs extended in front of you. Bend your right knee and place your right foot on the floor, outside your left thigh. Bring your left heel toward your right buttock. Cross your left arm over your right arm and bring your palms together. Hold for 5-10 breaths, then switch sides.\\n\n\\n2.Adho Mukha Svanasana (Downward-Facing Dog Pose): \\n\\nThis pose can help stretch the muscles in the hands, wrists, and arms, improving flexibility and reducing pain. Start on your hands and knees, with your wrists directly under your shoulders and your knees directly under your hips. Lift your hips up and back, straightening your arms and legs. Press your hands into the floor and lengthen through your spine. Hold for 5-10 breaths.\\n\n\\n3.Garudasana (Eagle Pose): \\n\\nThis pose can help strengthen the muscles in the hands and wrists, which can improve grip strength and reduce pain. To perform this pose, stand with your feet hip-width apart and your arms at your sides. Bring your right arm under your left arm, and bend both elbows to bring your palms together. Cross your right thigh over your left thigh. Balance on your left foot and hold for 5-10 breaths, then switch sides.\\n\n\\n4.Utthita Trikonasana (Extended Triangle Pose): \\n\\nThis pose can help stretch the wrists and forearms, promoting flexibility and reducing pain. To perform this pose, stand with your feet about 3-4 feet apart. Turn your right foot out 90 degrees and your left foot in slightly. Reach your right arm forward and hinge at your hip to reach your right hand toward your right shin or the floor. Extend your left arm straight up toward the ceiling. Hold for 5-10 breaths, then switch sides.\\n\n\\n5.Padangusthasana (Big Toe Pose): \\n\\nThis pose can help stretch the muscles in the hands, wrists, and arms, improving flexibility and reducing pain. To perform this pose, stand with your feet hip-width apart. Inhale and lift your arms up overhead. Exhale and fold forward, reaching for your big toes with your hands. Hold for 5-10 breaths.\\n\\n6.Marjariasana (Cat Pose): \\n\\nThis pose can help stretch and mobilize the wrists, reducing stiffness and promoting flexibility. To perform this pose, start on your hands and knees, with your wrists directly under your shoulders and your knees directly under your hips. Inhale and arch your back, lifting your tailbone and dropping your belly. Exhale and round your spine, tucking your chin to your chest. Repeat for several breaths.\n\\n7.Bitilasana (Cow Pose): \\n\\nThis pose can help stretch and mobilize the wrists, reducing stiffness and promoting flexibility. To perform this pose, start on your hands and knees, with your wrists directly under your shoulders and your knees directly under your hips. Inhale and arch your back, lifting your tailbone and dropping your belly. Hold for a breath or two, then return to neutral spine.\n\\n8.Matsyasana (Fish Pose):\\n\\nThis pose can help stretch the chest and shoulders, relieving tension in the upper body and reducing carpal tunnel syndrome symptoms. To perform this pose, lie on your back with your knees bent and your feet flat on the floor. Lift your hips and slide your hands, palms down, under your buttocks. Press your forearms and elbows into the floor and lift your chest. Hold for 5-10 breaths.\\n\\n9.Baddha Konasana (Butterfly Pose):\\n \\n\\nThis pose can help stretch the inner thighs, hips, and groin, which can alleviate pressure on the wrists and hands. To perform this pose, sit on the floor with the soles of your feet together and your knees bent out to the sides. Hold your ankles or feet with your hands and gently press your knees down toward the floor. Hold for 5-10 breaths.\n\\n10\\n.\\nUttanasana (Standing Forward Bend)\\n: \\n\\nThis pose can help stretch the muscles in the hands, wrists, and arms, reducing stiffness and promoting flexibility. To perform this pose, stand with your feet hip-width apart. Inhale and lift your arms up overhead. Exhale and fold forward, reaching for the floor with your hands. Hold for 5-10 breaths. If you have difficulty reaching the floor, you can place your hands on blocks or a chair seat.\n\n\\nBreathing and Meditation Practices for Carpal Tunnel Syndrome Relief\\nIn addition to yoga poses, breathing exercises and meditation can be helpful for managing carpal tunnel syndrome symptoms. Here are a few practices to try:\\nDeep Breathing:\\n Taking slow, deep breaths can help reduce stress and tension in the body, which can contribute to carpal tunnel syndrome symptoms.\\nGuided Meditation:\\n Guided meditations can help promote relaxation and reduce stress, which can in turn reduce carpal tunnel syndrome symptoms.\\nVisualization:\\n Visualizing the body healing and repairing itself can help reduce pain and promote healing in the wrists and hands.\n\\n\\nTips for Practicing Yoga with Carpal Tunnel Syndrome\\nWhen practicing yoga with carpal tunnel syndrome, it's important to listen to your body and modify your practice as needed. Here are a few tips to keep in mind:\\nUse Props\\n: Props like blocks or straps can help make poses more accessible and comfortable.\\nModify Poses\\n: If a pose is too painful or uncomfortable, modify it or skip it altogether.\\nBe Mindful\\n: Pay attention to your body and how it feels during your practice. If a certain pose or practice is causing pain or discomfort, stop and modify or skip it.\\n\\nConclusion:\\nManaging carpal tunnel syndrome symptoms can be a challenge, but incorporating yoga into your routine can be a natural and effective way to find relief. By practicing yoga poses, breathing exercises, and meditation regularly, you can improve flexibility, reduce pain, and promote relaxation in your wrists and hands. Give it a try and see how yoga can benefit your carpal tunnel syndrome symptoms today!\n\n\\nFrequently Asked Questions about Carpal Tunnel Syndrome\\n\\nQ1. How can yoga help people with carpal tunnel syndrome?\\nAns: \\nYoga is a great way to manage carpal tunnel syndrome symptoms! Certain yoga poses can help stretch and strengthen the muscles in the wrists, hands, and arms, which can relieve pressure on the median nerve and reduce symptoms like pain, numbness, and tingling. Plus, practicing yoga can help reduce inflammation, increase flexibility, and improve circulation in the affected area.\\n\\nQ2. What yoga poses should you avoid with carpal tunnel?\\nAns:\\n If you have carpal tunnel syndrome, it's important to avoid yoga poses that put too much pressure on the wrists or require excessive bending or flexing of the hands. Poses like Chaturanga Dandasana (Four-Limbed Staff Pose), Adho Mukha Svanasana (Downward-Facing Dog Pose), and Plank Pose can worsen carpal tunnel symptoms and should be avoided. Instead, focus on poses that gently stretch and strengthen the wrists and hands.\n\\nQ3.What are the best practices for carpal tunnel?\\nAns:\\n In addition to practicing yoga, there are several other best practices for managing carpal tunnel syndrome. These include taking frequent breaks from repetitive tasks that strain the wrists and hands, using ergonomic tools and equipment to reduce strain, maintaining good posture, and engaging in regular exercise and stretching to promote overall health and flexibility. It's important to take care of yourself both on and off the mat!\n\\nQ4.How can you protect yourself from carpal tunnel?\\nAns:\\n There are several steps you can take to protect yourself from developing carpal tunnel syndrome. Using ergonomic tools and equipment, taking frequent breaks from repetitive tasks, and maintaining good posture can all help reduce your risk. Engaging in regular exercise and stretching can also help keep your hands and wrists healthy and flexible. Remember to listen to your body and take action if you notice any symptoms of carpal tunnel syndrome, such as pain, numbness, or tingling in the hands or wrists. A healthcare provider can help diagnose and treat any issues before they become more serious."},"category":["fitness"]},{"id":"clg3manw0c2300bk8q089x7gd","slug":"yoga-for-improved-mobility","author":{"name":"Will","teacherMytSlug":"will-1","pictureUrl":"will.jpeg"},"title":"Top 10 Yoga Poses for Improved Mobility: Unlock Your Body's Potential","subTitle":null,"seoTitle":null,"seoDescription":"Yoga is an incredibly efficient tool for improving your mobility for the better, regardless of your age, background, or ability.","readTime":null,"excerpt":"Learn about the best yoga poses for improving your mobility.\n","tags":[],"createdAt":"2023-04-05T11:40:10.955124+00:00","coverUrl":"mo0n5st8ek3dj2p0m8ib.jpg","content":{"text":"We know that yoga can help elevate your mental and emotional wellbeing, but it’s actually an incredibly efficient tool for improving your mobility for the better, regardless of your age, background, or ability.\\nWhat do we mean by mobility, and why is it important? Mobility refers to the level of ease with which you can move your body. This affects your ability to walk, run, lift, and engage in physical activities like sports, dancing, or just playing in the backyard with your kids or grandkids. Your level of mobility directly translates to your overall well-being, and it can greatly influence whether or not you experience chronic pain.\\n\\nHow Yoga Improves Mobility?\\nA typical yoga practice includes performing a holistic routine of stretches that work to improve your flexibility, balance, and strength — which all directly impact your mobility. Let’s break down how each of those factors work.\\nFlexibility refers to the range of motion between your joints and muscles, and an inflexible body is rigid, stiff, and achy, with a relatively small range of motion. A regular yoga routine can help lengthen and strengthen your muscles, improving your range of motion while preventing injury and reducing your risk for chronic pain. Along with increasing mobility, improving your flexibility also puts less strain on your body overall.\\nBuilding strength is crucial to achieve better mobility, since stronger muscles give you better stability, balance, and control over your movements. Yoga targets muscle groups and makes them stronger, more toned, and more capable of increased movement with more control. Increasing strength also helps prevent injury, improves your sense of balance, and reduces your risk for issues later in life – like osteoporosis.\\nIt may be surprising to learn that yogic breathing can also help improve your mobility. By calming your mind, improving your awareness, and relaxing your body, you can build a greater connection with your physical self and reduce tension. This can lead to an increase in your range of motion and a better understanding of your personal limitations.\\nThe best part about yoga is that it's low impact, and it's approachable for everyone. It doesn’t matter how old you are, or whether or not you’re a beginner. You can start out with slow, gentle movements that can greatly improve your mobility without the risk of injury. You can also practice yoga in the comfort of your own home, by following the sequence below or working with one of the many qualified yoga instructors available here at \\nMyYogaTeacher\\n.\\n\\nYoga Poses for Better Mobility\\nTo get started practicing yoga for improved physical mobility, try performing the poses below several times per week over an extended period of time. \\n1.Sun Salutations\\n\\nStart at the top of your mat in Mountain pose, with your hands in prayer position. With flowing, dynamic movement, progress through the following postures 3 or more times:\\nUpward Salute\\nStanding Half-Forward Bend\\nStanding Forward Fold\\nLow Lunge (left foot forward)\\nPlank\\nFour-Limbed Staff pose\\nUpward Facing Dog or Cobra\\nDownward Facing Dog\\nLow Lunge (right foot forward)\\nStanding Half-Forward Bend\\nStanding Forward Fold\\nUpward Salute\\nReturn to Mountain pose\\nRepeat\\n\\n2. Chair Pose\\n\\nStand in Mountain pose at the top of your mat, with your hands at your sides and feet hip distance apart. As you inhale, raise your hands over your head, with your arms parallel with your ears. As you exhale, hinge slightly at your waist, bend your knees and lower your torso forward as if you were about to sit down in a chair. Keep your core engaged and your spine straight while you hold this posture for several breaths.\\n\\n3. Downward Facing Dog\\n\\nStart in a tabletop position, with your hands and knees on your mat. Push up from your hands and knees, lifting your hips until you are balanced on your hands and feet, with your body resembling an inverted “v.” Keep your head in between your arms, ears balanced over your shoulders, and stay in this pose for several breaths.\\n\\n4. Low Lunge\\n\\nFrom your position in Downward Dog, you can easily transition to Low Lunge by bringing your left foot forward and bending your left leg at the knee. With your right leg behind you, gently kneel on your right knee. Inhale as you reach your arms up over your head, parallel with your ears. Expand your chest, lengthen your spine, keep your chin level and your gaze focused forward in front of you.\\n\\n5. Plank\\n\\nLie face down on your mat, and using your palms to push up from the floor, lift your body until you are balanced on your palms and the toes of your feet. In this pose, your body should be positioned in a straight line, with your gaze directed at the floor in front of you. Hold for a few breaths, or for 30-60 seconds if you are feeling strong in this pose.\\n\\n6. Cobra Pose\\n\\nStart by laying with your stomach facing down on the floor, with your legs straight and your arms folded under your head. Place your palms on the mat parallel to your chest. Slightly lift your head off the mat, keeping your head and back aligned, and press your thighs together. Now, steadily pull your elbows towards your rib cage keeping your hands underneath your shoulders. With a deep inhale, press your hands into the mat, curl your shoulders backward, and lift your upper body off the mat, arching your back. Hold this position for a few breaths and then rest.\\n\\n7. Cat-Cow Pose\\n\\nStart in a tabletop position with your hands and knees on the floor. Inhale and look up, lifting your chin and gently arching your spine. As you exhale, drop your chin and look down toward your naval as you curl your spine forward. Continue this movement 5-10 times.\\n\\n8. Bow Pose\\n\\nLie down on your stomach with your forehead against the mat and your hands resting at your sides. Inhale and engage your core, slightly lifting your torso up, bending your legs and grabbing your ankles with each hand. Open your chest and lift your chin, so that your gaze is facing forward. Maintain a steady breath while holding this pose, allowing your body to gently rock back and forth with each inhale and exhale. Release after 20-30 seconds.\\n\\n9. Bridge Pose\\n\\nStart by lying on your back with your knees bent. On your next exhale, tuck your chin and lift your hips, being careful not to allow your knees to splay outward. Interlace your fingers on the floor underneath you and lift your hips higher, while staying in the pose for 5-10 breaths.\\n\\n10. Corpse Pose\\n\\nSit on your yoga mat and lower your body to the floor, relaxing your legs and letting your arms rest on the floor at your sides, palms up. Keep your eyes closed and focus on your breathing. Relax the muscles in your face and neck, and visualize every part of your body letting go of all tension. Hold this pose for 5-7 minutes.\\n"},"category":[]},{"id":"clg0gw3o0ycc30ak0rlfm4ea9","slug":"yoga-for-endometriosis","author":{"name":"Will","teacherMytSlug":"will-1","pictureUrl":"will.jpeg"},"title":"Yoga for Endometriosis: 6 Easy Poses to Try at Home","subTitle":null,"seoTitle":null,"seoDescription":"Yoga can help ease symptoms of endometriosis, and it’s a great option for women who are looking for a low-risk, low impact way to cope with the condition.","readTime":null,"excerpt":"Learn the best yoga poses for endometriosis symptoms.\n","tags":[],"createdAt":"2023-04-03T06:45:34.990165+00:00","coverUrl":"htglzgglkwtr6is6mzmi.jpg","content":{"text":"Endometriosis is a disorder that affects about 190 million women worldwide, causing painful periods, infertility, and other severe symptoms that can significantly reduce the overall quality of their lives. While science is still working to fully understand endometriosis, right now there are a few ways in which women can manage the symptoms of this painful condition, including medication, surgery and various forms of therapy. Yoga can also help ease symptoms, and it’s a great option for women who are looking for a low-risk, low impact way to cope with endometriosis.\\nYoga helps reduce the troubling symptoms of endometriosis in a few different ways. The overall practice of yoga activates the parasympathetic nervous system, which is responsible for operating the body's relaxation and digestive responses. These responses tell your body to slow down and rest, which are crucial when it comes to reducing the pain, anxiety, and stress that comes with endometriosis.\\nYoga also enhances blood flow to your reproductive organs, which can help reduce inflammation and promote healing. Yoga poses work to stretch the muscles and tissues around your uterus and ovaries, which can help reduce the intensity and duration of menstrual cramps. Endometriosis commonly causes intense chronic pain in the pelvis, lower back, and hips, which yoga can help alleviate through gentle stretches and movement that help open up and relax the muscles in these areas.\\nEndometriosis can also cause infertility due to scarring around the reproductive organs, but yoga can help offset this issue by increasing blood flow to the area and lowering inflammation. Yoga also works to balance your hormones by reducing cortisol and other stress hormones and regulating your menstrual cycle.\\nIn terms of mental health, yoga is one of the most effective tools in managing anxiety and depression, which are common symptoms of endometriosis. This condition can cause immense chronic pain, which typically results in emotional distress that yoga can help alleviate. Yoga sends signals to your mind and body that encourage both to relax, reducing tension, calming anxious thoughts, and improving your sense of well-being.\\n\\nWhat Types of Yoga are Best for Endometriosis?\\nThere are many different kinds of yoga, but if you’re experiencing symptoms of endometriosis you may want to stick with gentle postures like those you would perform in Hatha, Restorative, Gentle, or Yin yoga. These types of yoga focus on easy, low-impact movement, along with relaxation and stress reduction, and they typically involve some type of yogic breath work – which can also help reduce inflammation and chronic pain.\\nIf you’re considering yoga for managing your symptoms of endometriosis, there are certain precautions you should take in order to avoid making those symptoms worse. While you’re on your period, it’s important to avoid inverted postures that might interrupt or change your body’s natural flow. If a specific posture causes pain or discomfort, exit the pose immediately and take a break. It’s important to listen to your body and avoid any kind of position that doesn’t feel good. If you’re unsure about your alignment or you’d like some guidance on how to practice yoga for endometriosis, you can enroll in an online class or book a private session with one of the instructors here at \\nMyYogaTeacher\\n.\n\\n6 Easy Yoga Poses for Endometriosis\\nIf you’re experiencing the painful symptoms of endometriosis, try the gentle poses below for some relief.\\n1.Child’s Pose\\n\\nStart on your hands and knees and then lower yourself down so that your backside is resting on your heels, and your big toes are touching each other. Move your hands forward, palms down, so that your forehead is resting on the floor. Allow your spine to lengthen and your neck muscles to fully relax. Breathe deeply and mindfully while staying in this pose for 5-6 minutes.\n\\n2. Cat-Cow Pose\\n\\nStart in a tabletop position with your hands and knees on the floor. Inhale and look up, lifting your chin and gently arching your spine. As you exhale, drop your chin and look down toward your naval as you curl your spine forward. Continue this movement 5-10 times.\\n\\n3. Fixed Angle Pose\\n\\nSit on your yoga mat with your knees bent and the soles of your feet pressed against each other. With your spine straight, press your hands behind you and gently open up your chest and tuck in your abdomen. Hold the pose for 1-2 minutes.\\n\\n4. Seated Forward Fold Pose\\n\\nSit in the center of your mat with your legs stretched out in front of you. Take a deep inhale and raise your arms directly over your head. As you exhale, slowly lean forward and place your head and chest on top of your legs, and grab your big toes with both of your hands. Tuck your chin and curl abdomen, relaxing your lower back as you sink into this pose. Hold for one minute.\\n\\n5. Supine Twist Pose\\n\\nLie on the floor with your knees bent and bring them to your chest. Slowly and mindfully drop your left side while extending your arms outward in a “t” shape. Hold this pose for about 30 seconds while breathing mindfully. Bring your knees back to your chest, and then repeat on your right side.\\n\\n6. Legs Up The Wall Pose\\n\\nPlace a folded blanket parallel against a wall. Sit sideways in the middle of the blanket, and turn yourself toward the wall, lifting your legs up and propping them against the wall. Lay back comfortably, rest your head and neck on the floor, and fully straighten your legs. Spread your arms out to your sides with your palms facing up. Allow your chest, abdomen, and pelvis to completely relax. Breathe evenly and mindfully while holding this pose for 5-8 minutes.\\n\\nPranayama for Endometriosis\\nYogic breath work can help ease feelings of stress and anxiety, while giving you tools with which to manage pain. Try these breathing exercises to encourage a sense of calm and relaxation.\\n1.Nadi Sodhana or “Alternate Nostril Breathing”\\nExhale completely, and then place your right index finger onto your right nostril, and breathe deeply in through the left. Alternate and place your thumb over your left nostril, and exhale through your right. Continue alternating, repeating at least 10 times.\\n\\n2. Ujjayi or Ocean’s Breath\\nStart by breathing in through your mouth. As you exhale, pull in your chin in toward your body and so that your throat is partly constricted. Then, breathe in and out through your nose, making a slight sound that is similar to the ocean.\\n"},"category":["yoga_poses"]},{"id":"clg0fojrzxeqr0biq6yvfzdjk","slug":"yoga-for-acid-reflux","author":{"name":"Will","teacherMytSlug":"will-1","pictureUrl":"will.jpeg"},"title":"Yoga and Digestion: 8 Poses to Help Ease Acid Reflux Symptoms","subTitle":null,"seoTitle":null,"seoDescription":"Yoga helps alleviate symptoms of acid reflux and prevent onset by reducing stress and anxiety, activating your digestive system, and improving your posture.","readTime":null,"excerpt":"Learn the best poses for reducing acid reflux.\n","tags":[],"createdAt":"2023-04-03T06:11:42.97583+00:00","coverUrl":"ckauzlgegiwd249grkhg.jpg","content":{"text":"If you experience acid reflux on a regular basis, then you’re already familiar with how it typically unfolds. It often starts with a burning sensation in your chest and the repeated urge to burp and let go of accumulated gas. There are lots of reasons why acid reflux occurs, including a number of lifestyle factors like poor diet and emotional stress. Thankfully, yoga can help manage symptoms and reduce episodes if they are stress-related. \\n\\nHow Yoga Helps with Acid Reflux\\nOne of the ways that yoga helps reduce acid reflux is by reducing stress and anxiety. These are the common culprits for acid reflux, because they cause your body to engage in a cascade of fight/flight/freeze responses that includes increased production of stomach acid. By reducing your stress and anxiety, you can help your body avoid switching on that fight/flight/freeze response.\\nAnother way that yoga can reduce acid reflux is through improving your posture and alignment. Poor posture can contribute to chronic acid reflux by placing too much pressure on your stomach and esophagus. Yoga postures that correct your alignment — like Downward Facing Dog and Standing Forward Fold — help relieve this pressure and prevent the onset of acid reflux. It’s important to note that in order to truly improve your posture, you need to practice these poses regularly and for the long term – over time they can help reduce your risk of developing acid reflux in the first place.\\nYoga can also help regulate your digestive system, which is another factor that contributes to acidity. When food gets stuck in your digestive tract, it can cause gas and bloating, slowing your entire digestive system down, which eventually manifests in your stomach with an acidic reaction. By stimulating your digestive system, you can help your body move and process food smoothly through your digestive tract without gas, bloating, or acidity.\\nOne of the most important ways yoga can help prevent acid reflux is by strengthening your diaphragm, which is the muscle that prevents acid from moving up into your esophagus. When the diaphragm is weak or tense, it can actually allow acid reflux to rise up from your stomach and push its way into your esophagus, which is what causes that uncomfortable burning sensation in your chest. Yoga postures that promote diaphragmatic breathing, such as Seated Forward Fold and Corpse pose can help strengthen this muscle and prevent acid reflux.\n\\n\\n8 Effective Yoga Poses for Acid Reflux\\nIn order to get the most benefit from practicing yoga for acid reflux, it’s recommended that you develop a regular routine that involves performing yoga at least 3-4 times per week for 6-9 months. This isn’t a quick fix, but with a long term commitment you can reduce the onset of acid reflux and improve your overall quality of life.\\nThe poses below are basic, primary yoga poses you can practice in your very own home. If you’re unsure how to practice the postures, or you’d like some professional guidance, try working with one of our certified yoga instructors at \\nMyYogaTeacher\\n.\\n1.Mountain Pose\\n\\nStart by standing at the top of your mat with your feet hip distance apart. Balance your weight evenly on both feet. Keep your arms relaxed at your sides, with your spine straight and your chest lifted. Your gaze should be focused straight ahead of you while you breathe easily and gently. Hold the pose for 1-2 minutes.\n\\n2. Standing Forward Fold\\n\\nStand at the front of your mat, feet hip distance apart. Exhale and bend forward from the waist, with your knees slightly bent and touching your hands to the floor in front of your feet. Inhale and exhale, allowing your torso to extend without rounding your back. Lengthen and soften your neck, and let the muscles of your thighs and lower back open and release any built-up tension. Hold the pose for 1-2 minutes.\\n\\n3. Downward Facing Dog Pose\\n\\nWith your hands and knees on the floor, push your hips upward until you are balancing on your hands and feet, and your body resembles an inverted “v” shape. Reach your heels toward the floor, stretching your hamstrings and activating your thighs. Keep your head between your arms, lengthening your side-body as you stretch. Stay here for several breaths.\\n\\n4. Seated Spinal Twist Pose\\n\\nSitting with your knees bent and your feet tucked in next to your left butt cheek, inhale with your spine straight, lifting your chest. As you exhale, rotate your torso to your right. Position your right hand on the floor just slightly behind you, and rest your left hand on your right knee. On your next breath, rotate a little more as you exhale, turning your head to look over your right shoulder. Hold this pose for 20 to 30 seconds, then repeat on the other side.\\n\\n5. Cat-Cow Pose\\n\\nStart with your hands and knees on the floor. Inhale and look up, lifting your chin and gently arching your back. As you exhale, drop your chin and look down toward your naval as you curl your spine forward. Continue this movement 5-10 times.\\n\\n6. Child’s pose Pose\\n\\nStart on your hands and knees and then lower yourself down so that your backside is resting on your heels, and your big toes are touching each other. Move your hands forward, palms down, so that your forehead is resting on the floor. Allow your spine to lengthen and your neck muscles to fully relax. Breathe deeply and mindfully while staying in this pose for 5-6 minutes.\n\\n7. Seated Forward Fold Pose\\n\\nStart by sitting on your yoga mat with your legs stretched out in front of you. Come onto your sit bones and inhale with a straight spine. Raise your arms over your head and as you exhale, begin to bend forward by hinging at your waist. Slowly lower your torso toward the tops of your legs, allowing your spine to curve forward as you reach your legs. Hold this pose for 30-60 seconds.\\n\\n8. Corpse Pose\\n\\nSit on your yoga mat and lower your body to the floor, relaxing your legs and letting your arms rest on the floor at your sides, palms up. Keep your eyes closed and focus on your breathing. Relax the muscles in your face and neck, and visualize every part of your body letting go of all tension. Hold this pose for 5-7 minutes."},"category":["yoga_poses"]}],"randomPosts":[{"id":"clfce8q050idr0aiombuq99xa","slug":"yoga-for-dancers","author":{"name":"Will","teacherMytSlug":"will-1","pictureUrl":"will.jpeg"},"title":"10 Yoga Poses Every Dancer Should Know","createdAt":"2023-03-17T10:24:56.736557+00:00","coverUrl":"rg8yvhhzuzvbnjnqb6qj.jpg","content":{"text":"If you’re a dancer then you already know — dancing requires the kind of full-body muscular control that’s much more involved than just being graceful on your feet. To be a good dancer, you need a high level of body awareness, muscle tone and flexibility. But that’s not all — dancing also requires control over your breathing to execute those delicate moves with ease.\\nIf you’re looking to become a better dancer, or improve your existing skill set, yoga can help you gain more flexibility, strength, balance, and master your breathing. Yoga can also help improve your posture and alignment, and boost your concentration, awareness, and your well-being.\\n\\nThe Best Kind of Yoga for Dancers\\nMost dancers come to yoga with a preset level of flexibility most students don’t have. That’s why it’s important to take it slow if you’re just starting to practice yoga. It may be tempting to push too hard and overdo it. Like dancing, yoga poses require specific alignment — performing poses incorrectly can lead to injury.\\nDepending on your goals, there are multiple styles of yoga that may be right for you. For a flowing practice of yoga that often mimics dancing, Vinyasa yoga can help you gain more flexibility and movement that compliments your dance performance. Like Vinyasa, Power yoga can sometimes involve flowing movement, but it's a style more focused on building strength and balance.\\nHatha, Iyengar, and Ashtanga yoga can also help improve your balance and posture, and these types of yoga typically involve some kind of breath work (or pranayama). If you need to unwind and destress while stretching sore and overworked muscles, Yin yoga or Restorative yoga can help you relax with gentle poses that are held for longer periods of time.\\n\\n10 Effective Yoga Poses for Dancers\\nOf course, you can get started with some basic poses to help improve your dancing skills in the comfort of your own home. Try the poses below for a basic primer on dance-friendly yoga poses, or schedule an at-home session at \\nMyYogaTeacher online\\n.\\n\\n1. Tree Pose\\n\\nTree pose is an excellent pose for improving your balance and posture.\\nStand in Mountain pose with your feet hip distance apart. Keep your arms relaxed at your sides while you focus on an easy, steady breath. Transfer your body weight to your left foot, while softly bending your right knee, pulling it into your chest. Place the sole of your right foot on the inside of your left thigh. Keep your spine and head straight, with your gaze forward. Once you’ve steadied your balance, bring your hands together in Namaste formation. Hold for 5-6 deep breaths.\\n\\n2. Warrior I Pose\\n\\nWarrior I is both lengthening and strengthening, giving your legs a workout while stretching your upper body.\\nStand in the center of your mat with your weight evenly balanced on both your feet. Step your right foot forward with your toes pointed toward the front of the mat. Angle your left (back) foot slightly. Bend your right knee at 90 degrees while keeping your left leg flexed and engaged. Inhale and lift your arms up toward the ceiling. Gently arch your back and lift your chest. You can keep your gaze facing forward, or look up toward your hands to further open your chest. Hold for 30-60 seconds and then repeat on the other side.\\n\\n3. Half-Moon Pose\\n\\nThis pose also improves your balance while strengthening your legs.\\nFrom the center of your mat, step your right foot forward. Drop your left hand to your side while reaching your right hand forward. Touch the tip of the mat with your right hand as you inhale and lift your left leg off the floor. Ground your right foot into the mat, and gently straighten your right leg. Lift and extend your left arm so that it is stretching up toward the ceiling, and lengthen your left leg as it extends toward the back of the room. Keep your head in a neutral position and your gaze facing forward. Hold for 3-4 breaths.\\n\\n4. Dancer’s Pose\\n\\nThe perfect pose for dancers, this posture works on your balance, focus, and alignment.\\nStand in the middle of your mat with your weight evenly balanced on both feet. Shift your weight onto your left foot, while bending your right knee and grabbing your right foot with your right hand. Lift your left arm up toward the ceiling. Bend at your waist and slowly lean forward, lifting your right leg and engaging your core. For better balance, focus your gaze on a fixed point in front of you. Hold for 3-5 breaths, then repeat on the other side.\\n\\n5. Downward Facing Dog Pose\\n\\nOne of the basic primary poses, Downward Facing Dog stretches your calves, hamstrings, and lower back.\\nWith your hands and knees on the floor, push your hips upward until you are balancing on your hands and feet, and your body resembles an inverted “v” shape. Reach your heels toward the floor, stretching your hamstrings and activating your thighs. Keep your head between your arms, lengthening your side-body as you stretch. Stay here for several breaths.\\n\\n6. Plank Pose\\n\\nFor incredible balance and core strength, try practicing Plank pose at least once every day.\\nStart with your hands and knees on the floor in tabletop position, with your hands placed shoulder-width apart. Engage your core and lift the backs of your thighs toward the ceiling until your body is positioned in a straight line from your heels through your crown. Tuck your tailbone and press down with your heels as you hold this pose for 30-60 seconds.\\n\\n7. Locust Pose\\n\\nLocust builds strength in your lower back and spine while stretching your core.\\nLie face down on your mat, resting your forehead on your forearms and your legs stretched straight out behind you. With an inhale, extend your arms to your sides and lift your lower legs off the mat, keeping your upper legs (thighs and core) flat on the mat. Engage your glutes and press both of your legs together while holding them up. Hold this pose for 5-6 breaths.\\n\\n8. Fixed Angle Pose\\n\\nRange of motion in your hips is important for dancing, and Fixed Angle pose stretches your hip muscles while relieving tension in your lower back.\\nSit on your yoga mat with your knees bent and the soles of your feet pressed against each other. With your spine straight, press your hands behind you and gently open up your chest and tuck in your abdomen. Hold the pose for 1-2 minutes.\\n\\n9. Boat Pose\\n\\nAnother great posture for core strength, Boat pose works your abdominal muscles and improves your balance.\\nSit on your mat with your knees bent and your hands at your sides. Engage your core, and gently lift and straighten your legs and your arms together, forming your body into a “v” shape. Keep your gaze focused on a fixed point in front of you, your chest open and your spine straight. Hold for a few breaths.\\n\\n10. Corpse Pose\\n\\nWhile this pose may seem deceptively simple, it’s one of the most important yoga postures you can practice. Corpse pose will help you de-stress, relax, and fully integrate your yoga practice.\\nSit on your yoga mat and lower your body to the floor, relaxing your legs and letting your arms rest on the floor at your sides, palms up. Keep your eyes closed and focus on your breathing. Relax the muscles in your face and neck, and visualize every part of your body letting go of all tension. Hold this pose for 5-7 minutes.\\n\\nFrequently Asked Questions about Yoga for Dancers\\n\\nHow is yoga good for dancers?\\nYoga is an excellent practice for dancers because it helps to improve flexibility, balance, and strength, which are all essential components of dance. Yoga postures are designed to work the entire body, and as a result, they can help dancers to develop the strength and stamina necessary to perform at their best. In addition to the physical benefits, yoga can also help dancers to reduce stress and anxiety, allowing them to focus more deeply on their performance.\\n\\nWhy is yoga good for dancers?\\nYoga is beneficial for dancers in many ways. One of the most significant advantages of practicing yoga is its ability to improve flexibility. Dancers need to be flexible to perform at their best, and yoga can help them achieve a greater range of motion in their movements. Additionally, yoga can improve balance, which is essential for dancers who must maintain precise alignment during their performances. Yoga can also help to prevent injuries and promote overall wellness, making it an excellent complement to any dancer's training regimen.\\n\\nHow to get started in yoga for dancers?\\nIf you're a dancer looking to incorporate yoga into your practice, there are several things you can do to get started. One of the best ways is to find a yoga teacher who has experience working with dancers. They will be able to tailor their instruction to your specific needs and goals. Additionally, you can look for yoga classes that focus on flexibility and balance, as these are areas that are particularly important for dancers. Finally, consider incorporating yoga into your warm-up or cool-down routine. This can be an excellent way to begin incorporating yoga into your dance practice and help you see the benefits of yoga firsthand."}},{"id":"cldsnnlhguo910ak0c46kn4d6","slug":"myofascial-release-yoga","author":{"name":"Will","teacherMytSlug":"will-1","pictureUrl":"will.jpeg"},"title":"Myofascial Release Yoga: Improving the Connections Within Your Body ","createdAt":"2023-02-06T10:13:21.404649+00:00","coverUrl":"wnehbrnvnqq7sad7vybp.jpg","content":{"text":"It’s easy to think that symptoms of soreness, stiffness, and lack of mobility in your body is simply an issue solely related to muscles. But there are other factors that can create aches and pains besides muscle tissue. \\nIssues like chronic muscle pain can actually be caused by stuck connective tissue called fascia, which attaches and protects the muscle fibers in your body. When it sticks, it can prevent your muscles from performing properly, leading to pain, rigidity, and decreased mobility.\n\\nFascia Tissue: Explained\\n\\nSo what is fascia, or myofascia tissue exactly? It plays an important function throughout your body, connecting muscle fibers and holding your organs and blood vessels in their proper place. You can think of your fascia tissue like a thin wrapper that’s made of collagen, surrounding your tissues and organs, keeping them safe and sound. There are multiple layers of fascia throughout your body, and there are some layers buried deeply to protect your bones and blood vessels. \\nBasically, fascia is like a second skin, and just like your epidermis, it can become tight, dried-out, and lose elasticity. Periods of inactivity and immobility can cause your fascia tissue to stick or become tight. Surgery, injury, and aging can also create issues with this connective tissue. And when it loses its elasticity, it can make you feel achy, sore, and stiff.\\n\n\\nHealing with Myofascial Release\\n\nIn order to restore the pliability of your fascia tissue, you must ease the tension to prevent this tissue from becoming even tighter and more painful. Doing so can be simple — by improving the flexibility of your body overall, you can also help improve the elasticity of your connective tissue. There are a handful of ways you can unstick or “release” fascia, like acupuncture, massage, or using foam rollers. Each of these methods offer a targeted approach and can help with specific areas.\\nHowever, if you want to make a difference in the fascia tissue throughout your body, yoga may be one of the best tools you can use. Through regular practice, you can not only improve the pliability of your fascia tissue, but you can help maintain this important protective layer so that it doesn’t become rigid or stuck in the future — preventing any further soreness or chronic pain.\\n\n\\nMyofascial Release Yoga\\n\nA myofascial release yoga session will typically include props like foam rollers, blocks, and therapy balls to help relieve tension in the connective tissue throughout your body. Like acupuncture or massage, these props help target specific pressure points in order to assist a myofascial release.\\nBy releasing this connective tissue, you can improve your mobility, encourage proper blood flow, and decrease symptoms of soreness, aching, and chronic pain. Regular practice of myofascial release yoga can also prevent this tissue from drying out, as well as any excess buildup of collagen.\\nMyofascial release yoga is approachable for everyone — from beginners to advanced yogis. And if you’re not feeling particularly flexible due to issues with your fascia tissue, that’s okay. The purpose of this style of yoga is to gently restore pliability and mobility to your connective tissue, joints, and muscles. So it’s important not to overdo it.\\nIf you’re not able to find a yoga class that is specifically geared toward myofascial release, look for yoga that involves deep, gentle stretching — like Yin Yoga. In a typical Yin Yoga class, you’ll hold simple poses for anywhere from three to five minutes, giving your body time to relax into the stretch and release any held tension. \\n\n\\n6 Myofascial Release Yoga Poses\\n\nOf course, you can also work with your fascia tissue at home with your own personal foam roller, yoga blocks, and therapy balls (if you have any on-hand). Along with these tools there are some beneficial yoga postures you can practice on a regular basis to keep your fascia tissue healthy, hydrated, and pliable. Try practicing the poses below several times a week to heal and maintain the elasticity of your connective tissue.\\n\n\\n1. Downward Facing Dog Pose\\n\\nIf you’re feeling soreness in your hamstrings, calves, or lower back, Downward Facing Dog can help relieve tight and restricted tissue in these areas.\n\\nStart in tabletop position, with your hands and knees on your yoga mat. Push your hips upward until you are balancing on your hands and feet, and your body resembles an inverted “v” shape. Reach your heels toward the floor, stretching your hamstrings and activating your thighs. Keep your head between your arms, lengthening your side-body as you stretch. Stay here for one minute.\\n\n\\n2. Supine Twist Pose\\n\\n\nFor aching throughout your upper and lower back, spinal twists can help unstick any connective tissue that might be causing problems. For the purpose of staying in the pose for several minutes and relaxing fully into the posture, try performing this Supine Twist on the floor. \\nLie on the floor with your knees bent and bring them to your chest. Slowly and mindfully drop your knees to your left side while extending your arms outward in a “t” shape. Hold this pose for 2-3 minutes while breathing mindfully. If the pose feels too strenuous to hold for a long period of time, try using a folded under your knees. When you’re ready to switch to the other side, bring your knees back to your chest, and then repeat on your right side.\\n\n\\n3. Thunderbolt Pose\\n\\n\nDo you feel pain or stiffness in your feet? Try practicing Thunderbolt pose with flexed feet to encourage an impactful release. Performing this pose in this way can also help with plantar fasciitis.\n\\nStart by sitting on your knees in Thunderbolt pose, with your hands resting comfortably on your thighs. Next, shift your weight forward for just a moment while you tuck all 10 of your toes under. Slowly lean back so that your buttocks are rested on your heels, gently applying pressure to the balls of your feet. If this feels uncomfortable or too painful, you can use a folded blanket positioned under your knees for added support. Hold the pose for several breaths or longer if you can.\\n\n\\n4. Camel Pose\\n\\n\nNow that you’ve released the fascia along the backs of your legs, your feet, and your upper and lower back, it’s time to ease tension on the front side of your body. Camel pose targets your abdomen, spine, neck, and the fronts of your shoulders.\n\\nStart by kneeling in the center of your mat. Rest your hands on your knees and place the tops of your feet flat on the mat, and sit with a straight spine. With your knees still on the ground, raise your body up and engage your core. Place your hands on your hips and lift your upper chest and shoulders until your face is pointed toward the ceiling. Extend your arms one by one behind you so that you can grab your heels with your hands and continue to lean backward. Only lean as far back as you feel comfortable, and hold this position for 3 to 5 breaths. To safely exit this pose, release your hands from your heels and place them on your lower back for support as you slowly raise yourself back up.\\n\n\\n5. Cat Cow Pose\\n\\n\n\\nThis simple pose helps restore mobility and pliability to the fascia tissue throughout your upper body, and improves the flexibility of your spine.\\nFrom your hands and knees, gently arch your back and lift your face to look up as you inhale. Then, as you exhale, curl your spine and turn your face down to look toward your naval. Repeat this movement at least 10 times in a fluid motion.\\n\n\\n6. Extended Side Angle Pose\\n\\nExtended Side Angle helps release fascia tissue around your hips and the sides of your torso, while improving shoulder mobility.\\nBegin in Mountain pose. Step your left foot forward and turn it 90 degrees. Ground your right foot and turn it slightly inward, and hold your arms out in a “T” shape. Bend your left knee to a 90-degree angle with your left thigh parallel to the floor. Lean toward your left knee by hinging forward at the hips, bringing your left arm to the floor. If you’re unable to reach the floor, you can use a yoga block for support. Lift your right arm and extend it above your right ear, so that your body resembles a straight line from your right ankle to the tips of your right fingers. Breath and hold this pose for 30-60 seconds. Repeat on the other side.\\n"}},{"id":"cl15mzam56v6p0civ30s56jgb","slug":"yoga-for-menopause","author":{"name":"Sarita","teacherMytSlug":"","pictureUrl":null},"title":"Yoga for Menopause : Why Menopausal Women Benefit From Yoga","createdAt":"2022-03-24T23:39:17.49117+00:00","coverUrl":"ik4av8npvdeyhe4qheep.jpg","content":{"text":"Did you know menopause yoga is a a real form of yoga? Granted, it’s not a traditional form of yoga like ashtanga, vinyasa, or yin yoga are. But it incorporates authentic, traditional yoga poses that benefit menopausal women.\\nMenopause may be a touchy subject for some of you, but here at MyYogaTeacher, we believe in being open and honest about all parts of our humanity.\\nDiscussing typically taboo topics like menopause helps women learn how to better manage their symptoms and lets them know they are not alone. \\nDuring menopause, women often seek medical treatment for their physical and psychological symptoms. But yoga for menopause symptoms offers hope for a natural remedy for many of the symptoms that you may experience during this transitional time! \\nAt MyYogaTeacher, every member is a part of a supportive community of yogis. We have students from all ages, all walks of life and who are experiencing many different phases of the human life cycle, including menopause.\\nMyYogaTeacher offers 1:1 classes with authentic yoga instructors from the birthplace of yoga, India! And if you haven’t experienced virtual private yoga classes yet, MyYogaTeacher makes 1:1 classes affordable and accessible! PLUS, with your membership, you get:\\n\\nRadiance! More energy, peace of mind, and better health & fitness\\n42+ daily group yoga classes, 100% live!\\nDiscounted yoga workshops, all live and interactive!\\nMaking new like-minded friends from around the world\\n\\nGrab your 2-week free trial and check out your membership options here!\\n\\nLearn more below about why menopausal women benefit from a consistent yoga practice!\\n\\n\\nRestorative yoga poses alleviate hot flashes\\nNo one really knows why women have hot flashes during (and even before) menopause. But this classic symptom is recognizable by an intense surge in body temperature and increased heart rate, making women feel flushed and hot.\\nYoga for menopause shouldn’t be vigorous. Any tension in the body or tightening of the muscles can make hot flashes worse. Cooling, restorative poses such as reclining bound angle pose, child’s pose, reclining hero pose, and reclined butterfly pose are good ones to help alleviate hot flashes. \\nAdditionally, using bolsters, blankets, blocks, or other props to make your yoga practice more comfortable is encouraged!\\n\\n\\nYoga for menopause helps manage decreased hormone symptoms\\nTraditionally, the allopathic route to resolving symptoms of decreased hormone production has been hormone replacement therapy. Doctors believe that to combat menopausal symptoms, replacing decreasing hormones such as estrogen was a solid solution.\\nUnfortunately, studies have shown that hormone replacement exposes women to serious health risks. Risks like dementia, stroke, heart attacks, as well as several types of cancer.\\nWhile yoga might not directly affect estrogen production, it has certainly shown to be effective at holistically managing the symptoms that occur due to the lack of estrogen that is produced during menopause.\\nSymptoms such as irritability, insomnia, fatigue, and lack of focus can all be managed with a consistent yoga practice.\\n\\n\\nMenopausal women are at increased risk of cardiovascular disease\\nIn an \\narticle from the National Institute of Health\\n, studies show the use of yoga therapy for menopausal women decreases the risk of cardiovascular disease (CVD). During menopause, women become more insulin resistent and have increased metobolic and vascular changes, all of which strongly contribute to CVD.\\nIncreasing evidence demonstrates that with proper guidance, yoga helps menopausal women reduce their risk of CVD, particularly in older adults who may have pre-existing medical conditions that make them especially prone to cardiovascular issues.\\nYoga also provides mental, physical, and emotional health benefits to this population of women that will help them live a more comfortable, happy, healthy life during and after menopause!\\n\\n\\nYoga poses for menopause\\nI guess you’re wondering what are some yoga poses you can do to help alleviate your menopausal symptoms! Let’s go over a few here to get you started.\\nYoga poses for mood swings\\nForward bend - \\nRelaxes the mind, fights depression and anxiety, calms the nervous system\\nBow pose - \\nOpens up the chest, lifts mood, and stimulates digestive organs\\nCamel pose - \\nHelps you feel safe and secure and aids in working through negative emotions\\nDownward facing dog - \\nIncreases circulation and wakes you up\\nLegs up a wall - \\nReduces fatigue and insomnia, calms the brain and relieves depression\\nYoga poses for hot flashes\\nChild’s pose - \\nCalms the heart rate, cools the body\\nReclining hero pose - \\nRelieves tight muscles that tense up when you’re uncomfortable\\nBridge pose - \\nReduces pain in back and stretches the neck and spine, improves circulation\\nReclining bound angle pose - \\nHelps create hormonal balance from overtaxed adrenal glands\\nWide leg forward bend - \\nLowers heart rate and blood pressure, cooling the body\\nYoga poses for cramps and heavy bleeding\\nSupine twist pose - \\nMassages reproductive organs, relieves tension in those areas\\nChild’s pose - \\nStretch lower back and allows lower abdominal muscles to relax\\nBow pose - \\nStretches out abdominal muscles and opens up reproductive organs\\nCobra pose - \\nStretches out abdominal muscles and puts gentle pressure on lower abdomen\\nHead to knees forward bend - \\n Relieves menstrual cramps, headache, and fatigue\\nTrying any or all of these poses each day you’re experiencing menopausal symptoms is sure to get you feeling better quickly, but try practicing yoga therapy for menopause every day for consistent relief from the uncomfortable symptoms you may be experiencing during this transitional time in your life.\\nAnd if you need some more guidance on how to get through these transitions with more ease, grace, and comfort, I encourage you to check out the affordable 1-on-1 private online yoga classes at MyYogaTeacher! We help people just like you!\\nNot a MyYogaTeacher member? Whether you’re interested in teaching yoga, starting yoga, or growing in your yoga journey, MyYogaTeacher is a great place to do it!\\nWhen you sign up for a 1:1 membership with us you get:\\n102 expert\\n, highly qualified yoga instructors to choose from\\nThe ability to switch instructors\\n or take classes with only your faves\\nAccess to unlimited group classes\\n, taught \\nlive\\nPersonalized instruction\\n and work out, diet, and lifestyle plans\\nTo be a member of a HUGE community\\n of happy yogis from around the world\\nYoga teachers who become friends\\n, who truly care about you!\\nIf you haven’t checked us out already, \\ngrab two free 1:1 sessions with your 2-week free trial here\\n!"}}],"relatedPosts":[{"id":"cl77o54vxciuw0ck85uv39v9x","slug":"yin-yoga-for-digestion","author":{"name":"Bharath","teacherMytSlug":"bharath-1","pictureUrl":"bharath-pro.jpg"},"title":"Yin Yoga for Digestion: 10 Restorative Yin Yoga Poses for Digestion","createdAt":"2022-08-24T13:45:35.992969+00:00","coverUrl":"kfzbgmsrthjpcvpiht8o.jpg","content":{"text":"If you experience bloating, gas or upset stomach but don’t exactly know the source, yoga can be great to help aid in your daily digestion. Yoga can help you to regulate your digestion, get a detox or relieve stomach pain from a meal gone wrong. If you’re looking to add yoga into your routine, we’d recommend yin yoga for help with digestion and stomach issues\\nWhat is Yin Yoga?\\nYin Yoga is a slower, restorative style that targets your deep connective tissues. Rather than a traditional vinyasa class that fatigues your muscles, yin goes deeper to connect under your skin to your ligaments, deep tissue and bones. This practice goes back centuries and is actually based in Chinese medicine.\\n“The practice of yin yoga is based on ancient Chinese philosophies and Taoist principles which believe there are pathways of Qi (energy) that run through our bodies. By stretching and deepening into poses, we’re opening up any blockages and releasing that energy to flow freely.” - Mind body green\\nWhy Yin Yoga?\\nYin Yoga allows you to come to your mat and answer the question “what does my body need today?” When you come to your mat for this style class, you can do a body scan and connect to your body. Notice how you feel and what’s bothering you today. Then, you can target your practice for your specific need or ailment. If you’re taking a live \\nyin yoga\\n class, the instructor will usually open class by giving you an opportunity to answer that question.\\nHow does yin yoga aid in digestion?\\nWhen you do yin or restorative poses for digestion, the poses target your spleen and stomach to aid in your digestion and promote detox qualities. You may think if your stomach is bothering you, it’s definitely something you ate. However in reality, the spleen can also carry worry. If you are stressed, upset or chronically worried, you may be experiencing pain due to stress. So coming to your mat and releasing your stomach and spleen may not only detox bloating or pain, but could also lighten your mental or emotional load. \\nWhen should you do Yin yoga to relieve stomach distress?\\nThere is no perfect time to do yoga. Every hour of the day is good for yoga if it fits in your schedule! But for maximum results, we recommend first thing in the morning or right before bed. \\nIf you choose to do your yin practice in the morning, your detox will continue all day and help your body to maintain homeostasis throughout the day. If you choose to do it at night, not only will you continue to detox while you sleep, you will benefit from a deeper more restful sleep and wake more rejuvenated. \\nSo what Yin yoga poses will help with your pain or symptoms? Try these poses to help with tummy issues or to \\nloosen up hip\\n whenever and wherever you are! If you prefer to practice alone or have a tight schedule, find time to fit these poses in during your busy day! Make sure to drink water after to aid in the process.\n\nFollowing are the 10 recommended yin yoga poses for digestion :\\n\n1. Ardha Matsyendrasana (Seated twist)\\nThis move will release anything trapped in your GI tract and beat bloat. \\n\\n\\n2. Marjaryasana/Bitilasana (Cat/Cow)\\nThis set of poses massages the inner abdominal and stimulates digestion. \\n\\n\\n3. Supta Matsyendrasana (Supine Twist)\\nThis pose is said to relieve constipation and bloating\\n\\n\\n4. Pawanmuktasana (Wind Reliever)\\n This pose eases gas and bloating and increases blood flow in the stomach. \\n\\n\\n5. Bhujangasana (Cobra Pose)\\nThis pose stretches the stomach and supports digestion. \\n\\n6. Adho Mukha Svanasana (Downward Dog)\\nBreathing into your belly in this shape can help to create space in your intestines. \\n\\n\\n7. Trikonasana (Triangle Pose)\\nThis pose releases stress and stimulates your organs. It will help to speed up normal digestion.\\n\\n\\n8. Setu Bandha Sarvangasana (Bridge Pose)\\nThis pose brings new blood flow to the stomach & helps to wake up fatigued tissue and muscles.\\n\\n\\n9. Uttana Shishosana (Puppy Pose) \\nThis pose helps to stretch your belly. It’s suggested for after a large meal. \\n\\n10. Viparita Karani (Legs Up The Wall)\\nReverse your blood flow, give into the ground and let go. Letting go will slow down your heart rate and release any blocked stress. \\n\\n\\nTry these poses on your own time when you’re experiencing stomach distress or add them to your morning routine for digestive support throughout your day! Don’t think you’re ready to flow on your own? Join us for a class! \\n[CTA-GC]\\nClasses to take to aid in digestion or detox: \\n\\nYin Yoga with Annelise\\n - This intermediate class is great for before bed and will help with an overnight detox. \\n\\nRestorative with Swathi\\n - This all levels class will keep you in long holds to aid in detoxification and target deep tissue release. \\nOther holistic ways to relieve stomach issues:\\nIf you want to take your new digestive practice off your mat, add these simple things into your daily routine to keep your belly happy all day long! \\nTea\\nIn many scientific studies, Tea has been found to be great for digestive health because of its flavonoids. This ingredient can be found in many teas and is proven to calm the stomach and help to regulate the digestive process\\nGreen Tea\\nGreen tea is known to aid in a healthy daily detoxification because of its high levels of flavonoids which occur naturally in the fruits and veggies used to make green tea. Green tea will detox the liver and other major organs. The high level of antioxidants will keep your skin clear and refreshed as well! \\nGinger Tea\\nGinger is like nature’s pepto bismol. It can release gas and improve digestion by moving along what may be blocking your digestive process. While green tea is great for a slow all day detox, ginger tea is fast acting and gets to work immediately after drinking.\\nPeppermint Tea\\nPeppermint has been known to relieve gas, bloating and pain in the stomach. It’s a great choice for days when you feel cramping or intense stomach pain. Peppermint tea is great for staying hydrated if you’re not feeling well and is also great for a full day detox. \\nWhich brings us to our next category, When your belly is bothering you, it’s important to hydrate! It can feel overwhelming when your stomach hurts to drink water or remember to focus on your hydration, but being dehydrated could cause you much more pain or trauma. If you’re already not feeling well, try these options for hydration! \\nLemon Water\\nLemon water can aid in digestion because the citric acid in the lemon helps to break down and digest food. Lemon water also works harder to hydrate your system than plain water. It won’t run through your system or sweat out as quickly. \\nCoconut Water\\nDrinking coconut water after meals helps with digestion and helps your body to avoid bloat. The electrolytes in coconut water also help to keep your system functioning normally which promotes healthy digestion! \\nSo if you want fries on the side of your salad or ice cream after dinner tonight, no worries! Just keep this list of digestive aids handy and tomorrow, you’ll be good as new! Every day is a new day to start again…and your belly will thank you for incorporating these healthy options into your life. "}},{"id":"cl7zwz24chnlt0biyk8wtb0cj","slug":"start-hatha-yoga-practice","author":{"name":"Namrata Khandelwal","teacherMytSlug":"namrata-2","pictureUrl":"namrata-k-pro.jpg"},"title":"Interested in starting a Hatha yoga practice? 10 tips to get started!","createdAt":"2022-09-13T08:10:21.940734+00:00","coverUrl":"kwfhavtczeih1sjadbhk.jpg","content":{"text":"Are you new to yoga? Looking to develop a practice but don’t know what style or where to begin? Hatha yoga is a great choice for beginners looking to build a routine or veterans looking to deepen their practice of breathing and flexibility.\\nFirst things first, What is Hatha Yoga?\\nHatha yoga is a form of gentle yoga made up of poses and breath work and often starts or ends with a meditation. This type of practice can be challenging because in most traditional Hatha classes, poses are held for 30 seconds to a minute. \\nStyles of Hatha Yoga that we offer at \\nMyYogaTeacher\\n:\\nHatha Yoga - This practice focuses separately on each asana. Focusing on connecting each asana with the breath and deepening each pose. This practice allows for breaks between poses and is more gentle and slow paced. \\nHatha Vinyasa - Known as a flow class, adding in the vinyasa makes the practice a little more fast paced. The poses are more linked together and the movement is connected to your breath work. \\nWhat are the benefits of a Hatha Yoga Practice?\\nThere are many benefits to building a hatha yoga practice. On the surface, for your physical health, hatha can increase flexibility, strength and balance! Hatha is proven to fight signs of aging and help with joint or muscle pain and improve blood flow!\\nWhen you turn your practice inward, it can also deepen your sleep and with the addition of the breathwork, your practice can also help you cope with anxiety or depression symptoms. \\nHatha is a great place to start your yoga journey because you can take your time to get familiar with the poses and learn to connect them to your breath. It’s good for the body and the mind!\\nHere are 10 tips to get you started with a Hatha Yoga Practice:\\nKnow your why - Before you start to build your practice, it’s important to establish why you’re coming to your mat. Is your reason for physical health, mental health or maybe just to press pause on your day and breathe? Each flow can be personalized for whatever brings you to your mat each day.\\nBe a student! - Take a class with us so you can learn how to flow on your own. Sometimes before you fly solo, you need a co-captain. And if you never decide to fly on your own, we're happy to have you here with us! Our teachers are the best and we think you'll love their classes!\n\nCheck out these three Hatha classes we love!\n\\nHatha for Beginners\\n\n\\nHatha Yoga Intermediate\\n\n\\nHatha Vinyasa\\n\\nLearn to breath - In this practice, you'll be holding in poses and breathing into the space you create. The traditional breath practice for a hatha yoga class is\\n Ujjayi breathing\\n otherwise known as victorious breath. This breathing practice is often used in yoga because it forces you to slow down and focus on your breathing and its connection to your movement. \\nChoose your asasas - While Hatha is usually a gentle practice, there is no right or wrong way to build your Hatha flow. The goal is just to focus and move your body! All you need is a minimum of three to five poses to get started! Start by reviewing the poses you know and then when you’re ready, add more as you grow.\\nPractice your pause - once you know what asanas you’d like to practice, grab a stopwatch! Work on holding each pose for 30 seconds, then 45 seconds, then a minute. Don’t forget to breathe into it. And if you can, try to find space and deepen into each pose as you practice more. \\nFind a way to beat the mental fatigue - Don’t give in to the voice in your head that says you can’t do this. Holding the poses can be difficult at first. Have a little grace and try your best not to give up. Practice your mantras to keep you going. Our favorite? Your stronger than you think!\\nBuild a meditation practice - When building a meditation practice, it’s important to figure out what you need from it. Do you need mantras to help you keep going? Do you need to visual what's coming? Or do you need to focus inward on your breath and the current moment. Remember, there’s no wrong answer. Play with this practice. Add it to the beginning, then the end and see where it serves you. Can’t settle in for quiet reflection? Try journaling instead. \\nBe benevolent to yourself - In Hatha yoga, one of the most important practices is the principle of non-violence (ahimsa) this means do no harm to yourself or to others Try to go through your life being kind to yourself on and off your mat. For more on this practice, check out \\nthis article\\n by Yogauonline\\nRead the text- Like a lot of Yoga, hatha isn’t just based on a movement practice. In fact, there are two connected texts to teach you the foundations of this practice. \\nHatha Yoga Pradipika \\n- a 15th century Sanskrit manual on the practice and style. \\nSiva Samhita\\n - from the hindu perspective breaking “yoga” the practice, down into five parts.\\nTrack the progress of your practice - Once you’ve developed your practice, there is no ‘ end' in yoga, we can only keep coming back to deepen or extend our practice. That’s why it’s a “practice” because there is no perfect. You can always adjust. Some days you’ll need more, some days less. But all the days…you'll need yoga. \\nFive poses to get started with Hatha Yoga:\\n1. Childs Pose\\nFocus on your third eye here. Move your head from right to left to massage your forehead.\\n\\n\n2. Cat Pose\\nBreath into your spine as you arch your back away from the floor. Relax your neck.\\n\\n\\n3. Down Dog\\nFocus on lengthening your heels into the floor and pushing your hips towards the back of the room. \\n\\n\\n4. Forward Fold\\nSurrender into this pose. Reach your palms towards the floor and deepen your stretch with every exhale.\\n\\n\\n5. Savasana\\nRelax your entire body into the ground. Release all the tension and slow your breath. \\n\\n\nNow that you have the tools you need, you’re ready to go! Find where your practice fits best and get ready to feel relaxed and enlightened! If you’re doing hatha for physical health, try adding the practice in after another workout or at the end of your day. \\nLooking to build a practice for relaxation or to wind down from your anxiety? Try starting your day with practice and a cup of green tea! \\nMyYogaTeacher\\n has tons of options available to you! See you on your mat! "}},{"id":"ckr7tf4oolv3u0c25s8cz6qrj","slug":"what-are-sun-salutations","author":{"name":"Priyanka","teacherMytSlug":null,"pictureUrl":null},"title":"What Are Sun Salutations? Start Your Day Right With These Moves","createdAt":"2021-07-17T13:38:03.578839+00:00","coverUrl":"ljd9egtasslviqhw4lqm.jpg","content":{"text":"It’s a simple question that we get asked a lot as yoga instructors.\\nWhat is a Sun Salutation and why is it important? After all, this simple series of asanas is included in almost every single yoga practice from beginner to advanced.\\nObviously, there’s something important about it, right?\\nThe answer is yes.\\nIn my yoga class on myYogaTeacher, \\nBeginner’s Guide to Sun Salutations\\n, yogis learn all about this wonderful series of yoga poses and how impactful they are to a regular yoga practice and your day!\\nNot an MYT member yet? You should definitely check it out! \\nSign up for your free 2-week trial\\n and get access to 35+ different group yoga classes every single day, at all times of day!\\nIn the meantime, let’s talk about this traditional series of poses and how they help you start your day – and yoga practice – right!\\n[CTA-DEFAULT]\\nWhat are Sun Salutations?\\nThe Sun Salutation is a practice involving a flow of 8 different yoga poses linked together in a graceful sequence.\\nBecause the sequence moves the body in all different directions, sun salutations help clear the energy centers of the body and heat it up so all the muscles and joints are ready for deeper poses. \\nSun salutations are also invigorating as a stand alone sequence! If you don’t have a lot of time for a full yoga practice, 5 minutes of sun salutations is a surefire way to rev up your body, boost immunity, and stretch out tight muscles.\\nThe 8 basic poses of a Sun Salutation sequence\\nTadasana (Mountain Pose)\\n\\n\\n Urdhva Hastasana (Upward Salute)\\n\\n\\nUttanasana (Standing Forward Bend)\\n\\n\\n Anjaneyasana (Low Lunge) \\n\\n\\nPlank Pose\\n\\n\\nChaturanga Dandasana (Four-Limbed Staff Pose)\\n\\n\\n Urdhva Mukha Svanasana (Upward-Facing Dog Pose)\\n\\n\\nAdho Mukha Svanasana (Downward-Facing Dog Pose)\\n\\n\\n\\n\\nThe movement from posture to posture is accompanied by an inhale or exhale. You’ll experience this in my Beginner’s Guide to Sun Salutations class. It’s really fairly simple, and there are plenty of ways to modify the poses to meet your fitness level!\\nBenefits of Sun Salutations\\nI briefly discussed some of the reasons we incorporate these poses into a yoga practice, but here’s a more in depth explanation of the benefits of sun salutations!\\nBody and mind preparation\\nFirst, I want to talk about how the sun salutation sequence can be a stand alone practice to start your day. Many people (even avid yogis) don’t want to wake up before the crack of dawn and spend thirty minutes to an hour doing yoga.\\nIf yoga feels like a burden, then you won’t do it. And we definitely don’t want you to feel this way about your yoga practice!\\nYou don’t need to practice yoga for a long time to prepare your mind and body for the day. The sun salutation flow is an excellent way to get in even 5-10 minutes of yoga in the mornings. And the best part is, once you memorize this easy sequence you:\\nDon’t need a computer, phone, or tv\\nDon’t need any voice guidance\\nCan do it almost anywhere\\nDon’t necessarily need a yoga mat or props\\nYou can still reap the benefits of yoga with this flow. It awakens your mind, your muscles. It gets your breath going and revives you mentally, physically, and emotionally. And you can perform these moves throughout your day if you need a little pep in your step during that afternoon slump.\\nIf you’re starting this flow in the morning, you might want to modify the first couple of rounds to allow your body time to loosen up!\\nSun salutations build internal heat\\nSo another great benefit of sun salutations is their ability to quickly warm up your muscles, ligaments, and tendons in preparation for bigger, deeper yoga poses.\\nJumping straight into deep, engaged postures is not beneficial.\\nSun salutations give our body time to rev up, kind of like a car before a big race! These poses allow for the release of synovial fluid, which lubricates your joints. They also require you to engage your core, which is an important aspect of almost all yoga poses. \\nJust as importantly as releasing lubricating fluid for your joints and warming up your core, sun salutations gently stretch out tight or sore muscles. This prevents injury when practicing those deeper poses I mentioned.\\nSun salutations clear energy pathways\\nMaybe this is a little woo for you, but the energy centers in your body are a real thing!\\nIf you’re not familiar with your chakras, here’s a brief description of all of them:\\nRoot chakra - responsible for your sense of security and stability, located at the base of your spine\\nSacral chakra - located just below your belly button, responsible for sexual and creative energy and your emotions\\nSolar plexus chakra - located in your stomach region, responsible for confidence, self-esteem, and helps you feel in control of your life\\nHeart chakra - all about your ability to love and show compassion and empathy\\nThroat chakra - helps you communicate verbally, express yourself\\nThird eye chakra - located on the forehead between the eyes, linked to your intuition and imagination\\nCrown chakra - located on the top of your head and represents your connection to self, others, and the universe/divine\\nEvery asana from the sun salutation flow touches on one of these energy centers! And clear chakras promote stress relief, clear mind, increased focus, more creativity, more feelings of security and safety, and being more in touch with your emotions, feeling more compassionate.\\nWho wouldn’t want to feel this way?!\\nCombined with your breath, the sun salutation sequence will bring so much life to your...well, life!\\nIf you haven’t taken the jump into the wonderful world that is myYogaTeacher yet, I’d love to have you check out one of the several yoga classes I teach, \\nBeginner’s Guide to Sun Salutations!\\n\\nNot sure yet? That’s ok! \\nMyYogaTeacher offers a free 2-week trial! You can sign up for it here, completely risk free!\\n\\nI’d love to see you on the mat!"}}],"blogContent":{"id":"ckkepkey863nr0a31wt0hv7cr","slug":"yoga-for-sciatica","author":{"name":"Will","teacherMytSlug":"will-1","pictureUrl":"will.jpeg"},"title":"Yoga for Sciatica: Cure Sciatica With These 7 Yoga Poses","createdAt":"2021-01-27T00:46:38.726703+00:00","updatedAt":"2022-08-01T06:33:31.00152+00:00","coverUrl":"yoga-for-sciatica.jpg","seoDescription":"Use these seven yoga poses to cure sciatica! That's right. Yoga for sciatic pain and discomfort is a real thing. Learn more about it in this article.","content":{"text":"If you're experiencing low back or leg pain, it could be sciatica. Fortunately, yoga can bring you some welcome relief. In this article, we'll share 7 yoga poses for sciatica. But what is sciatica, what does it feel like, and what yoga poses can help ease your pain? Keep reading for answers to all those questions and more.\\n\\nOf course, you can always jump right in with myYogaTeacher's \\nYoga for Back Pain program\\n. Sign up for a two-week free trial of the program and you'll get three free one-on-one sessions with our expert yoga instructors as well as group classes focusing on yoga for back pain and core strengthening. Plus, you'll have access to 30+ other daily yoga classes!\\n[CTA-DEFAULT]\\nWhat Is Sciatica and What Does It Feel Like?\\nThe sciatic nerves are the longest nerves in the body and are as thick as your pinky. They start in your lower lumbar spine and extend down the length of your legs to the soles of your feet. The pain from sciatica can start anywhere along this path. Most people who suffer from sciatica describe it as a tingling, burning, or searing pain or even numbness that starts in the lower back and shoots down the back of one leg.\\n\\nSciatica itself is the word used to describe the tenderness or compression of the sciatic nerve. It can be present with other back or muscle injuries or could be triggered by things as simple as sitting, walking, or just standing weird. Sciatica is typically unilateral meaning that people usually get it just on one side of the body at a time.\\n\\nBasically, sciatica isn't a good time. But there are ways to ease the pain. According to a \\nreport by Harvard Medical School\\n, practicing yoga is a non-invasive way to prevent sciatica. \\n\\n7 Yoga Poses for Sciatica\\nTo cure sciatica with yoga, it's important to find the right yoga poses that are going to make things better, not worse. Be sure to listen to your body; if anything you're doing causes you more pain or discomfort, stop doing it. We find it's also helpful to have a trusted yoga teacher who can show you the proper way to do yoga poses and who can provide modifications if needed.\\n\\nYoga can help align and strengthen the lower back, relieving pain caused by compression of the sciatic nerve. And, since we sit so much throughout the day, our hips tend to be tight, which also increases pressure on the sciatic nerves. Adding yoga asanas can help loosen tight areas and ease pain along the entire sciatic nerve.\\n\\nSo, without further ado, here are 7 yoga poses to improve and prevent sciatica you can add to your day. To get even more benefit, sign up for a two-week free trial of our \\nYoga for Back Pain program\\n!\\nBridge Pose (Setu Bandhasana)\\nLegs Up the Wall Pose (Viparita Karani)\\nPigeon Pose (Eka Pada Rajakapotasana)\\nDownward-Facing Dog Pose (Adho Mukha Svanasana)\\nWind-Relieving Pose (Pawanmuktasana)\\nHalf Lord of the Fishes Pose (Ardha Matsyendrasana)\\nCow Face Pose (Gomukhasana)\\n1. Bridge Pose\\n\\nBridge pose opens and stretches your hip flexors, relieves lower back pain, and strengthens core and back muscles. You can support your lower back with your hands, a block, or a bolster.\\n\\n2. Legs Up the Wall Pose\\n\\nLegs Up the Wall pose is helpful for relaxing the hips and back, reducing knee and ankle pain, and relieving tired feet and legs. You can do it actually up against a wall or not. Place a bolster under your hips for more support if that feels better for you.\\n\\n3. Pigeon Pose\\n\\nPigeon pose not only promotes good posture but stretches the lower part of your body, making the hip area more flexible and relieving muscle aches. It's important to perform this pose on both sides even if you only have pain on one side.\\n\\n4. Downward-Facing Dog Pose\\n\\nDownward-facing dog is an important yoga pose that helps lengthen the spine, stretch the back muscles, and strengthen the feet and legs. As you work your way into the pose, try to shift your weight back onto your heels (and off of your back). It's fine if you can't rest your heels on the floor.\\n\\n5. Wind-Relieving Pose\\n\\nWind-relieving pose loosens the lower back and helps flex your back and hip muscles. You may also find that this pose relieves knee pain. Stay in the pose for as long as is comfortable.\\n\\n6. Half Lord of the Fishes Pose\\n\\nTwists can feel amazing on your back but be sure to only twist as much as is comfortable for you, sitting on a cushion to lift your lower back as you twist, if needed. Half Lord of the Fishes helps to stretch your back muscles, release stiffness from hips, and flex the spine. Be sure to repeat the twist on both sides.\\n\\n7. Cow Face Pose\\n\\nCow face pose is a beautiful pose that can help elongate the spine and correct posture. It also strengthens the back and hip muscles. Many people struggle with this pose because they're not able to meet their hands at the back. That's okay. Your flexibility will improve over time.\\n\\nIf you have a few minutes left after completing these poses, take those minutes in savasana by lying on your back with your feet flat on the mat. Focus on how your body feels. If you notice areas of tension, breathe into those areas for a few minutes.\\n\\nYoga Poses to Avoid When You Have Sciatica\\nIf you're actively experiencing sciatica, your best bet is curling up with heating pads or ice packs until the pain is gone. In addition, there are some yoga poses that should be avoided as they can further aggravate already unhappy sciatic nerves. Generally, poses that involve forward bends or put pressure on the lower back should be avoided.\\n\\nIf you're taking any type of sedative medication or are hypermobile, it's important to listen to a physical therapist or qualified yoga teacher before proceeding with yoga practice.\\n\\nWrapping Up\\nNo matter whether your sciatic nerves get mad at you for sleeping wrong or you've just been sitting for too many hours out of the day, these yoga poses for sciatica are a great way to ease pain and prevent it from happening in the future. We recommend signing up for a free 2-week trial of our \\nYoga for Back Pain program\\n. You'll not only get access to our full schedule of yoga classes, but you'll receive three free one-on-one sessions with our expert yoga teachers who will address your questions and concerns and get you started on a path towards better back health (the one-on-one sessions are kind of like working with a physical therapist, but specifically for yoga).\\n","html":"<p>If you're experiencing low back or leg pain, it could be sciatica. Fortunately, yoga can bring you some welcome relief. In this article, we'll share 7 yoga poses for sciatica. But what is sciatica, what does it feel like, and what yoga poses can help ease your pain? Keep reading for answers to all those questions and more.</p><p></p><p>Of course, you can always jump right in with myYogaTeacher's <a title=\"https://www.myyogateacher.com/no-more-back-pain.html\" href=\"https://www.myyogateacher.com/no-more-back-pain.html\">Yoga for Back Pain program</a>. Sign up for a two-week free trial of the program and you'll get three free one-on-one sessions with our expert yoga instructors as well as group classes focusing on yoga for back pain and core strengthening. Plus, you'll have access to 30+ other daily yoga classes!</p><p>[CTA-DEFAULT]</p><h3>What Is Sciatica and What Does It Feel Like?</h3><p>The sciatic nerves are the longest nerves in the body and are as thick as your pinky. They start in your lower lumbar spine and extend down the length of your legs to the soles of your feet. The pain from sciatica can start anywhere along this path. Most people who suffer from sciatica describe it as a tingling, burning, or searing pain or even numbness that starts in the lower back and shoots down the back of one leg.</p><p></p><p>Sciatica itself is the word used to describe the tenderness or compression of the sciatic nerve. It can be present with other back or muscle injuries or could be triggered by things as simple as sitting, walking, or just standing weird. Sciatica is typically unilateral meaning that people usually get it just on one side of the body at a time.</p><p></p><p>Basically, sciatica isn't a good time. But there are ways to ease the pain. According to a <a title=\"https://www.health.harvard.edu/pain/sciatica-of-all-the-nerve\" href=\"https://www.health.harvard.edu/pain/sciatica-of-all-the-nerve\">report by Harvard Medical School</a>, practicing yoga is a non-invasive way to prevent sciatica. </p><p></p><h2>7 Yoga Poses for Sciatica</h2><p>To cure sciatica with yoga, it's important to find the right yoga poses that are going to make things better, not worse. Be sure to listen to your body; if anything you're doing causes you more pain or discomfort, stop doing it. We find it's also helpful to have a trusted yoga teacher who can show you the proper way to do yoga poses and who can provide modifications if needed.</p><p></p><p>Yoga can help align and strengthen the lower back, relieving pain caused by compression of the sciatic nerve. And, since we sit so much throughout the day, our hips tend to be tight, which also increases pressure on the sciatic nerves. Adding yoga asanas can help loosen tight areas and ease pain along the entire sciatic nerve.</p><p></p><p>So, without further ado, here are 7 yoga poses to improve and prevent sciatica you can add to your day. To get even more benefit, sign up for a two-week free trial of our <a title=\"https://www.myyogateacher.com/no-more-back-pain.html\" href=\"https://www.myyogateacher.com/no-more-back-pain.html\">Yoga for Back Pain program</a>!</p><ul><li><div>Bridge Pose (Setu Bandhasana)</div></li><li><div>Legs Up the Wall Pose (Viparita Karani)</div></li><li><div>Pigeon Pose (Eka Pada Rajakapotasana)</div></li><li><div>Downward-Facing Dog Pose (Adho Mukha Svanasana)</div></li><li><div>Wind-Relieving Pose (Pawanmuktasana)</div></li><li><div>Half Lord of the Fishes Pose (Ardha Matsyendrasana)</div></li><li><div>Cow Face Pose (Gomukhasana)</div></li></ul><h3>1. Bridge Pose</h3><img src=\"https://media.graphcms.com/output=format:png/resize=height:400,width:600/oQFlYhzfRPKpDrtAnrJ1\" alt=\"bridge pose.png\" title=\"bridge pose.png\" width=\"600\" height=\"400\" /><p>Bridge pose opens and stretches your hip flexors, relieves lower back pain, and strengthens core and back muscles. You can support your lower back with your hands, a block, or a bolster.</p><p></p><h3>2. Legs Up the Wall Pose</h3><img src=\"https://media.graphcms.com/JyjlanUHQ7yDrce4roFY\" alt=\"viparita karani.png\" title=\"viparita karani.png\" width=\"600\" height=\"400\" /><p>Legs Up the Wall pose is helpful for relaxing the hips and back, reducing knee and ankle pain, and relieving tired feet and legs. You can do it actually up against a wall or not. Place a bolster under your hips for more support if that feels better for you.</p><p></p><h3>3. Pigeon Pose</h3><img src=\"https://media.graphcms.com/output=format:png/resize=height:400,width:600/dh3j0X58RhqUq8G2Inql\" alt=\"pigeon pose.png\" title=\"pigeon pose.png\" width=\"600\" height=\"400\" /><p>Pigeon pose not only promotes good posture but stretches the lower part of your body, making the hip area more flexible and relieving muscle aches. It's important to perform this pose on both sides even if you only have pain on one side.</p><p></p><h3>4. Downward-Facing Dog Pose</h3><img src=\"https://media.graphcms.com/output=format:png/resize=height:400,width:600/6m8kQngmQcehxuVgyVYr\" alt=\"downward facing dog.png\" title=\"downward facing dog.png\" width=\"600\" height=\"400\" /><p>Downward-facing dog is an important yoga pose that helps lengthen the spine, stretch the back muscles, and strengthen the feet and legs. As you work your way into the pose, try to shift your weight back onto your heels (and off of your back). It's fine if you can't rest your heels on the floor.</p><p></p><h3>5. Wind-Relieving Pose</h3><img src=\"https://media.graphcms.com/output=format:png/resize=height:400,width:600/hATljESKTlCcJF7bfcOL\" alt=\"wind relieving pose.png\" title=\"wind relieving pose.png\" width=\"600\" height=\"400\" /><p>Wind-relieving pose loosens the lower back and helps flex your back and hip muscles. You may also find that this pose relieves knee pain. Stay in the pose for as long as is comfortable.</p><p></p><h3>6. Half Lord of the Fishes Pose</h3><img src=\"https://media.graphcms.com/wxp1S0L4RKKZRI613yOP\" alt=\"ardha matsyendrasana.png\" title=\"ardha matsyendrasana.png\" width=\"600\" height=\"400\" /><p>Twists can feel amazing on your back but be sure to only twist as much as is comfortable for you, sitting on a cushion to lift your lower back as you twist, if needed. Half Lord of the Fishes helps to stretch your back muscles, release stiffness from hips, and flex the spine. Be sure to repeat the twist on both sides.</p><p></p><h3>7. Cow Face Pose</h3><img src=\"https://media.graphcms.com/omIxRL5QtCf13KvL7EvA\" alt=\"gomukhasana.png\" title=\"gomukhasana.png\" width=\"600\" height=\"399\" /><p>Cow face pose is a beautiful pose that can help elongate the spine and correct posture. It also strengthens the back and hip muscles. Many people struggle with this pose because they're not able to meet their hands at the back. That's okay. Your flexibility will improve over time.</p><p></p><p>If you have a few minutes left after completing these poses, take those minutes in savasana by lying on your back with your feet flat on the mat. Focus on how your body feels. If you notice areas of tension, breathe into those areas for a few minutes.</p><p></p><h3>Yoga Poses to Avoid When You Have Sciatica</h3><p>If you're actively experiencing sciatica, your best bet is curling up with heating pads or ice packs until the pain is gone. In addition, there are some yoga poses that should be avoided as they can further aggravate already unhappy sciatic nerves. Generally, poses that involve forward bends or put pressure on the lower back should be avoided.</p><p></p><p>If you're taking any type of sedative medication or are hypermobile, it's important to listen to a physical therapist or qualified yoga teacher before proceeding with yoga practice.</p><p></p><h3>Wrapping Up</h3><p>No matter whether your sciatic nerves get mad at you for sleeping wrong or you've just been sitting for too many hours out of the day, these yoga poses for sciatica are a great way to ease pain and prevent it from happening in the future. We recommend signing up for a free 2-week trial of our <a title=\"https://www.myyogateacher.com/no-more-back-pain.html\" href=\"https://www.myyogateacher.com/no-more-back-pain.html\">Yoga for Back Pain program</a>. You'll not only get access to our full schedule of yoga classes, but you'll receive three free one-on-one sessions with our expert yoga teachers who will address your questions and concerns and get you started on a path towards better back health (the one-on-one sessions are kind of like working with a physical therapist, but specifically for yoga).</p><p></p>"},"category":["fitness","pain_management"],"utmCampaign":null,"utmMedium":null,"utmContent":null,"utmSource":null,"utmTerm":null,"utmSearchString":null,"imageHyperlink":[]},"loading":false,"blog_content":[{"type":"HTML","value":"<p>If you're experiencing low back or leg pain, it could be sciatica. Fortunately, yoga can bring you some welcome relief. In this article, we'll share 7 yoga poses for sciatica. But what is sciatica, what does it feel like, and what yoga poses can help ease your pain? Keep reading for answers to all those questions and more.</p><p></p><p>Of course, you can always jump right in with myYogaTeacher's <a title=\"https://www.myyogateacher.com/no-more-back-pain.html\" href=\"https://www.myyogateacher.com/no-more-back-pain.html\">Yoga for Back Pain program</a>. Sign up for a two-week free trial of the program and you'll get three free one-on-one sessions with our expert yoga instructors as well as group classes focusing on yoga for back pain and core strengthening. Plus, you'll have access to 30+ other daily yoga classes!</p>"},{"type":"CTA","value":"[CTA-DEFAULT]"},{"type":"HTML","value":"<h3>What Is Sciatica and What Does It Feel Like?</h3><p>The sciatic nerves are the longest nerves in the body and are as thick as your pinky. They start in your lower lumbar spine and extend down the length of your legs to the soles of your feet. The pain from sciatica can start anywhere along this path. Most people who suffer from sciatica describe it as a tingling, burning, or searing pain or even numbness that starts in the lower back and shoots down the back of one leg.</p><p></p><p>Sciatica itself is the word used to describe the tenderness or compression of the sciatic nerve. It can be present with other back or muscle injuries or could be triggered by things as simple as sitting, walking, or just standing weird. Sciatica is typically unilateral meaning that people usually get it just on one side of the body at a time.</p><p></p><p>Basically, sciatica isn't a good time. But there are ways to ease the pain. According to a <a title=\"https://www.health.harvard.edu/pain/sciatica-of-all-the-nerve\" href=\"https://www.health.harvard.edu/pain/sciatica-of-all-the-nerve\">report by Harvard Medical School</a>, practicing yoga is a non-invasive way to prevent sciatica. </p><p></p><h2>7 Yoga Poses for Sciatica</h2><p>To cure sciatica with yoga, it's important to find the right yoga poses that are going to make things better, not worse. Be sure to listen to your body; if anything you're doing causes you more pain or discomfort, stop doing it. We find it's also helpful to have a trusted yoga teacher who can show you the proper way to do yoga poses and who can provide modifications if needed.</p><p></p><p>Yoga can help align and strengthen the lower back, relieving pain caused by compression of the sciatic nerve. And, since we sit so much throughout the day, our hips tend to be tight, which also increases pressure on the sciatic nerves. Adding yoga asanas can help loosen tight areas and ease pain along the entire sciatic nerve.</p><p></p><p>So, without further ado, here are 7 yoga poses to improve and prevent sciatica you can add to your day. To get even more benefit, sign up for a two-week free trial of our <a title=\"https://www.myyogateacher.com/no-more-back-pain.html\" href=\"https://www.myyogateacher.com/no-more-back-pain.html\">Yoga for Back Pain program</a>!</p><ul><li><div>Bridge Pose (Setu Bandhasana)</div></li><li><div>Legs Up the Wall Pose (Viparita Karani)</div></li><li><div>Pigeon Pose (Eka Pada Rajakapotasana)</div></li><li><div>Downward-Facing Dog Pose (Adho Mukha Svanasana)</div></li><li><div>Wind-Relieving Pose (Pawanmuktasana)</div></li><li><div>Half Lord of the Fishes Pose (Ardha Matsyendrasana)</div></li><li><div>Cow Face Pose (Gomukhasana)</div></li></ul><h3>1. Bridge Pose</h3>\n <picture>\n <source \n type=\"image/webp\"\n srcset=\"https://media.graphcms.com/resize=w:930,fit:crop/quality=value:75/output=format:webp/compress/output=format:png/resize=height:400,width:600/oQFlYhzfRPKpDrtAnrJ1\" \n alt=\"bridge pose.png\"\n title=\"bridge pose.png\"\n \n \n class=\"lazyLoadingImg\"\n />\n <source \n type=\"image/jpg\"\n srcset=\"https://media.graphcms.com/resize=w:930,fit:crop/quality=value:75/output=format:jpg/output=format:png/resize=height:400,width:600/oQFlYhzfRPKpDrtAnrJ1\"\n alt=\"bridge pose.png\"\n title=\"bridge pose.png\"\n \n \n class=\"lazyLoadingImg\"\n />\n <img \n srcset=\"https://media.graphcms.com/resize=w:930,fit:crop/quality=value:75/output=format:jpg/output=format:png/resize=height:400,width:600/oQFlYhzfRPKpDrtAnrJ1\"\n alt=\"bridge pose.png\"\n title=\"bridge pose.png\"\n \n \n class=\"lazyLoadingImg\"\n />\n </picture>\n <p>Bridge pose opens and stretches your hip flexors, relieves lower back pain, and strengthens core and back muscles. You can support your lower back with your hands, a block, or a bolster.</p><p></p><h3>2. Legs Up the Wall Pose</h3>\n <picture>\n <source \n type=\"image/webp\"\n srcset=\"https://media.graphcms.com/resize=w:930,fit:crop/quality=value:75/output=format:webp/compress/JyjlanUHQ7yDrce4roFY\" \n alt=\"viparita karani.png\"\n title=\"viparita karani.png\"\n \n \n class=\"lazyLoadingImg\"\n />\n <source \n type=\"image/jpg\"\n srcset=\"https://media.graphcms.com/resize=w:930,fit:crop/quality=value:75/output=format:jpg/JyjlanUHQ7yDrce4roFY\"\n alt=\"viparita karani.png\"\n title=\"viparita karani.png\"\n \n \n class=\"lazyLoadingImg\"\n />\n <img \n srcset=\"https://media.graphcms.com/resize=w:930,fit:crop/quality=value:75/output=format:jpg/JyjlanUHQ7yDrce4roFY\"\n alt=\"viparita karani.png\"\n title=\"viparita karani.png\"\n \n \n class=\"lazyLoadingImg\"\n />\n </picture>\n <p>Legs Up the Wall pose is helpful for relaxing the hips and back, reducing knee and ankle pain, and relieving tired feet and legs. You can do it actually up against a wall or not. Place a bolster under your hips for more support if that feels better for you.</p><p></p><h3>3. Pigeon Pose</h3>\n <picture>\n <source \n type=\"image/webp\"\n srcset=\"https://media.graphcms.com/resize=w:930,fit:crop/quality=value:75/output=format:webp/compress/output=format:png/resize=height:400,width:600/dh3j0X58RhqUq8G2Inql\" \n alt=\"pigeon pose.png\"\n title=\"pigeon pose.png\"\n \n \n class=\"lazyLoadingImg\"\n />\n <source \n type=\"image/jpg\"\n srcset=\"https://media.graphcms.com/resize=w:930,fit:crop/quality=value:75/output=format:jpg/output=format:png/resize=height:400,width:600/dh3j0X58RhqUq8G2Inql\"\n alt=\"pigeon pose.png\"\n title=\"pigeon pose.png\"\n \n \n class=\"lazyLoadingImg\"\n />\n <img \n srcset=\"https://media.graphcms.com/resize=w:930,fit:crop/quality=value:75/output=format:jpg/output=format:png/resize=height:400,width:600/dh3j0X58RhqUq8G2Inql\"\n alt=\"pigeon pose.png\"\n title=\"pigeon pose.png\"\n \n \n class=\"lazyLoadingImg\"\n />\n </picture>\n <p>Pigeon pose not only promotes good posture but stretches the lower part of your body, making the hip area more flexible and relieving muscle aches. It's important to perform this pose on both sides even if you only have pain on one side.</p><p></p><h3>4. Downward-Facing Dog Pose</h3>\n <picture>\n <source \n type=\"image/webp\"\n srcset=\"https://media.graphcms.com/resize=w:930,fit:crop/quality=value:75/output=format:webp/compress/output=format:png/resize=height:400,width:600/6m8kQngmQcehxuVgyVYr\" \n alt=\"downward facing dog.png\"\n title=\"downward facing dog.png\"\n \n \n class=\"lazyLoadingImg\"\n />\n <source \n type=\"image/jpg\"\n srcset=\"https://media.graphcms.com/resize=w:930,fit:crop/quality=value:75/output=format:jpg/output=format:png/resize=height:400,width:600/6m8kQngmQcehxuVgyVYr\"\n alt=\"downward facing dog.png\"\n title=\"downward facing dog.png\"\n \n \n class=\"lazyLoadingImg\"\n />\n <img \n srcset=\"https://media.graphcms.com/resize=w:930,fit:crop/quality=value:75/output=format:jpg/output=format:png/resize=height:400,width:600/6m8kQngmQcehxuVgyVYr\"\n alt=\"downward facing dog.png\"\n title=\"downward facing dog.png\"\n \n \n class=\"lazyLoadingImg\"\n />\n </picture>\n <p>Downward-facing dog is an important yoga pose that helps lengthen the spine, stretch the back muscles, and strengthen the feet and legs. As you work your way into the pose, try to shift your weight back onto your heels (and off of your back). It's fine if you can't rest your heels on the floor.</p><p></p><h3>5. Wind-Relieving Pose</h3>\n <picture>\n <source \n type=\"image/webp\"\n srcset=\"https://media.graphcms.com/resize=w:930,fit:crop/quality=value:75/output=format:webp/compress/output=format:png/resize=height:400,width:600/hATljESKTlCcJF7bfcOL\" \n alt=\"wind relieving pose.png\"\n title=\"wind relieving pose.png\"\n \n \n class=\"lazyLoadingImg\"\n />\n <source \n type=\"image/jpg\"\n srcset=\"https://media.graphcms.com/resize=w:930,fit:crop/quality=value:75/output=format:jpg/output=format:png/resize=height:400,width:600/hATljESKTlCcJF7bfcOL\"\n alt=\"wind relieving pose.png\"\n title=\"wind relieving pose.png\"\n \n \n class=\"lazyLoadingImg\"\n />\n <img \n srcset=\"https://media.graphcms.com/resize=w:930,fit:crop/quality=value:75/output=format:jpg/output=format:png/resize=height:400,width:600/hATljESKTlCcJF7bfcOL\"\n alt=\"wind relieving pose.png\"\n title=\"wind relieving pose.png\"\n \n \n class=\"lazyLoadingImg\"\n />\n </picture>\n <p>Wind-relieving pose loosens the lower back and helps flex your back and hip muscles. You may also find that this pose relieves knee pain. Stay in the pose for as long as is comfortable.</p><p></p><h3>6. Half Lord of the Fishes Pose</h3>\n <picture>\n <source \n type=\"image/webp\"\n srcset=\"https://media.graphcms.com/resize=w:930,fit:crop/quality=value:75/output=format:webp/compress/wxp1S0L4RKKZRI613yOP\" \n alt=\"ardha matsyendrasana.png\"\n title=\"ardha matsyendrasana.png\"\n \n \n class=\"lazyLoadingImg\"\n />\n <source \n type=\"image/jpg\"\n srcset=\"https://media.graphcms.com/resize=w:930,fit:crop/quality=value:75/output=format:jpg/wxp1S0L4RKKZRI613yOP\"\n alt=\"ardha matsyendrasana.png\"\n title=\"ardha matsyendrasana.png\"\n \n \n class=\"lazyLoadingImg\"\n />\n <img \n srcset=\"https://media.graphcms.com/resize=w:930,fit:crop/quality=value:75/output=format:jpg/wxp1S0L4RKKZRI613yOP\"\n alt=\"ardha matsyendrasana.png\"\n title=\"ardha matsyendrasana.png\"\n \n \n class=\"lazyLoadingImg\"\n />\n </picture>\n <p>Twists can feel amazing on your back but be sure to only twist as much as is comfortable for you, sitting on a cushion to lift your lower back as you twist, if needed. Half Lord of the Fishes helps to stretch your back muscles, release stiffness from hips, and flex the spine. Be sure to repeat the twist on both sides.</p><p></p><h3>7. Cow Face Pose</h3>\n <picture>\n <source \n type=\"image/webp\"\n srcset=\"https://media.graphcms.com/resize=w:930,fit:crop/quality=value:75/output=format:webp/compress/omIxRL5QtCf13KvL7EvA\" \n alt=\"gomukhasana.png\"\n title=\"gomukhasana.png\"\n \n \n class=\"lazyLoadingImg\"\n />\n <source \n type=\"image/jpg\"\n srcset=\"https://media.graphcms.com/resize=w:930,fit:crop/quality=value:75/output=format:jpg/omIxRL5QtCf13KvL7EvA\"\n alt=\"gomukhasana.png\"\n title=\"gomukhasana.png\"\n \n \n class=\"lazyLoadingImg\"\n />\n <img \n srcset=\"https://media.graphcms.com/resize=w:930,fit:crop/quality=value:75/output=format:jpg/omIxRL5QtCf13KvL7EvA\"\n alt=\"gomukhasana.png\"\n title=\"gomukhasana.png\"\n \n \n class=\"lazyLoadingImg\"\n />\n </picture>\n <p>Cow face pose is a beautiful pose that can help elongate the spine and correct posture. It also strengthens the back and hip muscles. Many people struggle with this pose because they're not able to meet their hands at the back. That's okay. Your flexibility will improve over time.</p><p></p><p>If you have a few minutes left after completing these poses, take those minutes in savasana by lying on your back with your feet flat on the mat. Focus on how your body feels. If you notice areas of tension, breathe into those areas for a few minutes.</p><p></p><h3>Yoga Poses to Avoid When You Have Sciatica</h3><p>If you're actively experiencing sciatica, your best bet is curling up with heating pads or ice packs until the pain is gone. In addition, there are some yoga poses that should be avoided as they can further aggravate already unhappy sciatic nerves. Generally, poses that involve forward bends or put pressure on the lower back should be avoided.</p><p></p><p>If you're taking any type of sedative medication or are hypermobile, it's important to listen to a physical therapist or qualified yoga teacher before proceeding with yoga practice.</p><p></p><h3>Wrapping Up</h3><p>No matter whether your sciatic nerves get mad at you for sleeping wrong or you've just been sitting for too many hours out of the day, these yoga poses for sciatica are a great way to ease pain and prevent it from happening in the future. We recommend signing up for a free 2-week trial of our <a title=\"https://www.myyogateacher.com/no-more-back-pain.html\" href=\"https://www.myyogateacher.com/no-more-back-pain.html\">Yoga for Back Pain program</a>. You'll not only get access to our full schedule of yoga classes, but you'll receive three free one-on-one sessions with our expert yoga teachers who will address your questions and concerns and get you started on a path towards better back health (the one-on-one sessions are kind of like working with a physical therapist, but specifically for yoga).</p><p></p>"},{"type":"CTA","value":"[CTA-DEFAULT]"}],"isSlugACategory":false,"searchCategory":"yoga-for-sciatica","showPopUp":false,"popUpType":null,"showedPopup":false,"windowWidth":null,"ctaPath":"signup","redirectURL":"#","current_url":"https://www.myyogateacher.com/articles/yoga-for-sciatica","student_details":"","facebookUrl":"","twitterUrl":"","copyUrl":"","emailUrl":"","ctaContent":[{"id":"ckxrz2i14tov40c25g1dpicsg","name":"[CTA-DEFAULT]","description":{"html":"<p><strong>Get 2 free private yoga sessions and 2 weeks of unlimited group classes</strong> with authentic yoga teachers. No credit card required when you sign up today!</p>"},"title":{"html":"<p><strong>Online Yoga Classes – </strong><u><strong>Live & Interactive</strong></u></p>"},"linkText":"Start Free Trial","linkUrl":"https://www.myyogateacher.com/signup"},{"id":"ckxrz37hsu0cj0a76mgb4594m","name":"[CTA-FREECLASS]","description":{"html":"<p><strong>Get 2 free private yoga sessions and 2 weeks of unlimited group classes</strong> with authentic yoga teachers. No credit card required when you sign up today!</p>"},"title":{"html":"<p><strong>Online Yoga Classes – </strong><u><strong>Live & Interactive</strong></u></p>"},"linkText":"Start Free Trial","linkUrl":"https://www.myyogateacher.com/signup"},{"id":"ckxrz4d5stsye0b75dtlx1w0n","name":"[CTA-TRENDS]","description":{"html":"<p>Get ahead of the next trend and practice with authentic Indian yoga teachers! Sign up today and <strong>get 2 free private yoga sessions PLUS 2 weeks of unlimited group classes</strong>. No credit card required when you sign up today!</p>"},"title":{"html":"<p><strong>Online Yoga Sessions – </strong><u><strong>Live & Interactive</strong></u></p><p><strong>Practice with Authentic Indian Yoga Teachers</strong></p><p></p>"},"linkText":"Start Free Trial","linkUrl":"https://www.myyogateacher.com/signup"},{"id":"ckxrz6nq0tqdr0c258titvagg","name":"[CTA-REVIEWS]","description":{"html":"<p>Find out what all the hype is about! <strong>Get 2 free private yoga sessions and 2 weeks of unlimited group classes</strong> with authentic yoga teachers. No credit card required when you sign up today!</p>"},"title":{"html":"<p><strong>Online Yoga Sessions – </strong><u><strong>Live & Interactive</strong></u></p><p><strong>103,478 Happy Students & 12,086 ⭐⭐⭐⭐⭐ Reviews</strong></p><p></p>"},"linkText":"Start Free Trial","linkUrl":"https://www.myyogateacher.com/signup"},{"id":"ckxrz7nzktu400b752fym6wpw","name":"[CTA-HATHA]","description":{"html":"<p><strong>Get 2 free private hatha yoga sessions and 2 weeks of unlimited group classes </strong>(including tons of daily Hatha yoga classes). No credit card required when you sign up today!</p>"},"title":{"html":"<p><strong>Online Hatha Yoga Sessions – </strong><u><strong>Live & Interactive</strong></u></p><p><strong>with Authentic Indian Teachers</strong></p><p></p>"},"linkText":"Start Free Trial","linkUrl":"https://www.myyogateacher.com/signup"},{"id":"cky90p88g3zgc0d23yz6taont","name":"[CTA-NASAL]","description":{"html":"<p><strong>Get 2 free private sessions </strong>to relieve post nasal drip and clear out your sinus. </p><p><strong>PLUS, 2 weeks of unlimited group classes </strong>with authentic Indian yoga teachers. No credit card required when you sign up today!</p>"},"title":{"html":"<p><strong>Online Yoga Sessions – </strong><u><strong>Live & Interactive</strong></u></p><p><strong>Relieve Post Nasal Drip & Clear Your Sinus Today!</strong></p><p></p>"},"linkText":"Start Free Trial","linkUrl":"https://www.myyogateacher.com/signup"},{"id":"ckyirvl8g25ce0c70cldmca2g","name":"[CTA-TRATAKA]","description":{"html":"<p><strong>Get 2 free private sessions </strong>with experienced Trataka teachers. </p><p><strong>PLUS, 2 weeks of unlimited group classes </strong>(like ‘Candle Gazing Meditation) with authentic yoga teachers. No credit card required when you sign up today!</p>"},"title":{"html":"<p><strong>Online Yoga Sessions – </strong><u><strong>Live & Interactive</strong></u></p><p><strong>Learn Trataka (Candle Gazing) Meditation Today!</strong></p><p></p>"},"linkText":"Start Free Trial","linkUrl":"https://www.myyogateacher.com/signup"},{"id":"ckyisqh482ck60b79rp1r1jcg","name":"[CTA-YIN]","description":{"html":"<p><strong>Get 2 free private yoga sessions</strong>, work with an experienced yoga therapist to reduce (and even eliminate) your back pain. <strong>PLUS 2 weeks of unlimited group classes </strong>(like ‘Yoga for Back Pain’) with authentic yoga teachers. No credit card required when you sign up today!</p>"},"title":{"html":"<p><strong>Online Yoga Therapy – </strong><u><strong>Live & Interactive</strong></u></p><p><strong>Relieve Back Pain Safely & Effectively Today!</strong></p><p></p>"},"linkText":"Start Free Trial","linkUrl":"https://www.myyogateacher.com/signup"},{"id":"ckyitki4w2liz0b30tqpzhy4i","name":"[CTA-KRIYA]","description":{"html":"<p><strong>Get 2 free private yoga sessions </strong>for Kriya Yoga, Pranayama, and Meditation <strong>and 2 weeks of unlimited group classes </strong>with authentic yoga teachers. No credit card required when you sign up today!</p>"},"title":{"html":"<p><strong>Online Yoga Classes – </strong><u><strong>Live & Interactive</strong></u></p><p><strong>Practice Kriya, Pranayama, and Meditation Today!</strong></p>"},"linkText":"Start Free Trial","linkUrl":"https://www.myyogateacher.com/signup"},{"id":"ckyitxgyg2pot0b79lu1fcpp1","name":"[CTA-BREATH]","description":{"html":"<p><strong>Get 2 free private yoga sessions </strong>for yogic breathing techniques (pranayama) and <strong>2 weeks of unlimited group classes</strong>, like ‘Stretch and Breathe’, ‘Kriya, Pranayama, and Meditation’, and many others. No credit card required when you sign up today!</p>"},"title":{"html":"<p><strong>Online Yoga Sessions – </strong><u><strong>Live & Interactive</strong></u></p><p><strong> Learn Beginner, Intermediate, and Advanced Pranayama!</strong></p>"},"linkText":"Start Free Trial","linkUrl":"https://www.myyogateacher.com/signup"},{"id":"ckykb6i2o1o7f0b368s1m7qow","name":"[CTA-LYMPHATIC]","description":{"html":"<p><strong>Get 2 free private yoga sessions</strong> for lymphatic drainage & immunity enhancement. <strong>PLUS 2 weeks of unlimited group yoga classes</strong> (including daily yin-yoga) when you sign up today! No credit card required to sign up.</p><p></p>"},"title":{"html":"<p><strong>Online Yoga Sessions – </strong><u><strong>Live & Interactive</strong></u></p><p><strong>for Lymphatic Drainage & Boosting Your Immune System!</strong></p>"},"linkText":"Start Free Trial","linkUrl":"https://www.myyogateacher.com/signup"},{"id":"cl2vqlpyfe3yh0biohgxyx2hg","name":"[CTA-LEAD]","description":{"html":"<p>Lead Form</p>"},"title":{"html":"<p>Lead Form</p>"},"linkText":"Start Free Trial","linkUrl":"https://www.myyogateacher.com/signup"},{"id":"cl4gnwnrlga640ck37gutx7sn","name":"[CTA-GC]","description":{"html":"<p>CTA-GC</p>"},"title":{"html":"<p>CTA-GC</p>"},"linkText":"Start Free Trial","linkUrl":"https://www.myyogateacher.com/signup"}],"post":{"id":"ckkepkey863nr0a31wt0hv7cr","slug":"yoga-for-sciatica","author":{"name":"Will","teacherMytSlug":"will-1","pictureUrl":"will.jpeg"},"title":"Yoga for Sciatica: Cure Sciatica With These 7 Yoga Poses","createdAt":"2021-01-27T00:46:38.726703+00:00","updatedAt":"2022-08-01T06:33:31.00152+00:00","coverUrl":"yoga-for-sciatica.jpg","seoDescription":"Use these seven yoga poses to cure sciatica! That's right. Yoga for sciatic pain and discomfort is a real thing. Learn more about it in this article.","content":{"text":"If you're experiencing low back or leg pain, it could be sciatica. Fortunately, yoga can bring you some welcome relief. In this article, we'll share 7 yoga poses for sciatica. But what is sciatica, what does it feel like, and what yoga poses can help ease your pain? Keep reading for answers to all those questions and more.\\n\\nOf course, you can always jump right in with myYogaTeacher's \\nYoga for Back Pain program\\n. Sign up for a two-week free trial of the program and you'll get three free one-on-one sessions with our expert yoga instructors as well as group classes focusing on yoga for back pain and core strengthening. Plus, you'll have access to 30+ other daily yoga classes!\\n[CTA-DEFAULT]\\nWhat Is Sciatica and What Does It Feel Like?\\nThe sciatic nerves are the longest nerves in the body and are as thick as your pinky. They start in your lower lumbar spine and extend down the length of your legs to the soles of your feet. The pain from sciatica can start anywhere along this path. Most people who suffer from sciatica describe it as a tingling, burning, or searing pain or even numbness that starts in the lower back and shoots down the back of one leg.\\n\\nSciatica itself is the word used to describe the tenderness or compression of the sciatic nerve. It can be present with other back or muscle injuries or could be triggered by things as simple as sitting, walking, or just standing weird. Sciatica is typically unilateral meaning that people usually get it just on one side of the body at a time.\\n\\nBasically, sciatica isn't a good time. But there are ways to ease the pain. According to a \\nreport by Harvard Medical School\\n, practicing yoga is a non-invasive way to prevent sciatica. \\n\\n7 Yoga Poses for Sciatica\\nTo cure sciatica with yoga, it's important to find the right yoga poses that are going to make things better, not worse. Be sure to listen to your body; if anything you're doing causes you more pain or discomfort, stop doing it. We find it's also helpful to have a trusted yoga teacher who can show you the proper way to do yoga poses and who can provide modifications if needed.\\n\\nYoga can help align and strengthen the lower back, relieving pain caused by compression of the sciatic nerve. And, since we sit so much throughout the day, our hips tend to be tight, which also increases pressure on the sciatic nerves. Adding yoga asanas can help loosen tight areas and ease pain along the entire sciatic nerve.\\n\\nSo, without further ado, here are 7 yoga poses to improve and prevent sciatica you can add to your day. To get even more benefit, sign up for a two-week free trial of our \\nYoga for Back Pain program\\n!\\nBridge Pose (Setu Bandhasana)\\nLegs Up the Wall Pose (Viparita Karani)\\nPigeon Pose (Eka Pada Rajakapotasana)\\nDownward-Facing Dog Pose (Adho Mukha Svanasana)\\nWind-Relieving Pose (Pawanmuktasana)\\nHalf Lord of the Fishes Pose (Ardha Matsyendrasana)\\nCow Face Pose (Gomukhasana)\\n1. Bridge Pose\\n\\nBridge pose opens and stretches your hip flexors, relieves lower back pain, and strengthens core and back muscles. You can support your lower back with your hands, a block, or a bolster.\\n\\n2. Legs Up the Wall Pose\\n\\nLegs Up the Wall pose is helpful for relaxing the hips and back, reducing knee and ankle pain, and relieving tired feet and legs. You can do it actually up against a wall or not. Place a bolster under your hips for more support if that feels better for you.\\n\\n3. Pigeon Pose\\n\\nPigeon pose not only promotes good posture but stretches the lower part of your body, making the hip area more flexible and relieving muscle aches. It's important to perform this pose on both sides even if you only have pain on one side.\\n\\n4. Downward-Facing Dog Pose\\n\\nDownward-facing dog is an important yoga pose that helps lengthen the spine, stretch the back muscles, and strengthen the feet and legs. As you work your way into the pose, try to shift your weight back onto your heels (and off of your back). It's fine if you can't rest your heels on the floor.\\n\\n5. Wind-Relieving Pose\\n\\nWind-relieving pose loosens the lower back and helps flex your back and hip muscles. You may also find that this pose relieves knee pain. Stay in the pose for as long as is comfortable.\\n\\n6. Half Lord of the Fishes Pose\\n\\nTwists can feel amazing on your back but be sure to only twist as much as is comfortable for you, sitting on a cushion to lift your lower back as you twist, if needed. Half Lord of the Fishes helps to stretch your back muscles, release stiffness from hips, and flex the spine. Be sure to repeat the twist on both sides.\\n\\n7. Cow Face Pose\\n\\nCow face pose is a beautiful pose that can help elongate the spine and correct posture. It also strengthens the back and hip muscles. Many people struggle with this pose because they're not able to meet their hands at the back. That's okay. Your flexibility will improve over time.\\n\\nIf you have a few minutes left after completing these poses, take those minutes in savasana by lying on your back with your feet flat on the mat. Focus on how your body feels. If you notice areas of tension, breathe into those areas for a few minutes.\\n\\nYoga Poses to Avoid When You Have Sciatica\\nIf you're actively experiencing sciatica, your best bet is curling up with heating pads or ice packs until the pain is gone. In addition, there are some yoga poses that should be avoided as they can further aggravate already unhappy sciatic nerves. Generally, poses that involve forward bends or put pressure on the lower back should be avoided.\\n\\nIf you're taking any type of sedative medication or are hypermobile, it's important to listen to a physical therapist or qualified yoga teacher before proceeding with yoga practice.\\n\\nWrapping Up\\nNo matter whether your sciatic nerves get mad at you for sleeping wrong or you've just been sitting for too many hours out of the day, these yoga poses for sciatica are a great way to ease pain and prevent it from happening in the future. We recommend signing up for a free 2-week trial of our \\nYoga for Back Pain program\\n. You'll not only get access to our full schedule of yoga classes, but you'll receive three free one-on-one sessions with our expert yoga teachers who will address your questions and concerns and get you started on a path towards better back health (the one-on-one sessions are kind of like working with a physical therapist, but specifically for yoga).\\n","html":"<p>If you're experiencing low back or leg pain, it could be sciatica. Fortunately, yoga can bring you some welcome relief. In this article, we'll share 7 yoga poses for sciatica. But what is sciatica, what does it feel like, and what yoga poses can help ease your pain? Keep reading for answers to all those questions and more.</p><p></p><p>Of course, you can always jump right in with myYogaTeacher's <a title=\"https://www.myyogateacher.com/no-more-back-pain.html\" href=\"https://www.myyogateacher.com/no-more-back-pain.html\">Yoga for Back Pain program</a>. Sign up for a two-week free trial of the program and you'll get three free one-on-one sessions with our expert yoga instructors as well as group classes focusing on yoga for back pain and core strengthening. Plus, you'll have access to 30+ other daily yoga classes!</p><p>[CTA-DEFAULT]</p><h3>What Is Sciatica and What Does It Feel Like?</h3><p>The sciatic nerves are the longest nerves in the body and are as thick as your pinky. They start in your lower lumbar spine and extend down the length of your legs to the soles of your feet. The pain from sciatica can start anywhere along this path. Most people who suffer from sciatica describe it as a tingling, burning, or searing pain or even numbness that starts in the lower back and shoots down the back of one leg.</p><p></p><p>Sciatica itself is the word used to describe the tenderness or compression of the sciatic nerve. It can be present with other back or muscle injuries or could be triggered by things as simple as sitting, walking, or just standing weird. Sciatica is typically unilateral meaning that people usually get it just on one side of the body at a time.</p><p></p><p>Basically, sciatica isn't a good time. But there are ways to ease the pain. According to a <a title=\"https://www.health.harvard.edu/pain/sciatica-of-all-the-nerve\" href=\"https://www.health.harvard.edu/pain/sciatica-of-all-the-nerve\">report by Harvard Medical School</a>, practicing yoga is a non-invasive way to prevent sciatica. </p><p></p><h2>7 Yoga Poses for Sciatica</h2><p>To cure sciatica with yoga, it's important to find the right yoga poses that are going to make things better, not worse. Be sure to listen to your body; if anything you're doing causes you more pain or discomfort, stop doing it. We find it's also helpful to have a trusted yoga teacher who can show you the proper way to do yoga poses and who can provide modifications if needed.</p><p></p><p>Yoga can help align and strengthen the lower back, relieving pain caused by compression of the sciatic nerve. And, since we sit so much throughout the day, our hips tend to be tight, which also increases pressure on the sciatic nerves. Adding yoga asanas can help loosen tight areas and ease pain along the entire sciatic nerve.</p><p></p><p>So, without further ado, here are 7 yoga poses to improve and prevent sciatica you can add to your day. To get even more benefit, sign up for a two-week free trial of our <a title=\"https://www.myyogateacher.com/no-more-back-pain.html\" href=\"https://www.myyogateacher.com/no-more-back-pain.html\">Yoga for Back Pain program</a>!</p><ul><li><div>Bridge Pose (Setu Bandhasana)</div></li><li><div>Legs Up the Wall Pose (Viparita Karani)</div></li><li><div>Pigeon Pose (Eka Pada Rajakapotasana)</div></li><li><div>Downward-Facing Dog Pose (Adho Mukha Svanasana)</div></li><li><div>Wind-Relieving Pose (Pawanmuktasana)</div></li><li><div>Half Lord of the Fishes Pose (Ardha Matsyendrasana)</div></li><li><div>Cow Face Pose (Gomukhasana)</div></li></ul><h3>1. Bridge Pose</h3><img src=\"https://media.graphcms.com/output=format:png/resize=height:400,width:600/oQFlYhzfRPKpDrtAnrJ1\" alt=\"bridge pose.png\" title=\"bridge pose.png\" width=\"600\" height=\"400\" /><p>Bridge pose opens and stretches your hip flexors, relieves lower back pain, and strengthens core and back muscles. You can support your lower back with your hands, a block, or a bolster.</p><p></p><h3>2. Legs Up the Wall Pose</h3><img src=\"https://media.graphcms.com/JyjlanUHQ7yDrce4roFY\" alt=\"viparita karani.png\" title=\"viparita karani.png\" width=\"600\" height=\"400\" /><p>Legs Up the Wall pose is helpful for relaxing the hips and back, reducing knee and ankle pain, and relieving tired feet and legs. You can do it actually up against a wall or not. Place a bolster under your hips for more support if that feels better for you.</p><p></p><h3>3. Pigeon Pose</h3><img src=\"https://media.graphcms.com/output=format:png/resize=height:400,width:600/dh3j0X58RhqUq8G2Inql\" alt=\"pigeon pose.png\" title=\"pigeon pose.png\" width=\"600\" height=\"400\" /><p>Pigeon pose not only promotes good posture but stretches the lower part of your body, making the hip area more flexible and relieving muscle aches. It's important to perform this pose on both sides even if you only have pain on one side.</p><p></p><h3>4. Downward-Facing Dog Pose</h3><img src=\"https://media.graphcms.com/output=format:png/resize=height:400,width:600/6m8kQngmQcehxuVgyVYr\" alt=\"downward facing dog.png\" title=\"downward facing dog.png\" width=\"600\" height=\"400\" /><p>Downward-facing dog is an important yoga pose that helps lengthen the spine, stretch the back muscles, and strengthen the feet and legs. As you work your way into the pose, try to shift your weight back onto your heels (and off of your back). It's fine if you can't rest your heels on the floor.</p><p></p><h3>5. Wind-Relieving Pose</h3><img src=\"https://media.graphcms.com/output=format:png/resize=height:400,width:600/hATljESKTlCcJF7bfcOL\" alt=\"wind relieving pose.png\" title=\"wind relieving pose.png\" width=\"600\" height=\"400\" /><p>Wind-relieving pose loosens the lower back and helps flex your back and hip muscles. You may also find that this pose relieves knee pain. Stay in the pose for as long as is comfortable.</p><p></p><h3>6. Half Lord of the Fishes Pose</h3><img src=\"https://media.graphcms.com/wxp1S0L4RKKZRI613yOP\" alt=\"ardha matsyendrasana.png\" title=\"ardha matsyendrasana.png\" width=\"600\" height=\"400\" /><p>Twists can feel amazing on your back but be sure to only twist as much as is comfortable for you, sitting on a cushion to lift your lower back as you twist, if needed. Half Lord of the Fishes helps to stretch your back muscles, release stiffness from hips, and flex the spine. Be sure to repeat the twist on both sides.</p><p></p><h3>7. Cow Face Pose</h3><img src=\"https://media.graphcms.com/omIxRL5QtCf13KvL7EvA\" alt=\"gomukhasana.png\" title=\"gomukhasana.png\" width=\"600\" height=\"399\" /><p>Cow face pose is a beautiful pose that can help elongate the spine and correct posture. It also strengthens the back and hip muscles. Many people struggle with this pose because they're not able to meet their hands at the back. That's okay. Your flexibility will improve over time.</p><p></p><p>If you have a few minutes left after completing these poses, take those minutes in savasana by lying on your back with your feet flat on the mat. Focus on how your body feels. If you notice areas of tension, breathe into those areas for a few minutes.</p><p></p><h3>Yoga Poses to Avoid When You Have Sciatica</h3><p>If you're actively experiencing sciatica, your best bet is curling up with heating pads or ice packs until the pain is gone. In addition, there are some yoga poses that should be avoided as they can further aggravate already unhappy sciatic nerves. Generally, poses that involve forward bends or put pressure on the lower back should be avoided.</p><p></p><p>If you're taking any type of sedative medication or are hypermobile, it's important to listen to a physical therapist or qualified yoga teacher before proceeding with yoga practice.</p><p></p><h3>Wrapping Up</h3><p>No matter whether your sciatic nerves get mad at you for sleeping wrong or you've just been sitting for too many hours out of the day, these yoga poses for sciatica are a great way to ease pain and prevent it from happening in the future. We recommend signing up for a free 2-week trial of our <a title=\"https://www.myyogateacher.com/no-more-back-pain.html\" href=\"https://www.myyogateacher.com/no-more-back-pain.html\">Yoga for Back Pain program</a>. You'll not only get access to our full schedule of yoga classes, but you'll receive three free one-on-one sessions with our expert yoga teachers who will address your questions and concerns and get you started on a path towards better back health (the one-on-one sessions are kind of like working with a physical therapist, but specifically for yoga).</p><p></p>"},"category":["fitness","pain_management"],"utmCampaign":null,"utmMedium":null,"utmContent":null,"utmSource":null,"utmTerm":null,"utmSearchString":null,"imageHyperlink":[]},"recommendations_group_class":null}
© Copyright 2020 MyYogaTeacher Inc