Some days you’re energetic and motivated to move your body, but some days you’re not! Some days you feel so sore that wiggling your feet hurts. And some days, maybe you just. can’t.
Here at MyYogaTeacher, we understand all of those types of days. They just mean we’re all human!
The good news is there’s a yoga for that. If you know us at all, you know that we want to make sure that anyone and everyone who wants to practice yoga feels comfortable doing so. No matter what kind of day they’re having.
Using props in yoga is nothing new. Especially yin yoga! You should always feel comfortable using a yoga prop if needed. But so many yogis underestimate the power of using a wall as a prop!
Making use of a wall in yin yoga has major physical and mental health benefits, but it also allows you to do something good for your body on days when you’re just not feelin’ it. As a matter of fact, when you’re sore or unmotivated (or both), using a wall for some relaxing yin yoga is probably just what your mind and body need!
MyYogaTeacher is excited to offer so many different types of yoga classes to meet the needs of our community of yogis! Yin yoga is just one of them. And it’s offered at various times on different days so you can find a time that works best for you to try it out! Plus, we have several expert yoga instructors who teach yin yoga. You get to choose which one you like best!
If you haven’t experienced virtual private yoga classes yet, MyYogaTeacher makes 1:1 classes affordable and accessible! PLUS, with your membership, you get:
Radiance! More energy, peace of mind, and better health & fitness
42+ daily group yoga classes, 100% live!
Discounted yoga workshops, all live and interactive!
Making new like-minded friends from around the world
Grab your 2-week free trial and check out your membership options here!
Meanwhile, let’s talk about how using a wall – the prop everyone has at home – for your yin yoga practice provides unprecedented relief from tight, sore muscles, headaches, and many other things!

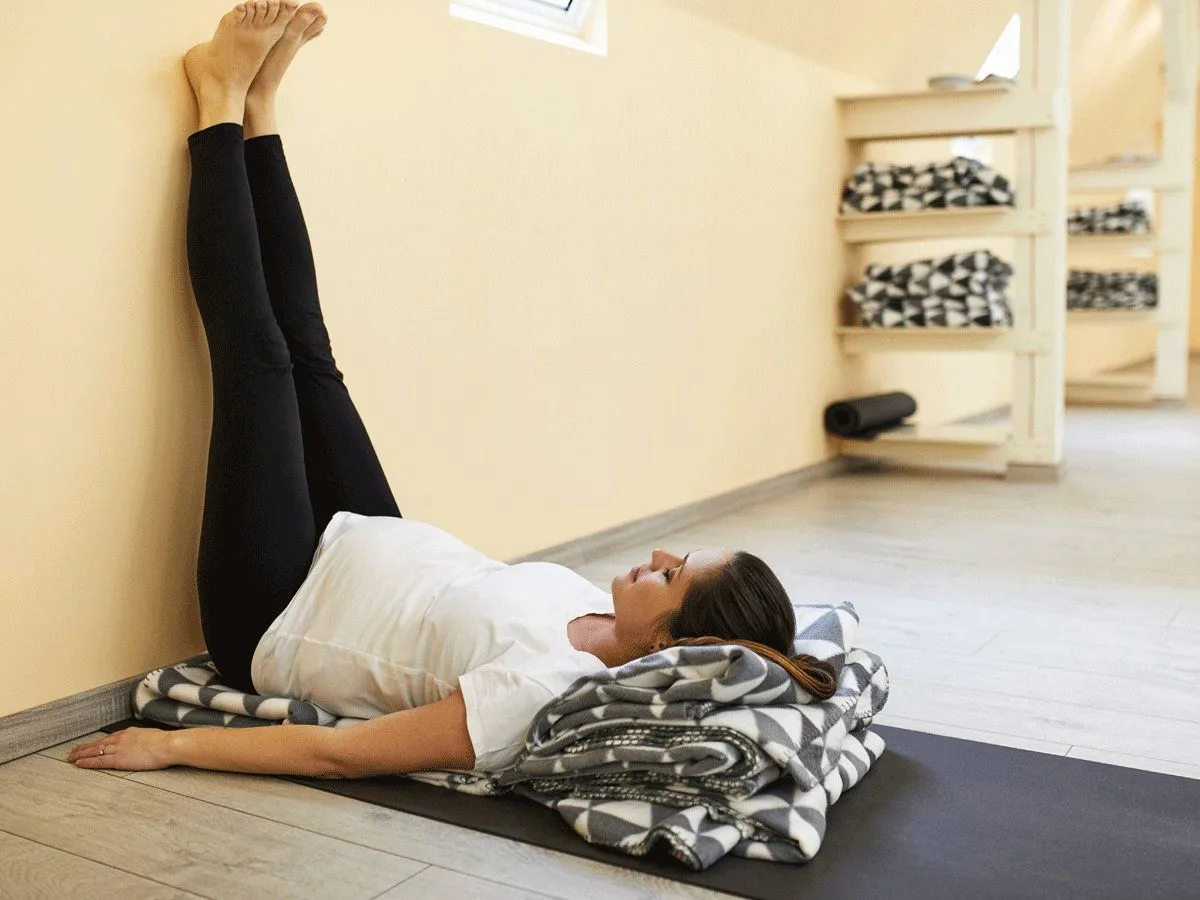
Seems pretty basic right? Lying down and propping your feet and legs up against a wall. Maybe so, but the benefits of feet up a wall pose are tremendous, especially if you decided to hold it for longer periods of time.
In this pose, you get a good hamstring stretch and release the muscles in your lower back. This inverted pose is passive and helps you melt into the floor as you let go of stress anxiety.
Feet up a wall pose also:
Reduces swelling in the feet and legs
Relieves migraine headache pain
Helps manage varicose veins
Improves thyroid function
Promotes better circulation
Helps you sleep better
Improves digestion
That’s a lot for a yoga pose where you get to lay down and relax, right? Inverted poses are also wonderful for promoting lymph flow, which is important for immunity, amongst other things.
See? Basic isn’t always bad!

When sitting up is just too much or too hard on your back and knees, you can get the same benefits of this pose lying down!
From feet up a wall pose, bring the soles of your feet together and bend your knees out to the sides as you slide your feet down the wall. You may like to have a folded blanket, mat, or bolster handy to place under your hips if you experience any discomfort.
Butterfly pose will stretch out your inner thighs, open your hips, and releases tension in your lower back. All while allowing you to rest and relax!
And because you’re doing this pose up against the wall instead of sitting upright, you’ll be able to focus more on allowing your body to stretch and relax passively versus worrying about the proper alignment of your spine or utilizing muscles that you need to use when you’re sitting.

While walls are great for relaxing, gravity-induced yoga poses, they also help yogis deepen their practice in a way that’s safe and promotes good alignment. King Arthur’s Pose is a great example of how yogis can experience a deeper stretch than they normally would doing other similar poses without the assistance of a wall.
King Arthur’s Pose will stretch and lengthen the quadriceps and hip flexors, which is particularly helpful for people who sit a lot during the day for work or school.
This pose feels sooooooo good! Even if you’re already pretty bendy.
Another benefit to this wall pose is that it’s very stabilizing. No need to be wobbling around for standing quad stretches or worrying about keeping your knees protected. This pose takes care of all of that for you!

This wall pose version of reclined pigeon pose might be even better than the original!
Why? Because there’s no reaching or grabbing or holding onto anything involved in practicing it. Plus, you can adjust the intensity of this pose by bringing you hips closer to or further away from the wall.
Reclined pigeon pose will bring sweet relief to tight hips and glutes, as well as releasing tension in the lower back muscles. This wall pose also helps:
Relieve sciatica or piriformis issues
Improve digestion
Increase blood flow and circulation to pelvis
Open the hips
You may want to rest your head on a pillow or blanket during this pose, but it is not advised to place one under your hips as it could cause your hips to be uneven.
Besides the fact that beginner yogis and yogis who aren’t super flexible, are older, or have issues with vertigo may struggle to balance during standing forward bend, this wall pose also can help people deepen the stretch in their hamstrings and glutes.
Some people really struggle with forward bend, and that’s ok! It doesn’t matter how simple a yoga pose is, if using a wall helps you do a pose correctly and safely, then we’re all for it!
The key to getting the most out of standing forward bend (with or without a wall) is to make sure you allow your head to drop down and hang. Forward bend stretches out the entire spine, the hamstrings, glutes, and lower back muscles.
This inversion pose also helps alleviate migraine pain and headaches and brings more circulation to the brain and scalp. Which is great for cleansing the lymphatic system and boosts immunity.
There are many other poses you can practice using a wall. If you’re familiar with yoga, try these wall yoga poses as well:
Monkey pose (with back foot anchored)
King Cobra
Supine reclined twist
Side plank
Check out our latest article on 5 Yin Yoga Poses to Loosen Your Hips
Need some help discovering new ways to practice ancient moves? Maybe you aren’t sure about how to perform specific poses, whether it’s against a wall or not. We understand that!
Good thing MyYogaTeacher has several solution options for that! If you haven’t checked out our affordable 1:1 membership plans, you can sign up for your 2-week free trial and get a look at what’s available to you here!
Join the community of members who are really enjoying the perks of 1:1 instruction at MyYogaTeacher!
“Doing yoga 1:1 I get to practice with one teacher who knows what I need and can track progress.” - Erin, MYT member since October 2019
“Making a correction with 1:1 yoga is way better than any corrections that are ever made in a group class.” - Michael, MYT member since October 2019
“There is more focus on your alignment and you get more personal attention with 1:1. You make progress a lot quicker because the teacher is able to fully focus on you and change the techniques based on your body type and need.” - Kashmira, MYT member since November 2019

Receive personalized guidance tailored to your unique fitness goals, live with a dedicated coach—no credit card required.


© Copyright 2025 MyYogaTeacher Inc