Constipation, which often shows up as infrequent, difficult, or painful bowel movements, is a common digestive issue that affects nearly 9–20% of people in the U.S. It can lead to bloating, discomfort, and days of feeling sluggish or irritable. While yoga might not be the first remedy that comes to mind when you’re feeling blocked up, it’s proven to provide natural, holistic, and long-term relief.
Specific yoga poses for constipation help by stimulating the digestive system, massaging abdominal organs, and improving circulation in the gut, supporting smoother and more regular bowel movements. Deep and synchronized breathing in these poses also plays a key role by reducing stress and activating the body's natural “rest and digest” mode. This helps your body shift out of stress and into a calmer state where digestion can function more efficiently.
The following poses are especially effective in enhancing gut function, easing constipation, and helping you poop more easily and naturally:
Here’s how yoga provides relief from constipation:
[inline-CTA-1]
Some yoga poses to help you when you’re feeling constipated include:
Gentle twists massage your abdominal organs and allow waste to move smoothly through the intestines. The following poses can stimulate digestion, relieve bloating, and support regular bowel movements:
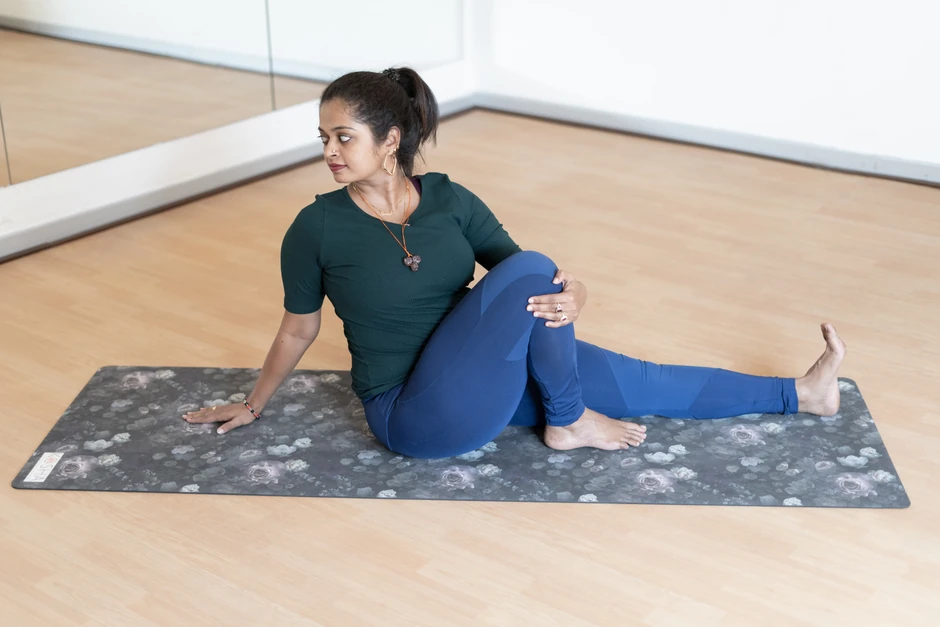
The seated spinal twist can help when you need immediate relief. This gentle twisting pose compresses the abdominal organs, aiding digestion and bowel stimulation.
This relaxing twist alleviates bloating and massages the intestines, aiding in constipation relief.
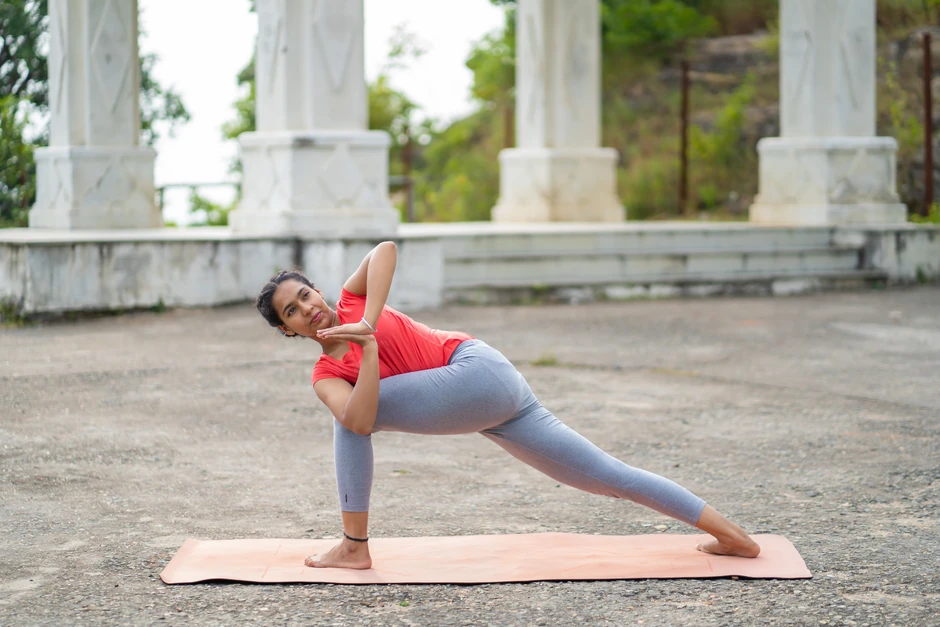
This dynamic twist stimulates the digestive tract and encourages bowel movement.
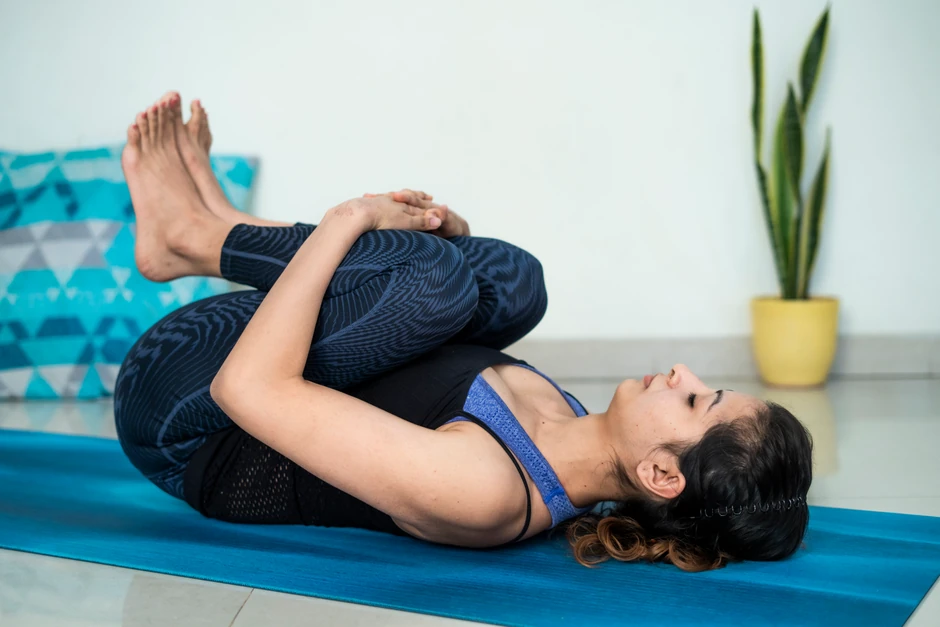
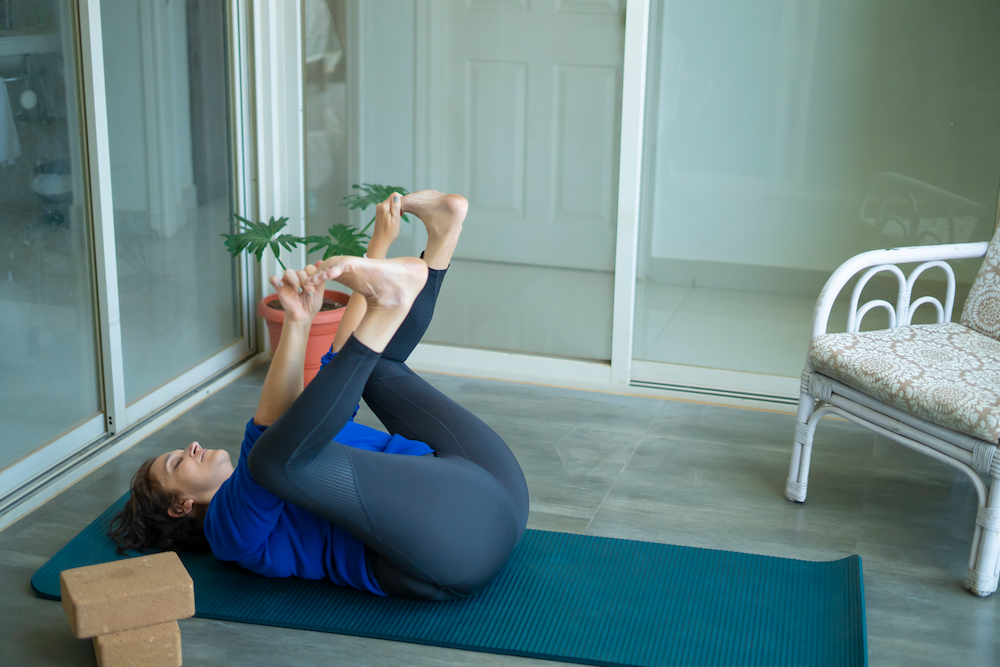
Activating the core engages the abdominal muscles, which in turn massage the internal organs and stimulate digestion. Some poses include:
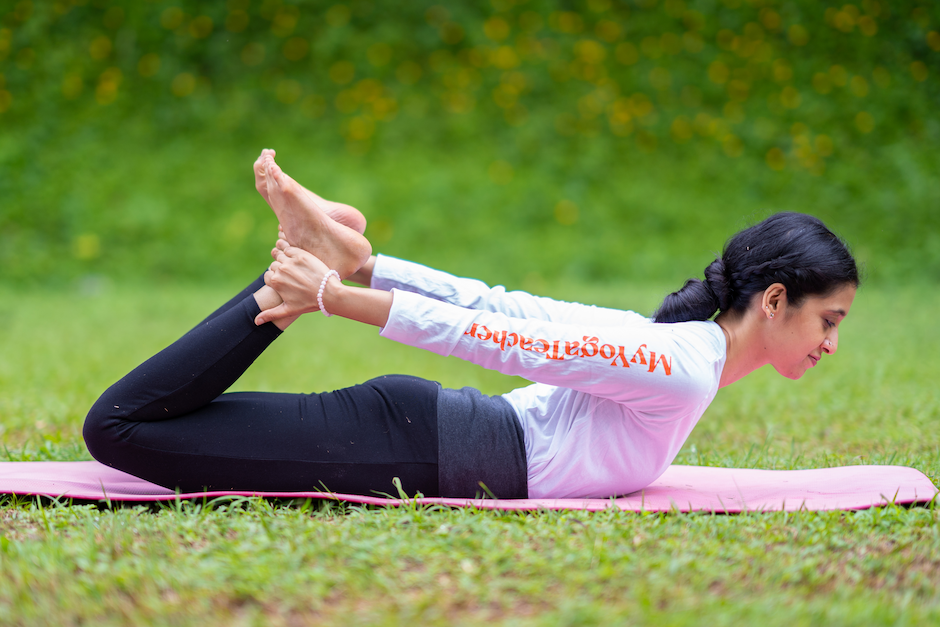
This pose massages the abdominal muscles, particularly the rectus abdominis and the obliques, while stimulating the intestines to promote bowel movement. Over time, it also helps strengthen these core muscles for better digestive support.
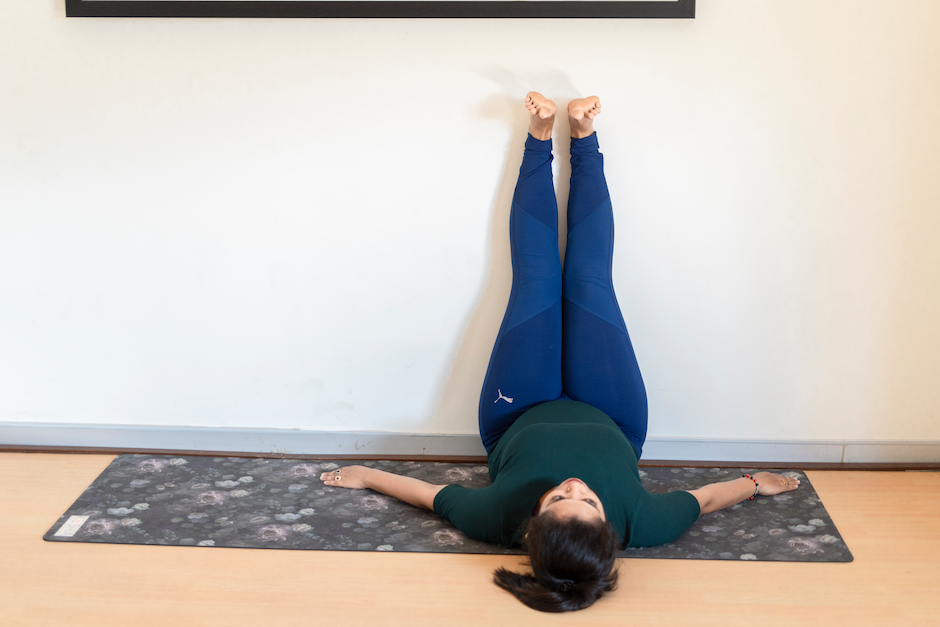
Activating the core with this gentle inversion improves circulation and relieves abdominal discomfort caused by constipation.
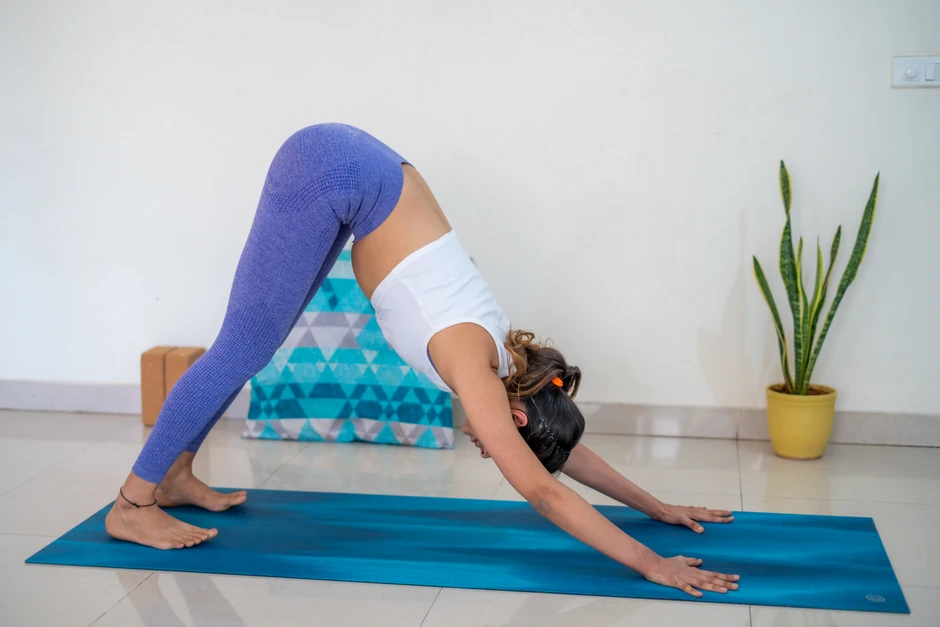
This pose stretches the entire body and engages the core, improving blood flow to the digestive organs and aiding you to pass stool easily.
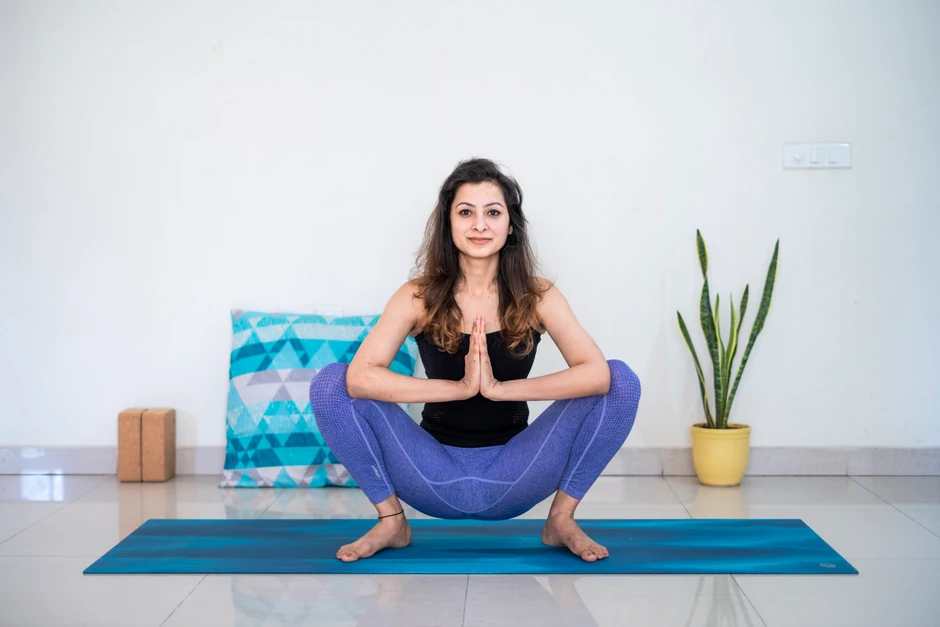
The garland pose is a deep squat that increases circulation in the pelvic area, helping with digestion and elimination of the stool.
These poses help ease tension in the abdomen and lower back—where gas and bloating tend to build up. Gently compressing and releasing these areas helps release trapped gas and support more comfortable bowel movements.
This pose gently compresses the abdomen, releasing trapped gas and stimulating the digestive system. Clearing the buildup of gas relieves intestinal pressure, clears blockages, and promotes smoother digestion and regular bowel movements.

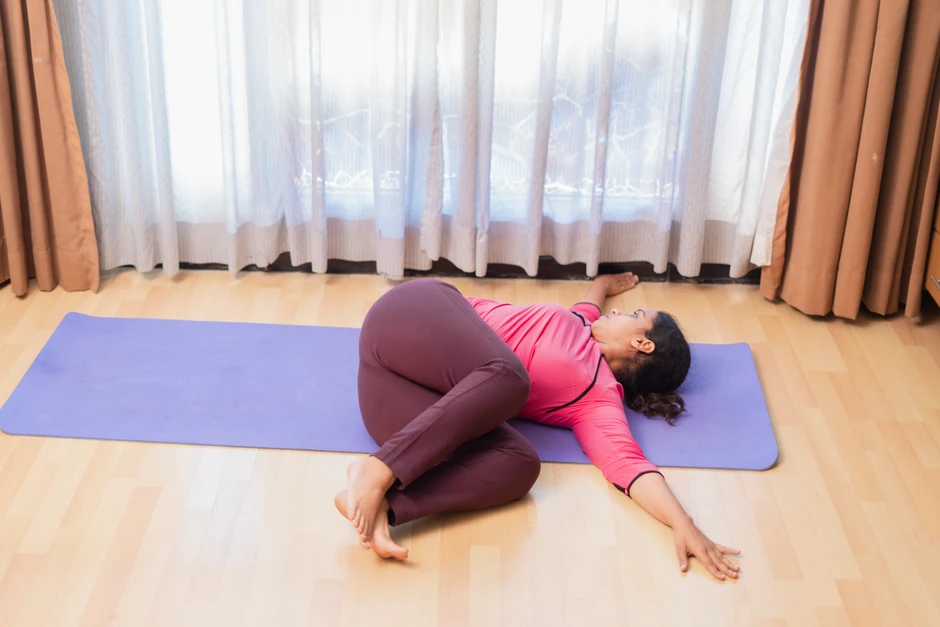
This calming pose stretches the lower back and relieves abdominal tension, aiding digestion.
This pose releases tension in the lower back and gently compresses the abdominal area, easing digestion.
When done correctly, you can maximize the benefits of these yoga poses for constipation.
[inline-CTA-2]
Poses like Wind-Relieving Pose and Seated Spinal Twist are particularly effective for relieving constipation. These poses gently massage your abdominal organs, stimulate bowel movement, and encourage better digestion, helping to ease discomfort and promote regularity.
Doing yoga for 15–30 minutes daily can help manage constipation effectively. If that isn’t possible, aim for at least 3–4 sessions a week to maintain consistency and see noticeable improvements in your digestion and bowel movements.
In addition to yoga, staying hydrated, increasing fiber intake through fruits and vegetables, and drinking warm water or herbal teas can help relieve constipation. Regular physical activity, stress management techniques, and consuming probiotics are also effective in improving digestive health.
Some people experience relief within minutes to a few hours after practicing yoga, especially poses that involve gentle twisting, core engagement, or abdominal compression. However, consistency matters. Practicing regularly, even just 10–15 minutes a day, can help improve digestion and support long-term relief from constipation.
Yes, but with modifications and guidance. During pregnancy, it's essential to avoid deep twists or poses that put pressure on the belly. Instead, opt for gentle versions like Seated Side Bend, Supported Child’s Pose, or Cat-Cow Stretch. Read this article on yoga for constipation during pregnancy, and make sure you consult your doctor and work with a prenatal yoga expert to ensure the poses are safe and suitable for your stage of pregnancy.


Receive personalized guidance tailored to your unique fitness goals, live with a dedicated coach—no credit card required.
%20(7).jpg)
Discover how yoga improves gut health through the gut-brain connection. Learn 8 poses to balance microbiomes, reduce inflammation, and heal your digestive system.
Yoga helps alleviate symptoms of acid reflux and prevent onset by reducing stress and anxiety, activating your digestive system, and improving your posture.
Yoga improves blood circulation by stimulating blood flow, increasing oxygen, regulating your digestive system, and reducing inflammation in your body.


© Copyright 2025 MyYogaTeacher Inc