What is Sirsasana (Headstand Pose)?
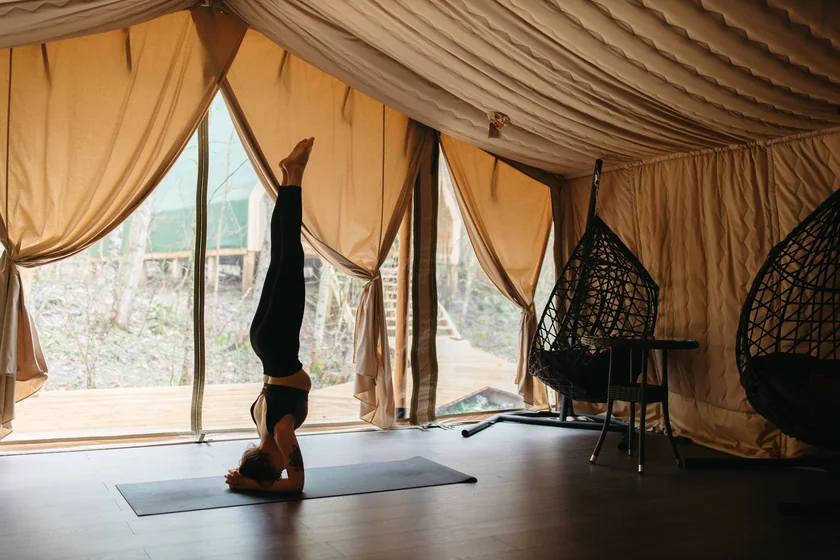
Sirsasana (Headstand Pose) is known as inverted asana in modern yoga practice. In ancient hatha yoga, it was characterized as both an asana and a mudra under distinct names. The Headstand pose is referred to as "King of Asanas".
In this yoga pose, the body is completely inverted and is held upright by the forearms, with the top of the head resting softly on the floor. This is a difficult yoga pose that should only be executed with the help of a qualified yoga instructor.
Overview & Etymology
Overview
Sirsasana is derived from the Sanskrit words Śīrṣa, which means "head," and Āsana, which means "posture" or "seat."
Sirsasana is a relatively new word for a pose that is considerably older and was formerly called by other names. In the Hatha Yoga Pradipika and other classical Hindu yoga texts, it was known as Viparita Karani, a yoga mudra.
Duryodhansana ("Duryodhana's pose") or Kaplkarana ("head technique") is the name given to it in Hemacandra's 11th century Yogastra. While Kapālīkarana (head posture) is the name given to it in Hemacandra's 18th-century Joga Pradipika.
However, the Sritattvanidhi of the 19th century uses both the names Sirsasana and Kapalasana.
Sanskrit Name: शीर्षआसन Pronunciation: Shir-sa-asa-na
Pose Type: Inversion Also known as: Headstand, Salamba Shirshasana
Strengthens: Vertebral Column, Neck, and Shoulders Stretches: Upper Abdomen
Health Benefits of Sirsasana
Improves pituitary gland functions.
Improves lymphatic system function.
Improves brain function and focus.
Improves vision due to increased blood circulation around the eyes.
Blood sugar metabolism is improved, which helps to cure mild diabetes naturally.
When to Avoid Performing Sirsasana
Avoid if you are a beginner.
Avoid in menstruation and pregnancy.
Avoid if you had a neck/spine injury or surgery.
Avoid during cerebral hemorrhage, back injury, or chronic glaucoma.
Avoid during blood pressure issues, arteriosclerosis, coronary or cerebral thrombosis.
Do not practice, if feeling dizziness, headaches, excessive sweating, or heart palpitations.
How to do Sirsasana (Headstand Pose)
Anyone who wants to improve their advanced yoga asana practice can perform a headstand. Although it's highly suggested for newbies to practice only with a certified yoga teacher because it is hard to check whether the posture is held symmetrically when practiced on one's own.
So, to get started with your Sirsasana practice, there are four parts to the whole process.
Part 1 - Preparatory Poses for Sirsasana
1. Tadasana Gomukhasana (Standing Cow Face Pose) - Sirsasana puts a lot of strain on the shoulders, arms, elbows, and upper abdomen. When you start practicing Tadasana with Gomukhasana, your arms will promote extensions and external rotation in the upper arm, as well as leg strengthening.
As you lift weight away from your neck and head in Sirsasana, the cow face pose will help you develop a stable upper body base and a sense of lightness during Headstand practice.

2. Adho Mukha Svanasana (Downward Facing Dog Pose) -
The strength, stability, and balance of the Downward Facing Dog pose will assist your Sirsasana practice. The legs are stretched here, strengthening the hamstrings and hip muscles for more core stability in the inverted pose.

3. Prasarita Padottanasana (Intense Leg Stretch Pose) - It's a standing forward bend with the feet spread apart. This is a close preparation for Sirsasana, in which the bodyweight is placed on the head while the feet are extended and split wide apart, giving the leg muscles a good stretch.

Part 2: Step-by-Step Instructions to Perform Sirsasana
Step 1- Kneel near a yoga mat and spread it fourfold (if beginner) on the floor.
Step 2: Place your elbows, forearms, and knees flat on the mat and interlock your fingers together, with your wrists pressed into the mat.
Step 3- Form a cupping stance with palms. Now, place the crown of your head on the mat and the rear of your head against your palms.
Step 4- Lift your knees off the mat and walk your feet toward your torso to form an inverted V with your body.
Step 5- Keep your toes pointed on the mat for some time by engaging your core and shoulder muscles.
Step 6- Now, press down through your forearms, walk your feet even more toward your body (so that the back is straight), and bend your knees while lifting them toward your chest.
Step 7- Maintain your balance by engaging through your forearms, shoulders and squeezing your core tightly.
Note: You might need to perform these two actions a few times until you can maintain your balance with your knees bent and pulled toward your chest.
Step 8- Once you feel balanced, simultaneously and slowly extend your legs toward the sky. Take your time and move slowly.
Step 9- Hold this inverted position for 3 to 5 deep breaths, only if you feel comfortable in breathing.
Step 10- Return to the starting position by bending the knees and sliding them down to the floor in reverse order while exhaling, then releasing the neck, shoulders, and finally the head off the floor.
Breath Awareness: The headstand pose requires a lot of different inhales and exhales throughout the pose, which assists you in finding more stability and strength in your inversion. So, make sure you follow the following points carefully:
- Inhale while bringing your torso near to your palms, and exhale while bringing your crown of the head close to your palms.
- Lift the knee off the mat with another inhalation and exhale, extending the lower back and spine upwards.
- Inhale and walk with your toes close to your chest, then exhale and engage your legs, core, and shoulders to prepare your body for the posture. Relax your breath at this point by still engaging throughout.
- Take a deep breath in and as you exhale, lift both feet off the mat/floor and bring your legs to a 90-degree angle.
- Raise the body upwards as you inhale, putting extra pressure on the core and shoulders, and take the final position as you exhale.
- At the final position, begin steady breathing and keep your brain relaxed.
- Exhale as you release the position, bringing one leg close to the ground at a time, and then inhale as you get the entire body to relax pose.
Performance Duration for Beginners: Hold the pose for 20-60 seconds.
Performance Duration for Advanced: Hold the pose for 3 to 5 minutes.
Part 3: Things to Keep in Mind
Being an advanced pose like Sirsasana requires strength, alignment, and flexibility. If not executed carefully, this pose may cause neck, shoulder, back pain, and severe spine injuries. To accomplish it safely, you'll need to battle the fear of failing, and here are a few things to keep in mind:
Coordinate with a spotter - Working with a spotter is the most fantastic option. This might be a certified yoga instructor, a fitness guru, or a wise yoga buddy.
It isn't easy to check out or feel your body's alignment while you're upside down.
Hence, a spotter can assist you in properly aligning and supporting your body. They'll also help you get into and out of the asana without getting hurt.
Don't fall, just use the wall - It's fine to rely on a wall as long as you don't depend on it. Remember, you don't have to become too accustomed to the wall or rely on it excessively. It's wonderful to have the wall there for emotional support if you're frightened or afraid of falling.

Use safety props around you - Surround yourself with folded blankets or cushions. As you get stronger, you can inch yourself further until you can do a headstand in the middle of the room. If you're practicing this alone at home, spread some folded blankets or pillows on the ground around you, this way you'll have a gentle landing in case you do lose your balance.
Part 4: Relaxing Poses After Sirsasana
The shoulders and neck muscles need some time to relax and contract after practicing Sirsasana. A few poses must be practiced immediately after Sirsasana to achieve proper relaxation in the spine:
1. Balasana (Child Pose): Taking a step back from Sirsasana, sit on your heels, with arms stretched out, and place your face and forehead near the floor, keeping your body light and relaxed. The neck muscles are relaxed in the child's pose, and the elongated spine is relaxed. In this pose, the hip muscles are also relaxed.

2. Paschimottanasana (Seated Forward Bend): After relaxing in Balasan, get up and get seated in dandasana. Gently press your sitting bones into the floor to draw your lower tummy in and spine upwards. As you inhale, lengthen your spine.
Lengthen your spine as you inhale. Fold forward from the hips as you exhale. Maintain a straight back and only fold as far as you can with your flexed spine. Maintain length in the front of the body by traveling from the belly button to the ribs, chest, and forehead to the legs.

Keep your arms on the ground. Wrap your first two fingers and thumbs around your big toes if your hands reach your feet. To get deeper into the pose, stretch the front of your torso with each in-breath, elevating your head slightly. Hold this pose for a couple of minutes and relax your upper body.
3. Savasana (Corpse Pose): In Savasana, relax the entire body with calm breathing and make sure the limbs, head, and trunk are relaxed and close to the mat. Control your breathing and loosen up your entire body. Stay in this position for 12 breaths.

Sirsasana Variations to Consider
Different students have varying abilities, and a yoga position may be simple for one student but difficult for another. Thus, introduce these easier variations of headstand pose for beginners who are having difficulty with this advanced pose:
1. Tripod Headstand with Elbow on Knees: Place your head on the floor and bend your knees. Your palms should be on the ground, and your elbows should be bent at a 90-degree angle. Lift your feet off the floor by shifting your weight to your head and hands.

2. Inverted Staff Pose: Beginners of headstand stance can practice Urdhva Dandasana (Inverted Staff Pose), also known as Ardha Sirsasana. By engaging the core muscles (pulling the belly in), shoulders, arms, chest, diaphragm, as well as pelvis, you can take your headstand practice to the next level.


Enjoy a Free 1-on-1 Session with a Coach!
Receive personalized guidance tailored to your unique fitness goals, live with a dedicated coach—no credit card required.
Frequently Asked Questions about Sirsasana
Related Articles on Padmasana

Yin vs Restorative Yoga: What’s the Difference?
Yin vs Restorative Yoga explained. Compare intensity, hold times, props, and benefits. Learn the key differences and choose the right slow yoga style for you.
.webp)
Detox Yoga Sequence: Refresh and Renew After Holiday Indulgence
Refresh and renew after holiday indulgence with this 12-pose detox yoga sequence. Gentle twists and mindful stretches for digestion, circulation, and energy.
%20(7).jpg)
Yoga for Gut Health: How This Ancient Practice Heals Your Gut-Brain Connection
Discover how yoga improves gut health through the gut-brain connection. Learn 8 poses to balance microbiomes, reduce inflammation, and heal your digestive system.